
![[Nota]](https://webapi.partcommunity.com/service/help/latest/pages/it/installation_ecatalogsolutions/doc/images/note.png) | Nota |
|---|---|
Non eseguire un'installazione collegata tramite un drive di rete, ma solo direttamente sul computer in questione! | |
Sono installati i moduli standard PARTdataManager (selezione/ricerca dei pezzi) e PARTadmin (amministrazione).
Per impostazione predefinita
L'installazione viene eseguita sotto C:\Program Files\PARTsolutions
Professional.
Chiudere tutti i programmi aperti prima di eseguire la configurazione.
Contratto di licenza con l'utente finale
Accettare i termini del contratto di licenza e fare clic su .
Specificare le cartelle in cui installare il software.
Il pulsante consente di selezionare una cartella del disco rigido diversa da quella predefinita (se necessario).
Una volta effettuata la selezione, fare clic su .
→ Si apre la seconda pagina di impostazione della cartella di destinazione.
Se necessario, regolare i percorsi di CADENAS DATA, CADENAS SITESETUP, CADENAS Pool e CADENAS User.
Esempio del
start.env: Il sentiero sotto CADENAS_DATA è stato modificato.[ENVIRONS] CADENAS=%DirOfThisFile% CADENAS_SETUP=C:\ProgramData\PARTsolutions Professional\setup CADENAS_DEFAULTUSER=$CADENAS_SETUP\user\default_user CADENAS_SITESETUP=C:\ProgramData\PARTsolutions Professional\sitesetup CADENAS_USER=%UserAppData%\PARTsolutions Professional\user CADENAS_LICENSE=$CADENAS_SITESETUP\lic CADENAS_POOL=C:\ProgramData\PARTsolutions Professional\pool CADENAS_DATA=C:\data_minimal\Attivare le interfacce sul client [Enable interfaces on the client]: Se i sistemi CAD sono già installati, è possibile risparmiare l'attivazione manuale attivando l'opzione. In PARTadmin, nella categoria [Category] "Integrazione CAD [CAD integration]", è possibile attivarla manualmente anche in un secondo momento. Vedere Sezione 1.4.2, “ Integrazione CAD ” in ENTERPRISE 3Dfindit (Professional) - Amministrazione.
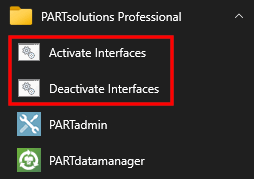
Sotto
...\software\install\scriptsScript batch che possono essere eseguiti localmente in qualsiasi momento per abilitare/disabilitare tutte le integrazioni. Questi possono essere Amministrativamente utilizzato anche nel corso di una distribuzione di software con distribuzione divenire.Una volta completata l'installazione, vengono visualizzate le voci corrispondenti del menu di avvio. I collegamenti Attiva interfacce / Disattiva interfacce avviano gli script batch menzionati in precedenza.
Avviare l'installazione facendo clic su .
→ Al termine dell'installazione, viene visualizzata la seguente finestra di dialogo.
→ I programmi installati possono ora essere richiamati dal menu di Windows.
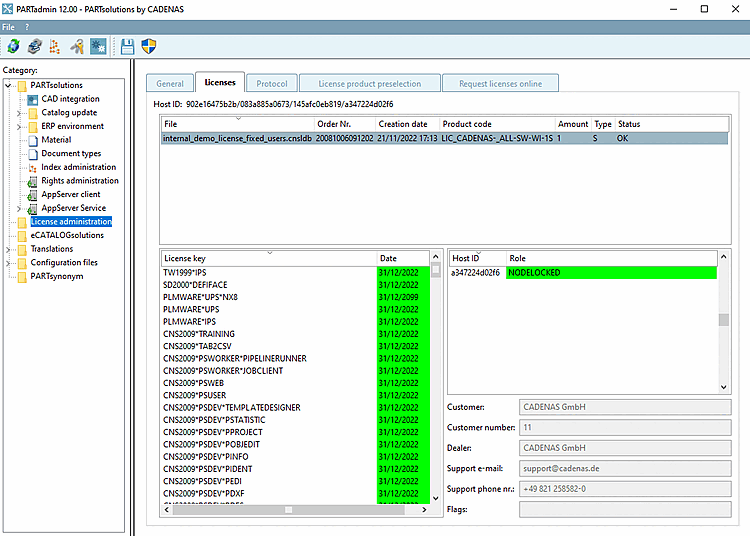
Importare una licenza già ricevuta tramite PARTadmin alla pagina Licenze [Licenses] > Aggiungi file... [Add file...] Licenze:
Altrimenti, è possibile richiedere una licenza nella scheda Richiesta di licenze online [Request licenses online].
I dettagli sulle licenze sono riportati nella sezione Sezione 1.5, “ Gestione delle licenze ” in ENTERPRISE 3Dfindit (Professional) - Amministrazione.
Installare i cataloghi e le classificazioni necessarie tramite PARTadmin.
I dettagli sono disponibili alla voce Sezione 1.4.3.1, “ Aggiornamento del catalogo online ” in ENTERPRISE 3Dfindit (Professional) - Amministrazione.


![[Importante]](https://webapi.partcommunity.com/service/help/latest/pages/it/installation_ecatalogsolutions/doc/images/important.png)


![Categoria "Integrazione CAD [CAD integration]](https://webapi.partcommunity.com/service/help/latest/pages/it/installation_ecatalogsolutions/doc/resources/img/img_c6962e9ef6614400a55b5dbaf0e272d0.png)


![PARTADMIN > Aggiornamento del catalogo [Catalog update] > Online](https://webapi.partcommunity.com/service/help/latest/pages/it/installation_ecatalogsolutions/doc/resources/img/img_9be8f484e8f143a3b9ffe159d3b13d9a.png)
| Nota |
|---|---|
Quando si utilizza un PARTapplicationServer centrale, questo deve essere avviato come servizio. A tale scopo, chiamare dopo l'installazione
e la licenza è stata attivata, " | |