
Trouver des modèles à l'aide d'un modèle paramétrique.[30]
![[Remarque]](https://webapi.partcommunity.com/service/help/latest/pages/fr/partsolutions_user/doc/images/note.png) | Remarque |
|---|---|
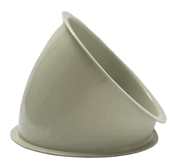
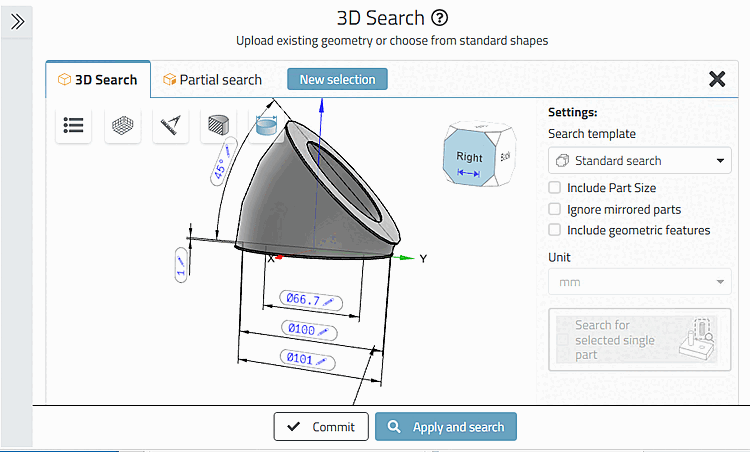
Ci-dessous, nous recherchons à titre d'exemple le coude de tuyau illustré. Regardez aussi en parallèle la vidéo à ce sujet : https://www-de.3Dfindit.com/de/corporate/enterprise/finden-mit-der-3-d-rastersuche-beispiel-rohrbogen Vous obtiendrez ainsi rapidement une vue d'ensemble. Vous trouverez des indications spécifiques dans le document ici. | |
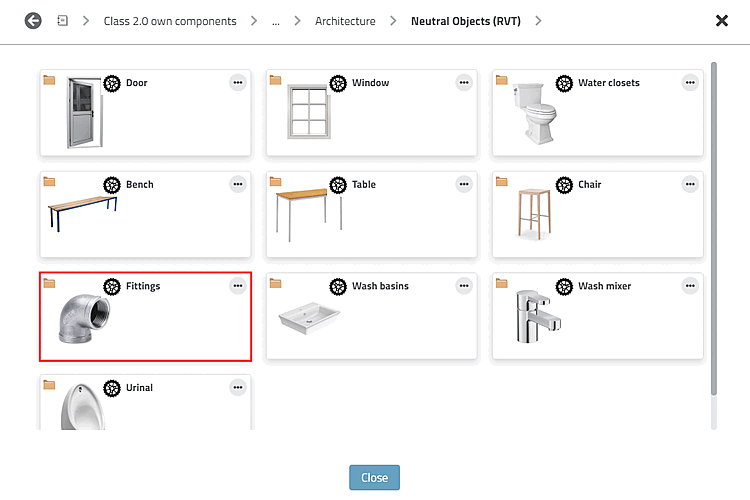
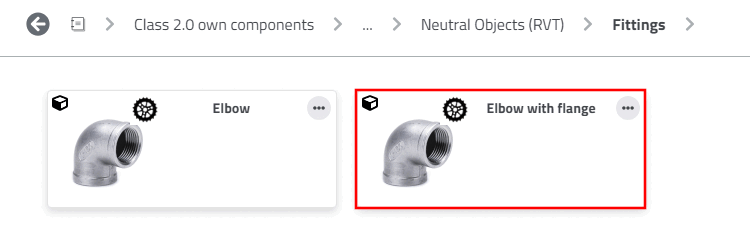
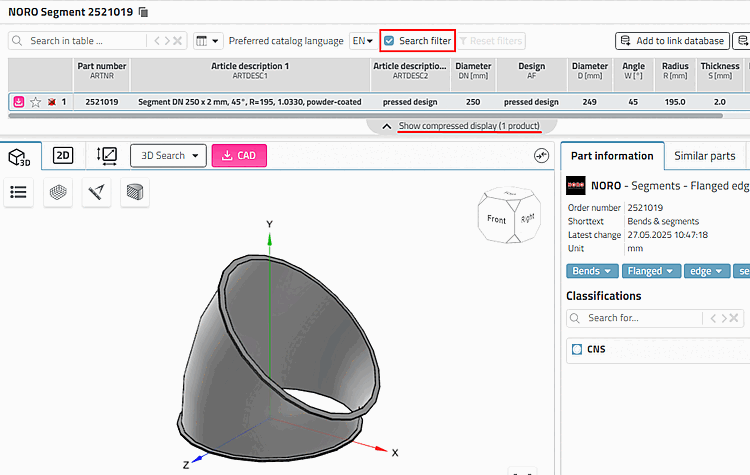
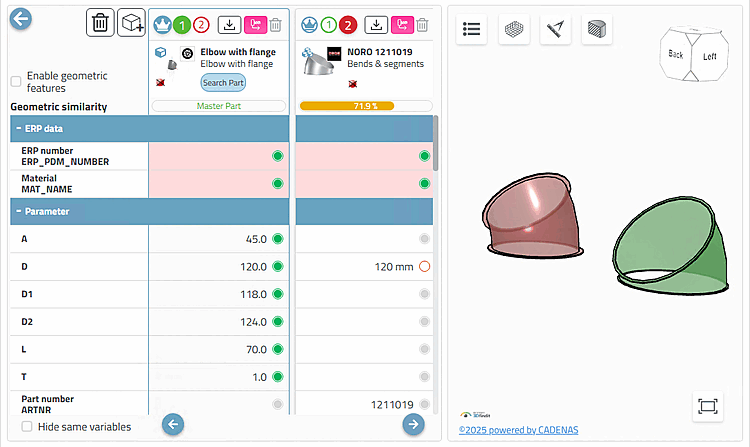
Naviguez vers une pièce propre Class 2.0 adaptée (ici dans l'exemple "coude de tuyau avec bride").
Ouvrez la pièce en double-cliquant dessus.
-> La boîte de dialogue des paramètres s'ouvre.
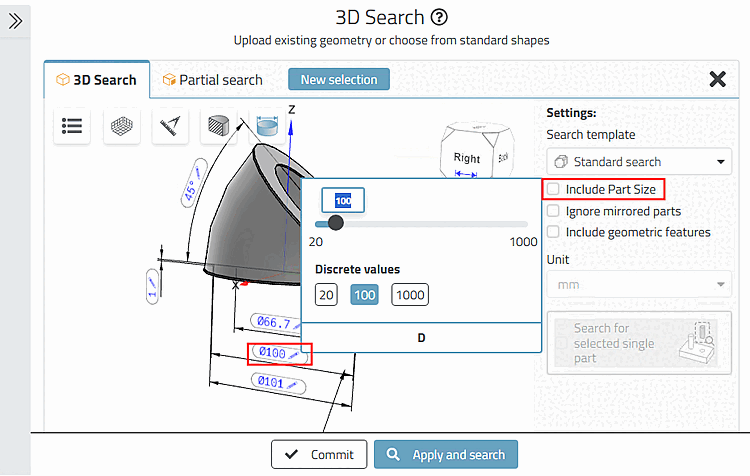
Ajuster les valeurs des variables ajustables
 directement dans l’aperçu 3D jusqu’à ce que le
modèle adapté à vos besoins.
directement dans l’aperçu 3D jusqu’à ce que le
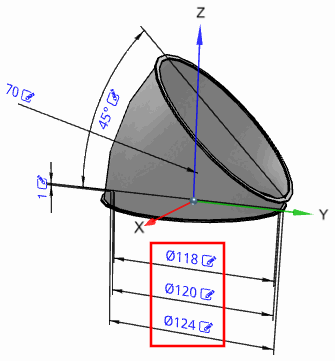
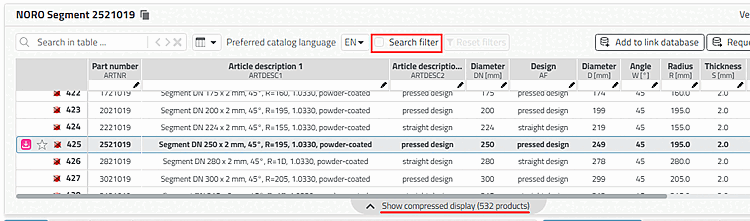
modèle adapté à vos besoins.Ici, dans l'exemple, nous mettons 118, 120 et 124.
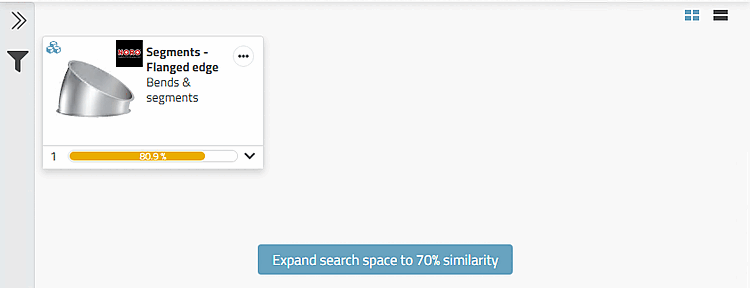
-> Les résultats de la recherche s'affichent (élargissez éventuellement l'espace de recherche).
-> Le composant est affiché avec une taille différente (car une taille adaptée n'est au moins pas indexée).
Désactivez l'option Filtre de recherche [Search filter] pour afficher le tableau complet et vérifier si la taille appropriée est incluse.
Filtrez le tableau en fonction du diamètre et de l'angle. Inscrivez "diamètre 110-130" et "angle 45". (En cliquant sur le bouton , vous pouvez à nouveau supprimer tous les filtres du tableau).
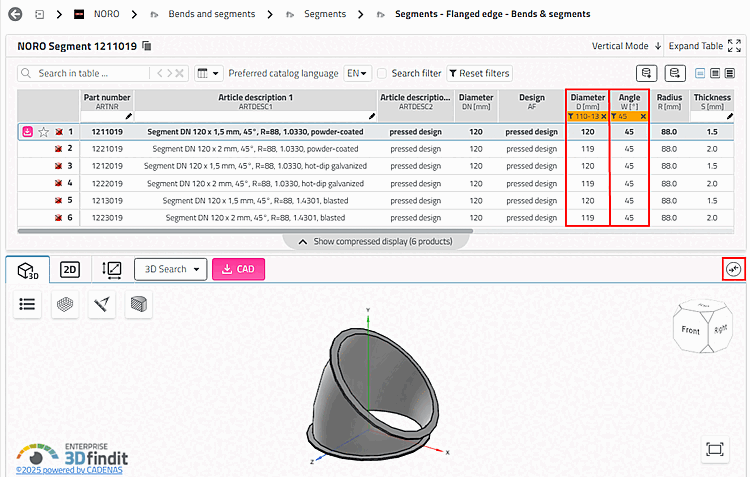
La ligne 1 contient le résultat souhaité.
Sélectionnez la ligne 1 et cliquez sur le Icône
 partie pour comparaison
. [Add part to compare]
partie pour comparaison
. [Add part to compare]
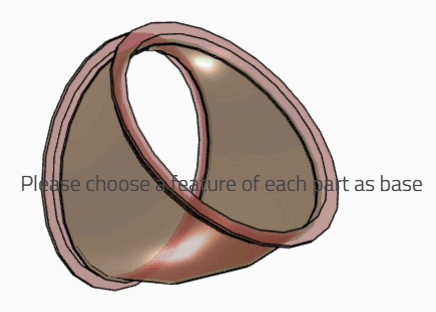
-> La pièce est chargée dans le comparateur de pièces.
-> Cela est visible à l'aide du numéro dans le bouton Comparaison [Compare] ou le numéro augmente d'un compteur.
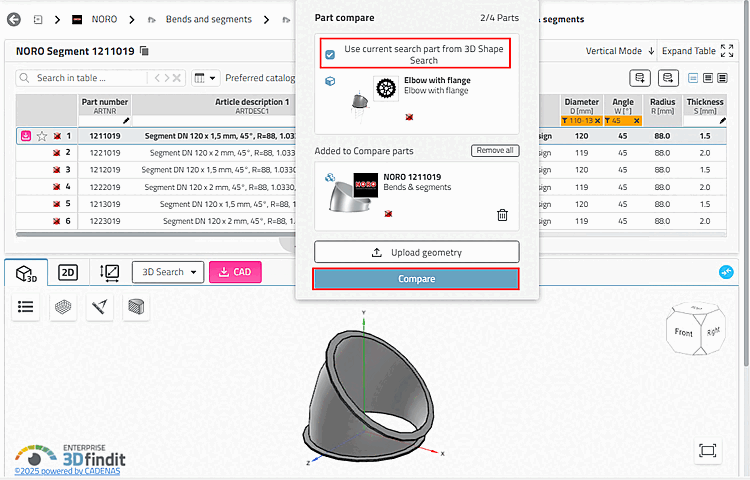
Cliquez sur le bouton Comparaison [Compare].
-> La boîte de dialogue Comparaison de pièces [Part compare] s'ouvre.
-> Activez l'option Utiliser la pièce de recherche actuelle à partir de la recherche de forme 3D [Use current search part from 3D Shape Search].
-> La partie recherche et la partie résultats s'ouvrent en comparaison.
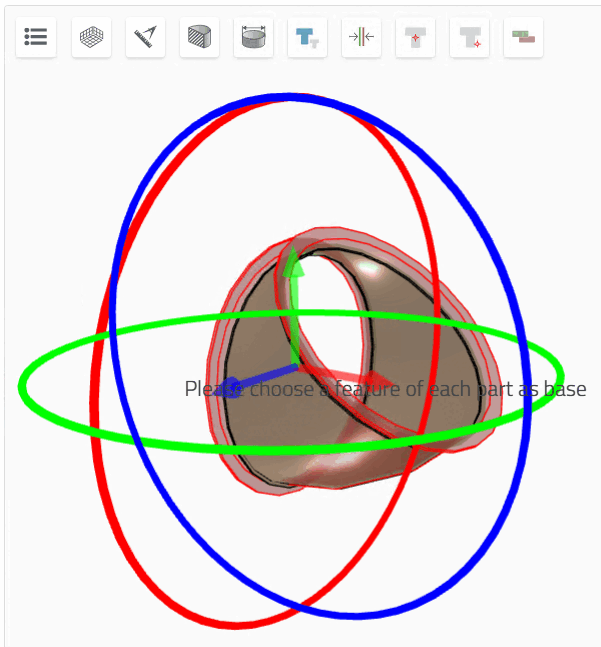
Sous Fonctions supplémentaires [Additional features] > Fonctions de comparaison [Compare functions], cliquez sur le bouton Alignement automatique [Automatic alignment].
Si nécessaire, sélectionnez la pièce dans l'un des états superposés. Déplacez et/ou faites pivoter la pièce sur des axes et des cercles de rotation.
De la même manière, vous pouvez comparer entre elles n'importe quelles pièces de résultat.
![PARTadmin -> Gestion des index [Index administration] -> Index de recherche géographique [Geometrical search index] -> Créer/Mettre à jour [Create/Update] -> Pourcentage [Percental fraction]](https://webapi.partcommunity.com/service/help/latest/pages/fr/partsolutions_user/doc/resources/img/img_998be9f5f0854c45b0294bf59d6cf509.png)

[30] Les classifications 2 .0 doivent être installées. Voir Section 1.8.1, « Soutien des méthodes de recherche » in ENTERPRISE 3Dfindit (Professional) - Administration.