Fare clic su "progetto monoparte.3db".
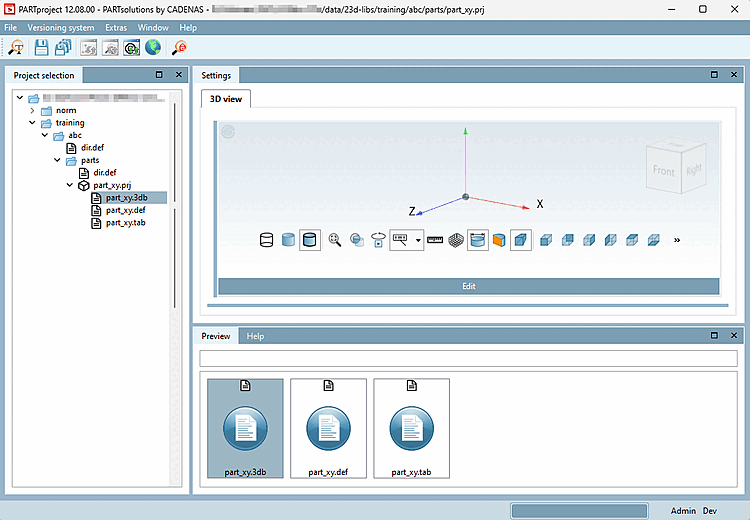
→ L'area di dialogo Impostazioni [Settings] mostra la finestra di aggancio della vista 3D. In questa finestra non è ancora disponibile alcuna anteprima.
Confermare con nella finestra di dialogo Modifica file [Edit file]. Il pulsante di opzione Copia variabili da tabella [Use variable from table] non è rilevante, poiché non esiste una tabella da cui copiare le variabili.
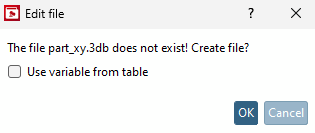
Creare la geometria [Geometry] / file *.3db del componente. Nell'esempio, viene utilizzato il dado a calotta della formazione. Vedere l'esempio nel manuale di formazione di eCATALOGsolutions. Sezione 7.4, “Creare un modello 3D: Piccolo esempio dalla A alla Z ” Un piccolo esempio è disponibile all'indirizzo .
Salvare il file *.3db e chiudere PARTdesigner.
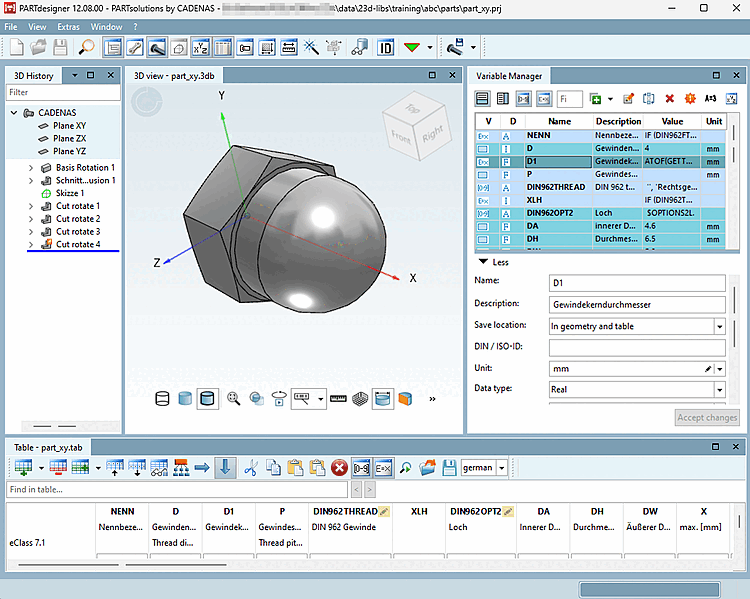
-> In PARTproject, la geometria del dado della calotta è ora trasferita come "part_xy.3db". L'anteprima mostra la rappresentazione corrispondente.
-> In seguito, la geometria del dado sarà visibile come anteprima 3D [3D preview] nella vista parti [Part view] di PARTdataManager o 3Dfindit.