Capitolo 2. Formazione - Creazione di un dado per tappi
2.9.
Fornire viste di dimensionamento
|  |
| Indietro | Avanti |
Le viste di quotatura [Dimensioning views] vengono integrate nel progetto sotto forma di file pra in PARTproject e successivamente visualizzate nel PARTdataManager, nella finestra di aggancio Dati tecnici [Technical details] o nei tooltip delle immagini di anteprima.
![[Nota]](https://webapi.partcommunity.com/service/help/latest/pages/it/partsolutions_user/doc/images/note.png) | Nota |
|---|---|
Per l'esempio di addestramento,
Informazioni dettagliate sulla creazione di file *.pra sono disponibili in Sezione 5.11.2, “ Creare e importare/convertire viste di quotatura esternamente ” in eCATALOG 3Dfindit. | |
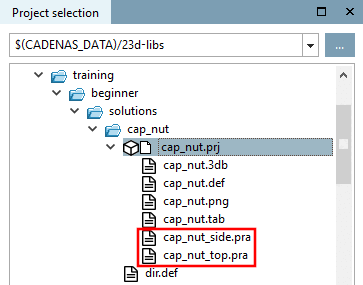
Copia i file pra di
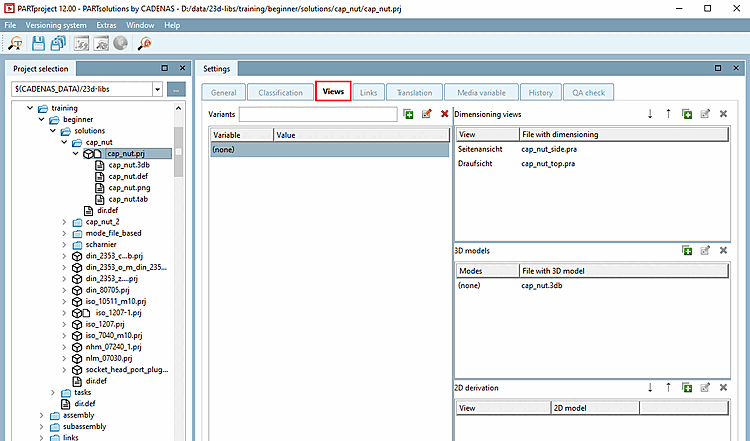
.../beginner/solutions/cap_nuta.../xy(quello che hai scelto Directory per la creazione del progetto).Nella pagina della scheda Impostazioni [Settings], aprire la pagina della scheda Visualizzazioni [Views].
In Viste di quotatura [Dimensioning views], fare clic prima sul campo Vista [View] e selezionare la vista corrispondente, quindi sul campo File con quotatura [File with dimensioning] per specificare il file 2D associato (*.pra).
Ripetere per tutto il necessario file. Per creare nuove righe, clicca sul pulsante Nuovo [New]
 .
.
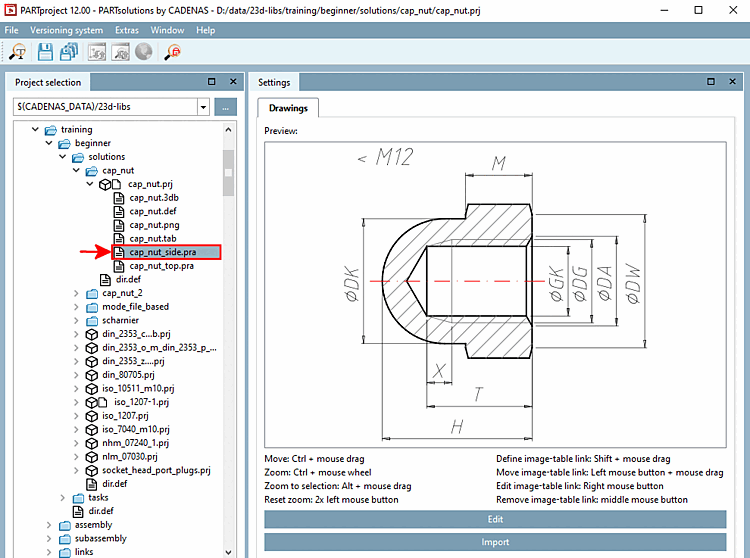
-> Le viste di quotatura [Dimensioning views] fanno ora parte del progetto.
Non appena si fa clic su una delle viste (qui la vista laterale), il file immagine [Picture file] corrispondente appare come anteprima [Preview].
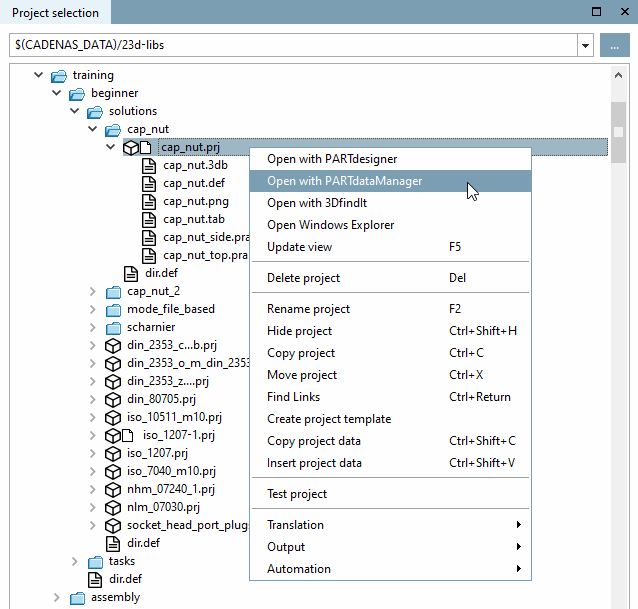
In PARTproject, fare clic su Apri con PARTdataManager [Open with PARTdataManager] nel menu contestuale del progetto desiderato.
Nel PARTdataManager, nell'area di aggancio Dati tecnici [Technical details], si trovano le viste 2D del dado a calotta inserite e dimensionate in modo corrispondente.
![Specifiche tecniche [Technical details]](https://webapi.partcommunity.com/service/help/latest/pages/it/partsolutions_user/doc/resources/img/img_8ee28696aeec4cbe9c1179ce40e57701.png)
In alternativa o in aggiunta, le viste di quotatura possono essere fornite anche come file 3db o tif:
Con PARTdesigner è possibile creare viste di quotatura [Dimensioning views] da viste standard, generare il testo di quotatura secondo varie specifiche e rendere disponibili varie versioni aggiuntive per il PARTdataManager.
I dettagli sono riportati nella sezione Sezione 5.11.1, “ Creare viste di quotatura con PARTdesigner ” in eCATALOG 3Dfindit.
I file *.tif possono essere creati da cataloghi cartacei, ad esempio tramite scansione.