|
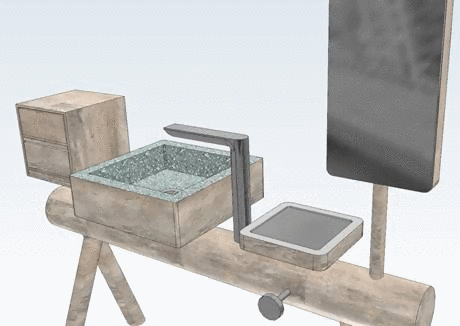
With new rendering functionality (textures and bumpmaps[16]) you will receive very realistic 3D views. The material ca be set for the whole part or for single faces.
![[Important]](https://webapi.partcommunity.com/service/help/latest/pages/it/installation_ecatalogsolutions/doc/images/important.png)
Via batch process materials can be mapped to colors. On this see Section 2.10.1.2.5, “Rendering enhancements: Map material to colors”.
Under PARTproject -> Edit project -> tabbed page General -> Render attributes -> Render material you can choose the render material for the selected part.
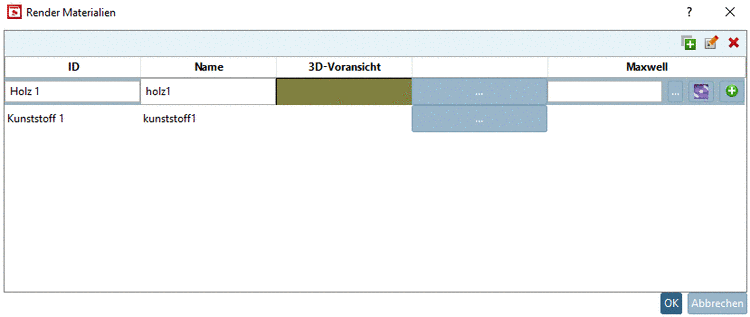
Under Render material, call the respective dialog Render Materials by clicking on the button .
With a click on
 apply lines for render materials and then enter
an ID
and a Name for each material.
apply lines for render materials and then enter
an ID
and a Name for each material.In order to edit the 3D preview, click on the button right beside 3D preview.
-> The dialog box Edit material for 3D preview is opened. It shows a dummy part, which mirrors all performed adjustments.
In the upper dialog area adjust Color, Transparency, Percentage Metallic and Roughness.
In the below dialog area you can load image files for Color texture and Normalmap (bumpmap).
In the above figure a Color has been used in addition. In order for it to be used for the 3D view, you have to check Mix color with color texture.
In particular adjust Scale, that the texture is optimally wrapped around the model (repeating of pattern). With Height you can adjust the hight of "bumps".
-> Now you are in the dialog Render Materials again.
The applied materials can now be selected under Render material.
Test the part in PARTdataManager.


The applied render materials are also available in PARTdesigner under Face attributes.