
![[Nota]](https://webapi.partcommunity.com/service/help/latest/pages/it/partwarehouse/doc/images/note.png) | Nota |
|---|---|
Non eseguire un'installazione collegata tramite un drive di rete, ma solo direttamente sul computer in questione! | |
Le seguenti illustrazioni si basano sull'esempio di un'installazione di un server o di un utente singolo.
Per impostazione predefinita
L'installazione viene effettuata sotto C:\Program Files\ENTERPRISE
3Dfindit.
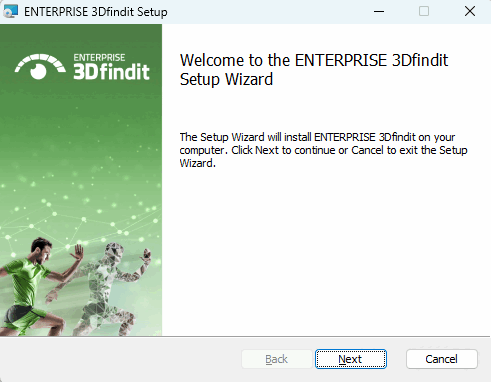
Chiudere tutti i programmi e i servizi aperti prima di eseguire il programma di configurazione.
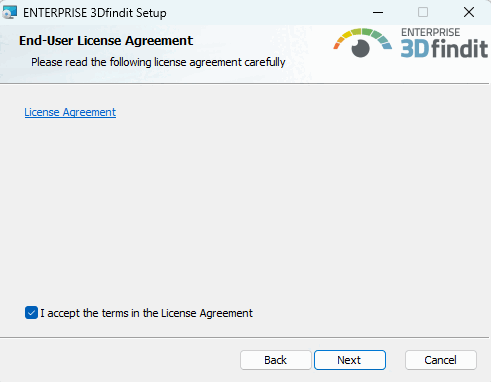
Accettare i termini del contratto di licenza e fare clic su .
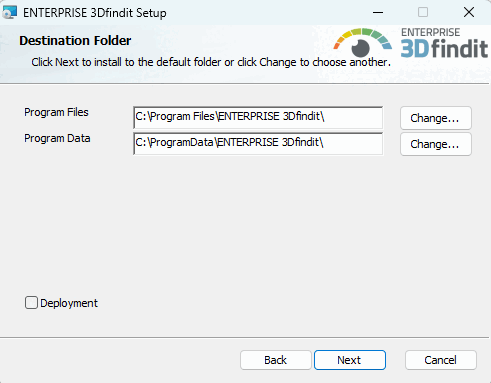
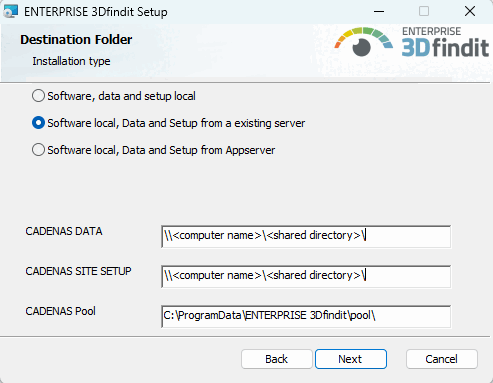
Cartella di destinazione [Destination Folder]
Specificare le cartelle in cui installare il software.
Il pulsante consente di selezionare una cartella del disco rigido diversa da quella predefinita (se necessario).
![[Importante]](https://webapi.partcommunity.com/service/help/latest/pages/it/partwarehouse/doc/images/important.png)
Importante I file di programma e i dati di programma devono essere indipendenti l'uno dall'altro!
La prima regola non deve essere aggirata nel secondo dialogo della cartella di destinazione.
CADENAS_DATA, CADENAS_POOL, CADENAS_SITESETUP, CADENAS_USER non devono trovarsi nella cartella "Programmi" (installazione del software) o sotto di essa!
Motivo: La directory del software è completamente fornita da MSI e i file aggiuntivi devono essere rimossi prima per evitare conflitti con file vecchi o obsoleti.
Esempio di struttura di directory corretta:
Program Files=c:\cad\software
CADENAS=c:\cad\software
CAENAS_DATA=c:\cad\data  <-- ok ..
CADENAS_POOL=c:\cad\pool <-- ok ..
Esempio di struttura di directory non corretta:
Program Files=c:\cad\
CADENAS=c:\cad
CAENAS_DATA=c:\cad\data  <-- error
CADENAS_POOL=c:\cad\pool <-- error
Se la struttura della directory non è corretta, viene visualizzato un messaggio di errore.
La PISCINA non deve mai essere al di sotto dei DATI!
Attenzione! Quando si usa Deployment, si è completamente liberi di impostare le strutture delle directory. Tuttavia, questo annulla tutti i controlli effettuati dal software!
La distribuzione [Deployment] può/deve essere utilizzata anche per la distribuzione ai client. Un'immagine creata da un amministratore/consulente può essere distribuita ai client tramite copia o condivisione. Vengono copiati solo i file, senza voci di sistema. È possibile creare un numero qualsiasi di copie. (Assicurarsi di selezionare ogni volta una directory di destinazione diversa).
Una volta effettuata la selezione, fare clic su .
→ Si apre la seconda pagina di impostazione della cartella di destinazione.
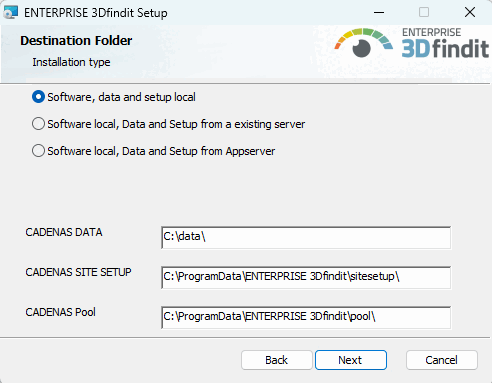
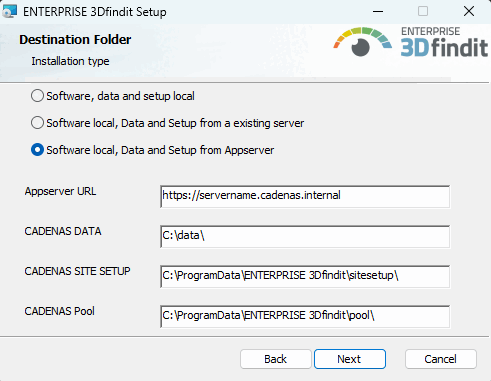
Cartella di destinazione [Destination Folder]
Selezionare una delle tre opzioni seguenti:
Software, dati e impostazioni in locale [Software, data and setup locally]: questa opzione può essere utilizzata, ad esempio, per un'installazione puramente monoutente o per un'installazione server. Se necessario, regolare i percorsi di installazione di CADENAS DATA, CADENAS SITE SETUP e CADENAS Pool.
Figura 4.27. Cartella di destinazione (2a finestra di dialogo) --- Nella figura, CADENAS DATA è adattata come esempio.
Esempio il
start.env: Il sentiero sotto CADENAS_DATA è stato modificato.[ENVIRONS] CADENAS=%DirOfThisFile% CADENAS_SETUP=C:\ProgramData\PARTsolutions\setup CADENAS_DEFAULTUSER=$CADENAS_SETUP\user\default_user CADENAS_SITESETUP=C:\ProgramData\PARTsolutions\sitesetup CADENAS_USER=%UserAppData%\PARTsolutions\user CADENAS_LICENSE=$CADENAS_SITESETUP\lic CADENAS_POOL=C:\ProgramData\PARTsolutions\pool CADENAS_DATA=C:\data\
Software in locale, dati e setup da un server esistente [Software Local, data and setup from an existing server]: Se è stata effettuata un'installazione sul server e le directory CADENAS_DATA e CADENAS_SETUP sono state rilasciate, è possibile installare un client in cui il software si trova localmente, ma le altre directory sono referenziate.
Software, dati e impostazioni locali dal server dell'applicazione [Software Local, data and setup from the app server]: Utilizzare questa opzione per un'installazione client.
CADENAS_DATA e CADENAS_SETUP vengono configurati tramite l'app server, per cui è necessario inserire solo l' URL dell' app server. Se necessario, modificare il percorso di installazione di CADENAS Pool.
Sezione 4.5.1, “Diversi scenari di installazione”Le spiegazioni dei vari casi d'uso sono disponibili su .
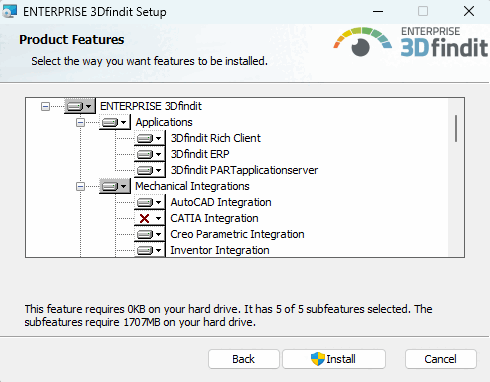
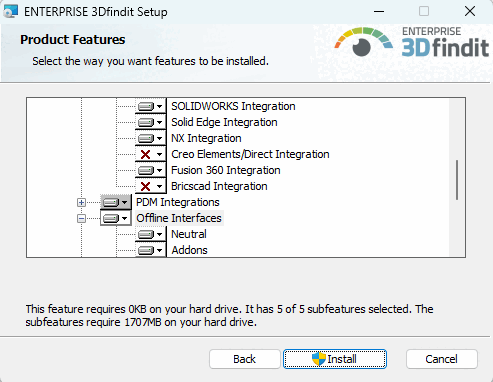
Selezionare le caratteristiche desiderate per l'installazione.
Questo pacchetto include sempre i pacchetti 3Dfindit PARTapplicationserver e 3Dfindit ERP.
Nota I driver JDBC speciali per MSSQL e Oracle NON sono forniti come parte della configurazione di ENTERPRISE 3Dfindit. Scaricateli voi stessi dai relativi siti web:
https://www.oracle.com/database/technologies/appdev/jdbc-downloads.html
sqljdbc_12.2\deu\mssql-jdbc-12.2.0.jre8.jaro.sqljdbc_12.2\deu\mssql-jdbc-12.2.0.jre11.jarhttps://learn.microsoft.com/de-de/sql/connect/jdbc/download-microsoft-jdbc-driver-for-sql-server?view=sql-server-ver16
Per informazioni dettagliate, consultare il Manuale di amministrazione di ENTERPRISE 3Dfindit alla voce Sezione 5.7.2, “ Connessione al database ” in ENTERPRISE 3Dfindit (Professional) - Amministrazione.
Sono incluse tutte le applicazioni ENTERPRISE 3Dfindit, in particolare 3Dfindit e PARTadmin, ma anche PARTlinkManager, PARTdataCenter, ecc.
Per la funzionalità di base di un client 3Dfindit ENTERPRISE puro, non è necessario installare né questo punto né PARTsolutions Appserver e PARTsolutions ERP. (Vedere anche Sezione 4.5.1, “Diversi scenari di installazione”).
server delle applicazioni PARTE
È richiesto esplicitamente quando si configura il server delle applicazioni. L'opzione 3Dfindit Rich Client non è necessariamente richiesta in questo caso, poiché PARTadmin è già incluso nell'opzione 3Dfindit PARTapplicationserver.
Inoltre, il PARTapplicationserver viene utilizzato esplicitamente per un'installazione monoutente con 3Dfindit.
Sezione 4.5.3, “ Installazione di PARTapplicationServer ”I dettagli sull'installazione di PARTapplicationserver sono disponibili su .
Gestione professionale delle parti con integrazione PDM/ERP/PLM[1] Questo pacchetto è sempre necessario per PARTsolutions. È quindi parte integrante del pacchetto 3Dfindit Rich Client. Viene quindi installato PARTlinkManager, ad esempio.
La selezione esplicita di questo solo pacchetto può essere utile se PARTlinkManager deve essere installato su un client.
Sezione 4.5.2, “ENTERPRISE 3Dfindit Integrazione ERP”Le informazioni di base sulla connessione del database di collegamento e sull'attivazione dell'integrazione ERP sono disponibili all'indirizzo .
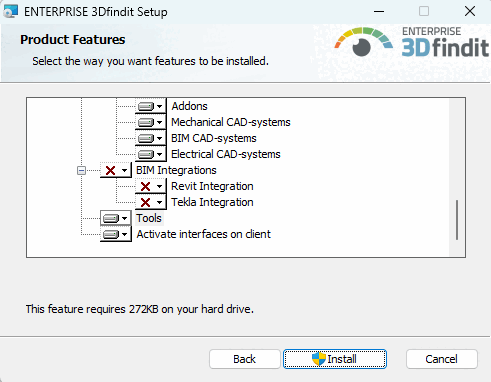
Integrazioni di ingegneria meccanica
Attivare le integrazioni acquistate.
Attivare le integrazioni acquistate.
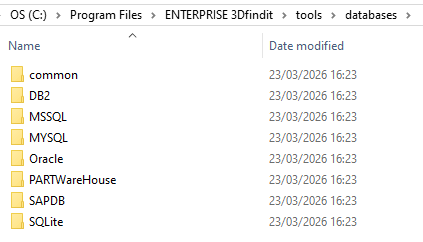
Strumenti: Contiene script di database necessari per l'impostazione dell'ambiente ERP e file vbs per attività speciali.
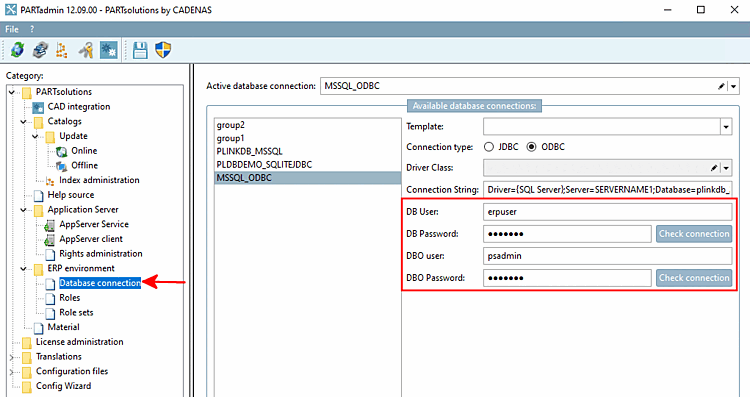
È inoltre possibile utilizzare gli script per impostare diritti diversi per l'utente standard ("erpuser") e l'utente amministratore ("psadmin").
CREATE USER IF NOT EXISTS 'erpuser' IDENTIFIED WITH mysql_native_password BY 'erpuser';

GRANT SELECT, INSERT, UPDATE, DELETE ON partlinkdb.ERPTABLE to erpuser;
GRANT SELECT, INSERT, UPDATE, DELETE ON partlinkdb.LINKTABLE to erpuser;
GRANT SELECT, INSERT, UPDATE, DELETE ON partlinkdb.CLASSFOLDERTABLE to erpuser;
GRANT SELECT, INSERT, UPDATE, DELETE ON partlinkdb.CLASSTABLE to erpuser;
GRANT SELECT, INSERT, UPDATE, DELETE ON partlinkdb.PRJTABLE to erpuser;
GRANT SELECT, INSERT, UPDATE, DELETE ON partlinkdb.PLMTABLE2 to erpuser;
GRANT SELECT, INSERT, UPDATE, DELETE ON partlinkdb.PLM_HIERARCHY to erpuser;
GRANT SELECT, INSERT, UPDATE, DELETE ON partlinkdb.CNSSEQ to erpuser;
GRANT SELECT, INSERT, UPDATE, DELETE ON partlinkdb.TREETABLE to erpuser;
GRANT SELECT, INSERT, UPDATE, DELETE ON partlinkdb.LOGTABLE to erpuser;
GRANT SELECT, INSERT, UPDATE, DELETE ON partlinkdb.EXPORTTABLE to erpuser;
Der Admin muss auch Spalten-Definitionen in der ERPTABLE ändern können.
CREATE USER IF NOT EXISTS 'psadmin' IDENTIFIED WITH mysql_native_password BY 'psadmin';

GRANT ALTER, SELECT, INSERT, UPDATE, DELETE ON partlinkdb.ERPTABLE to psadmin;
GRANT SELECT, INSERT, UPDATE, DELETE ON partlinkdb.LINKTABLE to psadmin;
GRANT SELECT, INSERT, UPDATE, DELETE ON partlinkdb.CLASSFOLDERTABLE to psadmin;
GRANT SELECT, INSERT, UPDATE, DELETE ON partlinkdb.CLASSTABLE to psadmin;
GRANT SELECT, INSERT, UPDATE, DELETE ON partlinkdb.PRJTABLE to psadmin;
GRANT SELECT, INSERT, UPDATE, DELETE ON partlinkdb.PLMTABLE2 to psadmin;
GRANT SELECT, INSERT, UPDATE, DELETE ON partlinkdb.PLM_HIERARCHY to psadmin;
GRANT SELECT, INSERT, UPDATE, DELETE ON partlinkdb.CNSSEQ to psadmin;
GRANT SELECT, INSERT, UPDATE, DELETE ON partlinkdb.TREETABLE to psadmin;
GRANT SELECT, INSERT, UPDATE, DELETE ON partlinkdb.LOGTABLE to psadmin;
GRANT SELECT, INSERT, UPDATE, DELETE ON partlinkdb.EXPORTTABLE to psadmin;
La connessione può essere controllata in PARTadmin alla voce Connessione al database [Database connection].
I dettagli su tutti i sistemi si trovano nei file readme delle singole directory.
Attiva le interfacce sul client: L'opzione è attivata di default. Se si disattiva l'opzione, è necessario attivare manualmente le interfacce desiderate in un secondo momento in PARTadmin nella categoria Integrazione CAD [CAD integration]. Vedere anche Sezione 1.4.2, “ Integrazione CAD ” in ENTERPRISE 3Dfindit (Professional) - Amministrazione.
Sotto
...\software\install\scriptsScript batch che possono essere eseguiti localmente in qualsiasi momento per abilitare/disabilitare tutte le interfacce. Questi possono essere Amministrativamente utilizzato anche nel corso di una distribuzione di software con distribuzione divenire.
Al termine dell'installazione, viene visualizzato il seguente messaggio. Fare clic su .
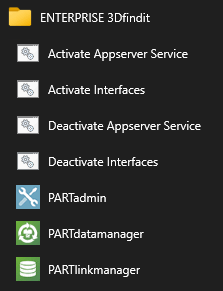
Una volta completata l'installazione, vengono visualizzate le voci corrispondenti del menu di avvio. I collegamenti Attiva interfacce / Disattiva interfacce avviano gli script batch menzionati in precedenza.
Fare clic su per uscire dalla procedura guidata di installazione.
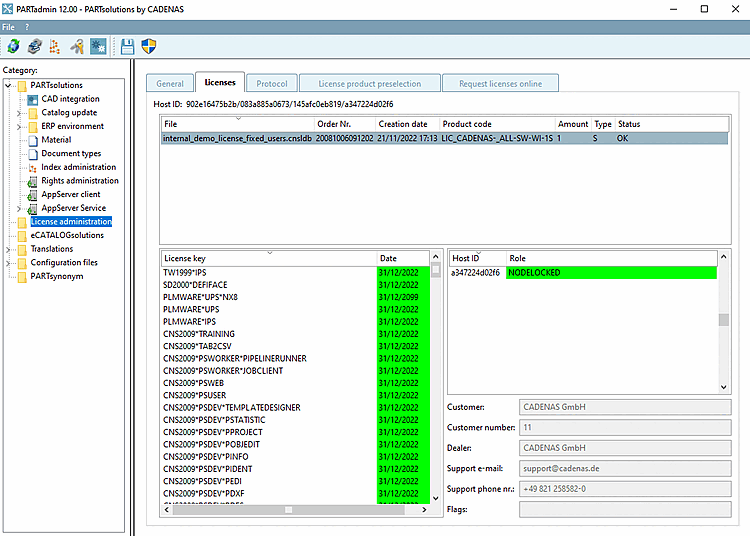
Importare una licenza già ricevuta (che contiene anche il PARTapplicationServer) tramite PARTadmin alla pagina Licenze [Licenses] > Aggiungi file... [Add file...]:
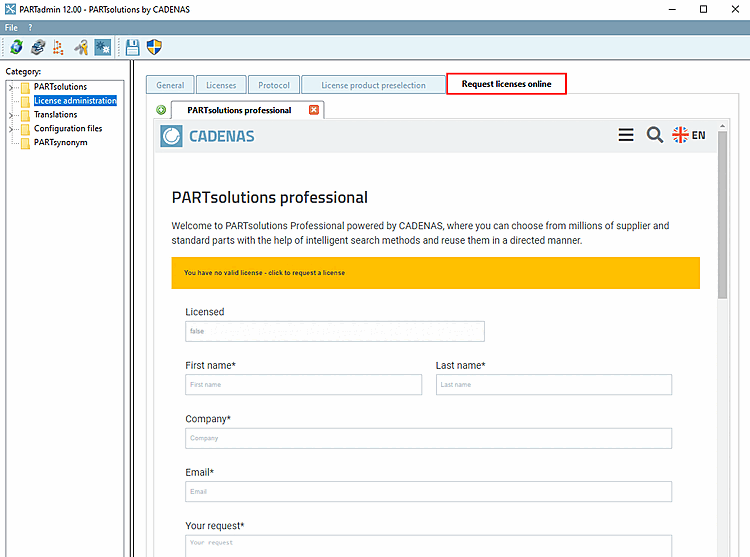
Altrimenti, è possibile richiedere una licenza nella scheda Richiesta di licenze online [Request licenses online].
Sezione 9.3, “Licenze ”I dettagli sulle licenze sono disponibili all'indirizzo .
Installare i cataloghi e le classificazioni richieste tramite PARTadmin.
I dettagli sono disponibili alla voce Sezione 1.4.3.1, “ Aggiornamento del catalogo online ” in ENTERPRISE 3Dfindit (Professional) - Amministrazione.
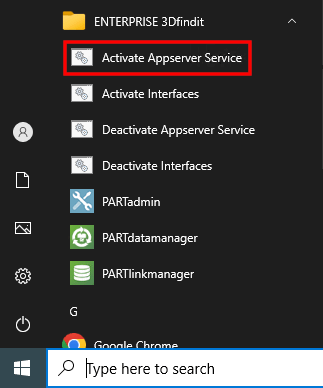
Quando si utilizza un PARTapplicationServer centrale, questo deve essere avviato come servizio.
A tale scopo, fare clic sulla voce Attiva servizio Appserver nel menu Start.
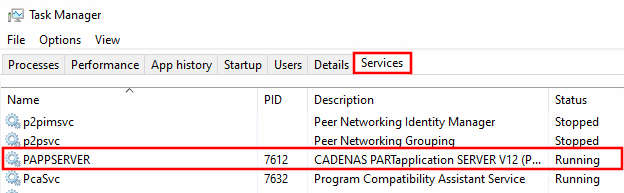
Controllare in Task Manager, alla voce Servizi, se la voce PAPPSERVER è presente e se lo stato è Esecuzione.
![Categoria "Integrazione CAD [CAD integration] Integrazione CAD](https://webapi.partcommunity.com/service/help/latest/pages/it/partwarehouse/doc/resources/img/img_69d38d5bed39459988aabe8a760d7521.png)
![PARTADMIN > Aggiornamento del catalogo [Catalog update] > Online](https://webapi.partcommunity.com/service/help/latest/pages/it/partwarehouse/doc/resources/img/img_9be8f484e8f143a3b9ffe159d3b13d9a.png)
Oltre alle istruzioni riportate in questo capitolo, si prega di osservare anche le informazioni riportate in Sezione 5.24, “Note importanti sull'aggiornamento alla V12” in ENTERPRISE 3Dfindit (Professional) - Amministrazione.
[1] La gestione delle parti con l'integrazione PDM/ERP/PLM è il collegamento dei dati del catalogo con i vostri dati nel sistema ERP/PLM. Ciò consente di controllare le approvazioni e le visualizzazioni basate sui ruoli e di visualizzare i dati del vostro sistema di database in PARTsolutions per l'utente. Il sistema di database deve essere fornito dal cliente.