
If you want to use your
Create, view, edit or edit favorites lists in a specific
To organize the structure, open the Favorites Lists [Favorites lists] dialog box by clicking on the Favorites icon  in the main bar. Here are all the necessary
functions.
in the main bar. Here are all the necessary
functions.
Users can use their
own lists and those shared by others. Show shared lists
the Access: Shared
 icon . If a user has shared their own list, the
icon also appeared.
icon . If a user has shared their own list, the
icon also appeared.
When a user
has access rights, the  icon is displayed at the end of the line. If a user has read-only permissions,
 displayed.
![Example: "Favorites lists" of "User2" - He is owner of "List 2" and has shared it (or it was shared by a other user), he is the owner of "List 4" and does not have it and he can use "List 1" (only with read permissions [ icon] ), shared by another user .](https://webapi.partcommunity.com/service/help/latest/pages/en/partsolutions_user/doc/resources/img/img_8494bd1a27e547aa990bd8cb97c22e5c.png)
Example:
"Favorites lists" of "User2" - He is
owner of "List 2" and has shared it (or it was shared by a
other user), he is the owner of "List 4" and does not have it
and he can use "List 1" (only with read permissions [
icon] ), shared by another user
.
![Example: "Favorites lists" of "User1" - He sees "List 2", which was shared by another user (only with read permissions [ icon]), he sees "List 1" (either as owner or someone who has write and read rights or even someone who is also the owner). And he sees his own list "Very special", which he did not share.](https://webapi.partcommunity.com/service/help/latest/pages/en/partsolutions_user/doc/resources/img/img_fca9a9bedaa748a6a3aaaeae11f5504d.png)
Example:
"Favorites lists" of "User1" - He sees
"List 2", which was shared by another user (only with read permissions [
icon]), he sees "List 1" (either as owner
or someone who has write and read rights or even someone who
is also the owner). And he sees his own list "Very special",
which he did not share.
The following functions (and notes) are available:
 Edit: The Edit
<List Name> dialog box opens. Change
Name and optional comment.
Edit: The Edit
<List Name> dialog box opens. Change
Name and optional comment.
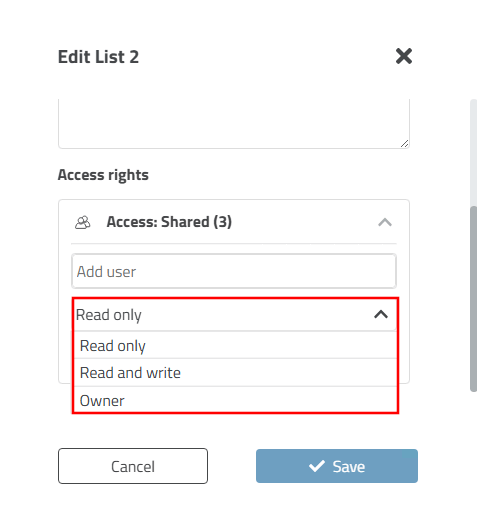
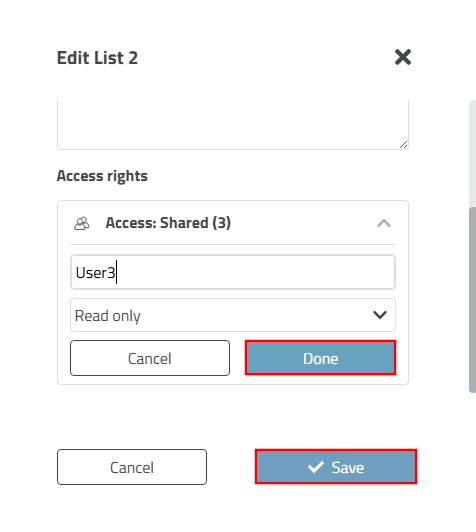
Under , you have the option of granting other users access rights to your lists.
-> An input field appears for the entry of the desired user and a list field with the options Read only, Read and write and Owner.
Enter the name of the desired user.
Select the desired access right and confirm first with and then with .
-> If no other user has been granted access rights, Access: Private is displayed.
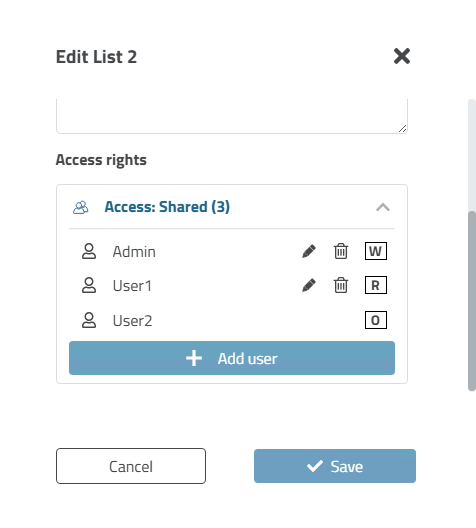
-> If other users have been granted access rights, Access: Shared is displayed. This is followed by the number of users in brackets. An icon also appears behind each user to indicate the type of access right.
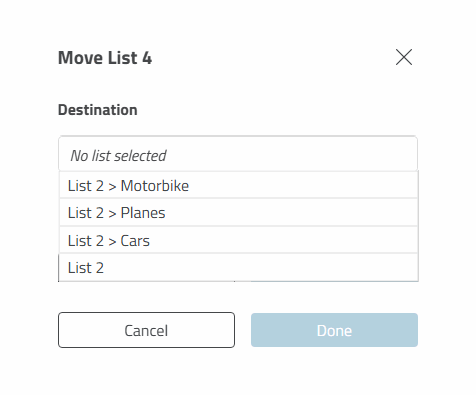
 Move: With
Click on the icon to open the Move dialog
<List Name>.
Move: With
Click on the icon to open the Move dialog
<List Name>.
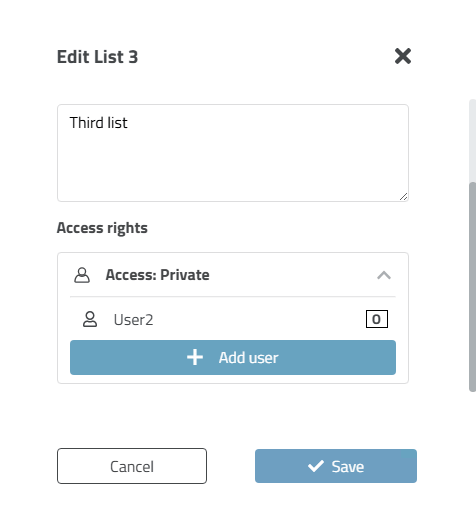
- List details
[List details]: You can use the
information, but Name Input Field and Comment Input Field are
disabled. This was determined by the owner of the list.
List details dialog: In this example, the favorites list belongs to another user who has read-only rights.
: Click on the button to open the dialog box of the same name. Enter a name and optionally a comment.
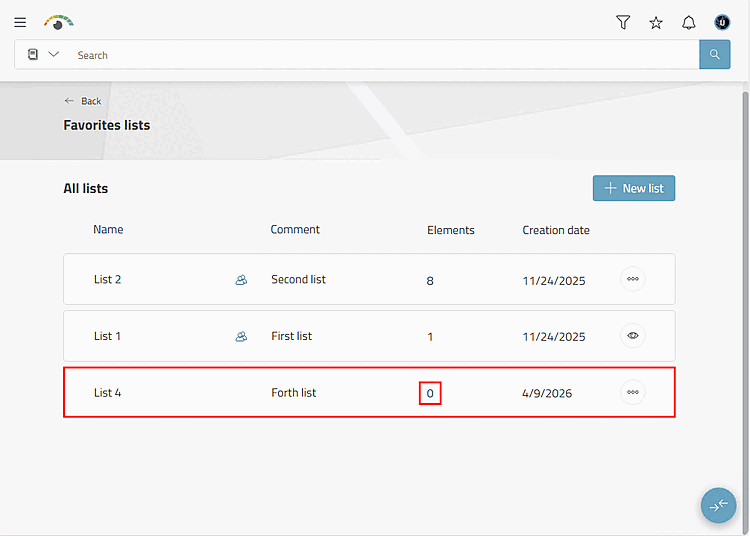
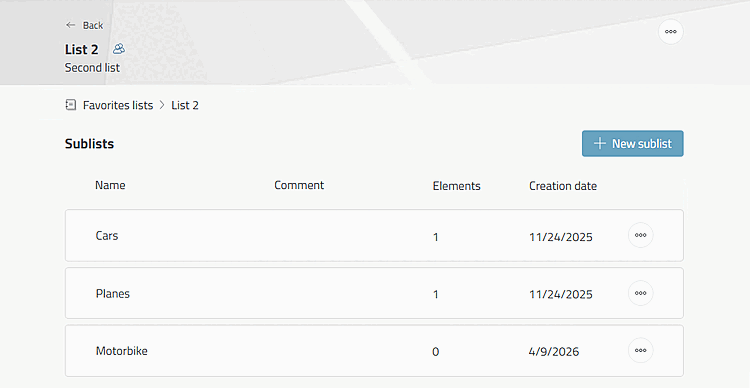
After clicking on the button, the new favorites list is displayed (still without any content [Elements 0]).
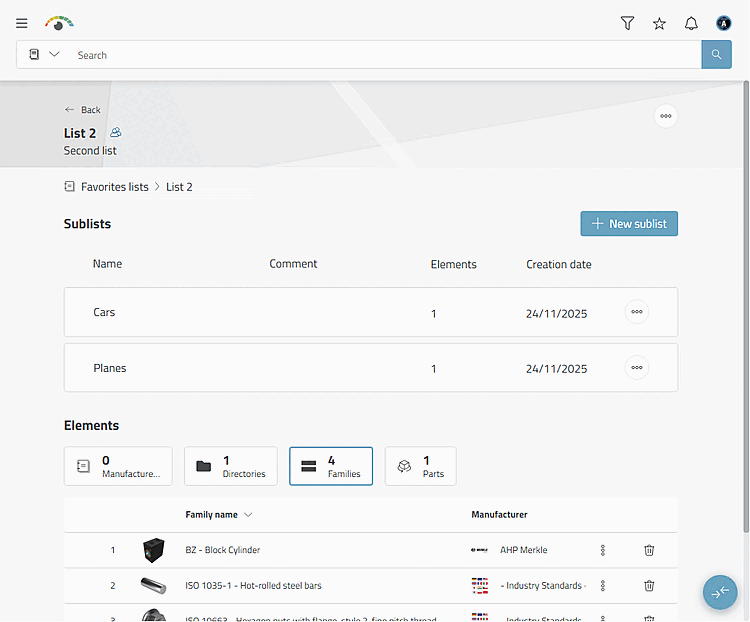
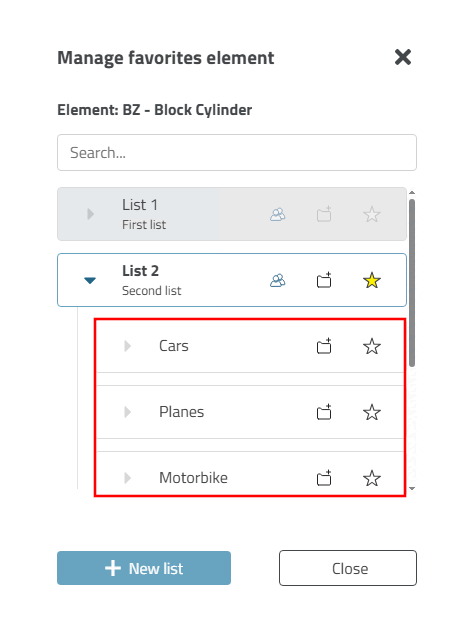
Click in Row: With a simple click on the desired line open the list and see the content divided into the elements Catalogues, directories, parts families and individual parts. The listing shows ERP status, thumbnail, directory name or product name (possibly also description text for individual parts), the catalogue name, the call symbol
 for the Manage favorites dialog
element and the delete symbol
for the Manage favorites dialog
element and the delete symbol  .
.If sublists are available, these are displayed above the elements.
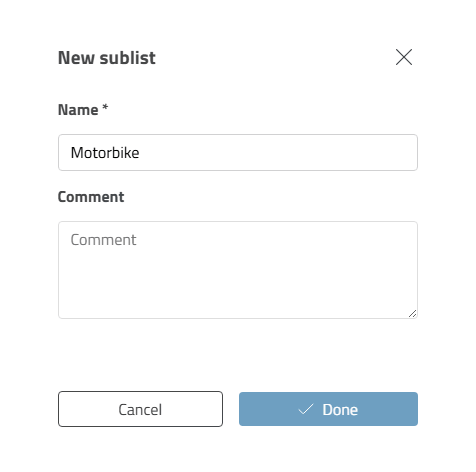
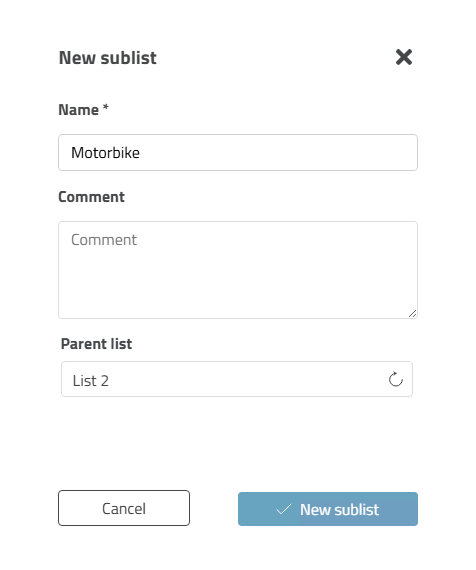
+ New sublist: Click on the button to open the dialog box of the same name.
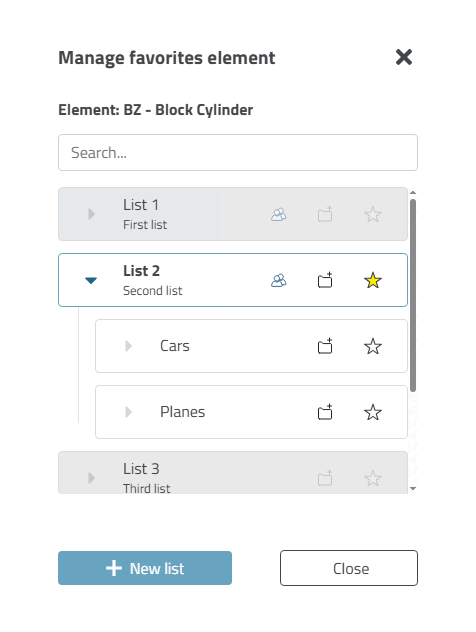
- : The Manage Favorites Item [Manage favorites element] dialog will
open.
With Click on the folder icon with the plus sign
 create in the list in question
a sub-list.
create in the list in question
a sub-list.-> The New sublist dialog box opens.
Click on the button to create a new list. If you do not specify a parent element, a list element is created at the top level, otherwise you can also specify any parent element.
![[Note]](https://webapi.partcommunity.com/service/help/latest/pages/en/partsolutions_user/doc/images/note.png)


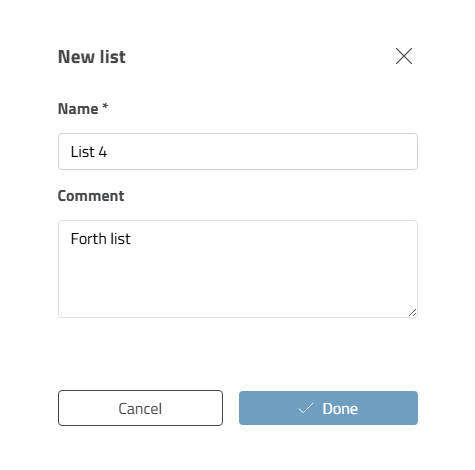
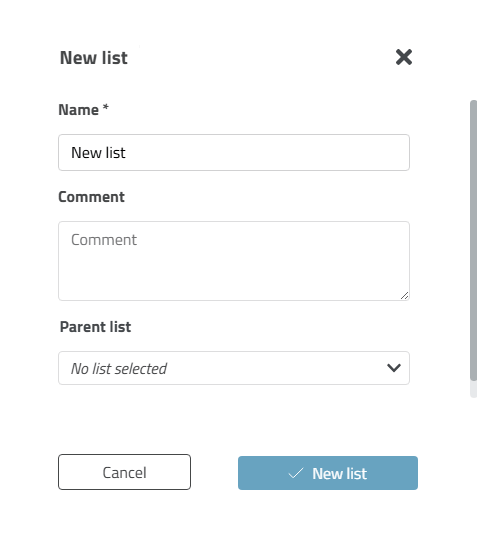
Use the button to create a new favorites list. You can do this in the overview of favorites lists or by clicking on the star icon anywhere in 3Dfindit.
In the new window that opens, you can add the name of the list and a comment.

It is also possible to create a new favorites list (and sublists) directly when setting favorites. See Section 8.2.1, “Mark element as favorite ”.
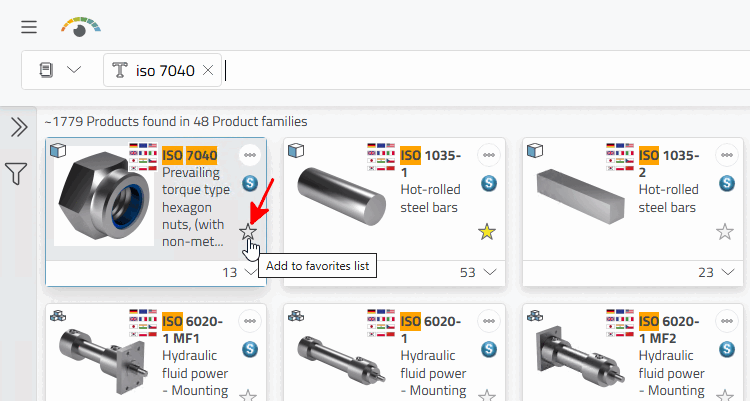
Click on the icon to open the Add to favorites list dialog box.
!["Add to favorites list [Add to favorites list]" dialog box](https://webapi.partcommunity.com/service/help/latest/pages/en/partsolutions_user/doc/resources/img/img_042849cb575d414393e766d4aa1f3d2a.png)