In the following the procedure of an offline catalog update is explained.
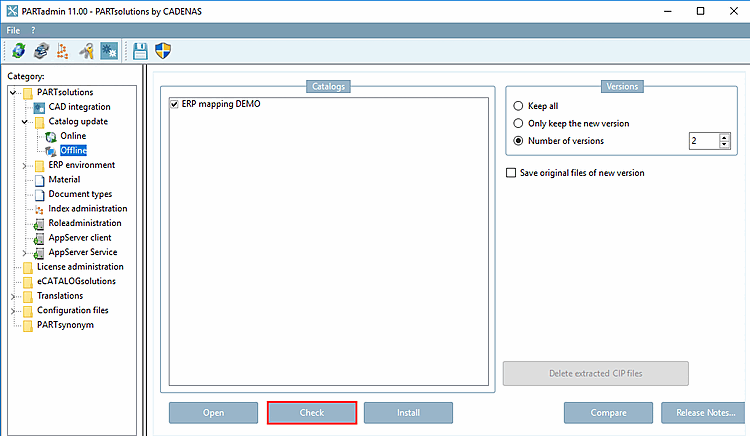
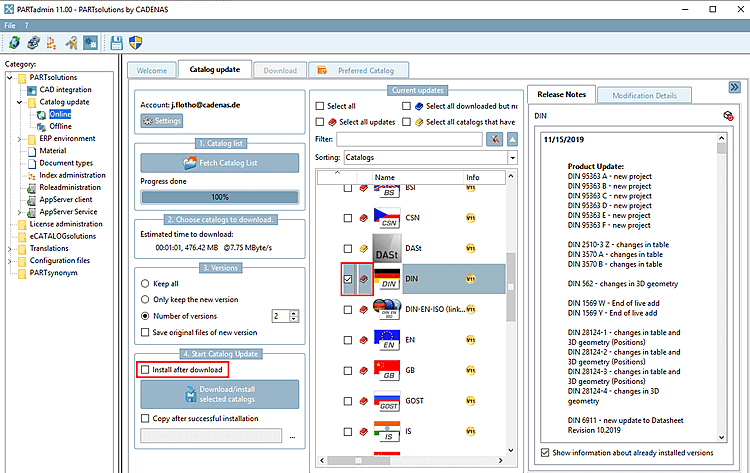
If you deactivated the Install after download option under Catalog update -> Online, the downloaded catalog files are now located in the temporary download directory [Download directory] that you specified in the settings dialog.
Open the CIP file by clicking on (selection in the Explorer window).
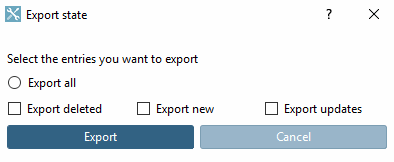
-> The CIP Installation dialog box opens with the options and :
The system checks whether there are data records with the status to be checked [to check] and/or not mapped.
If data records with the status to be checked [to check] or not mapped are found, the Protocol, ERP Status and PLM Status tabs are displayed in the CIP Installation dialog box after the check, otherwise the installation takes place immediately.
![[Note]](https://webapi.partcommunity.com/service/help/latest/pages/en/3dfindit/doc/images/note.png)
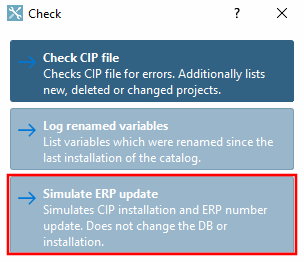
Note If you want to perform a check in any case, do not click on , but on (see below).
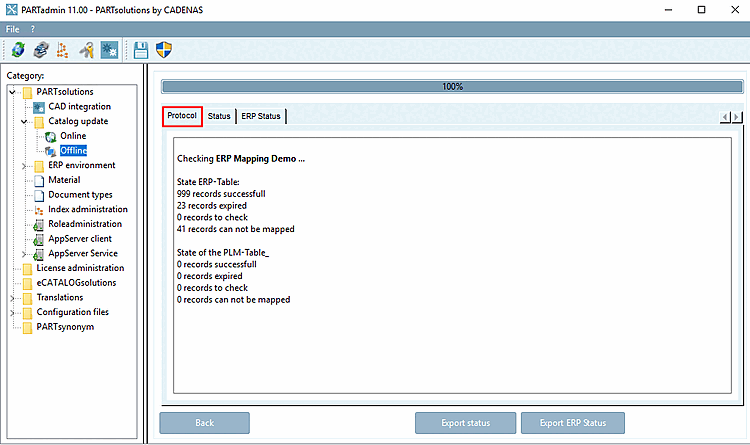
The number of data records per status [Status] is listed on the Log [Protocol] tab page (details below): (The same result as for Simulate ERP update, see Fig. „ Protocol tab page“)
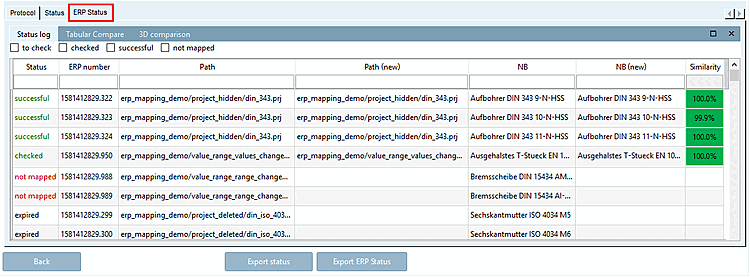
ERP status [ERP Status] tab page
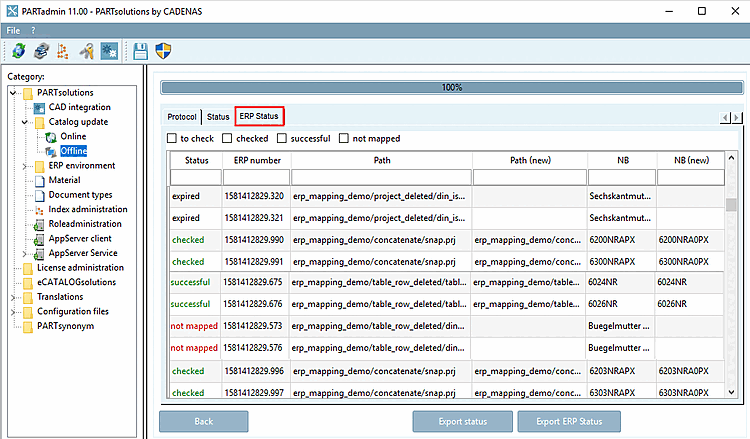
The status (checked [checked], successful, expired and not mapped ) is displayed for all affected ERP numbers, as well as Path, Path (new), NB and NB (new).
successful: The automatic check was successful. These are the projects that do not need to be verified. However, these may appear in the mapping dialog. These are the projects without an icon, which appear because the tab file has changed but does not have an
 Icon because nothing needs to be mapped (e.g. a new line has been added).
to be checked [to check]: This status should not actually occur, as publishing without ERP mapping is not permitted.
expired: Lines that have been verified with a red x
 in red, i.e. lines that no longer exist, as well as lines that have been mapped to "nothing" using conditions [Conditions].
not mapped: This status appears in the event of incorrect mapping, errors during installation or missing mapping.
If the Protocol, ERP Status and PLM Status tabs are displayed in the CIP Installation dialog box, there are data records with Status to check [69]and/or not mapped.
This means processing using the Update Manager [Update manager] [70] is necessary.
If the installation is to be carried out after the check, activate the checkbox next to the desired catalogs and click on , otherwise click on .
If there are no data records with the note to check or not mapped, the installation runs through without any further information. At the end of the installation, the Log [Protocol], Status and Status ERP [ERP Status] tabs are displayed again - this time in the standard dialog area of Catalog update -> Offline.
The installation starts immediately. At the end of the installation, the Protocol, Status and Status ERP [ERP Status] tabs are displayed - this time in the standard dialog area of Catalog update -> Offline.
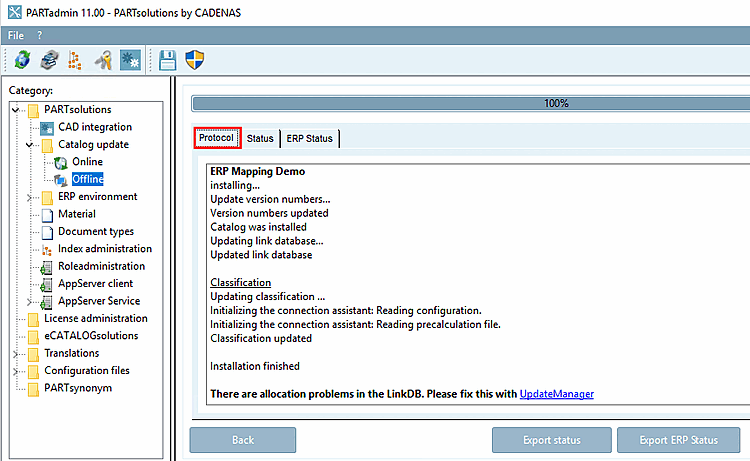
Result after installation has been completed:
At the end of the installation, the Protocol, Status and Status ERP [ERP Status] tabs are displayed - this time in the standard dialog area of Catalog update -> Offline.
The Protocol tab page is currently open.
If problems occurred, the message There were assignment problems in the LinkDB [There were mapping problems in the LinkDB. Please correct these in the UpdateManager.] is displayed on the Log [Protocol] tab page . [There were mapping problems in the LinkDB. Please correct these in the UpdateManager.] Please clean these up in the UpdateManager. [There were mapping problems in the LinkDB. Please correct these in the UpdateManager.] [71] During the very first catalog update with V10 or V11, the mappings must be carried out manually one last time (with the Update Manager [Update manager] ), but after that, stored ERP mappings take effect and manual intervention is only necessary in rare exceptional cases if an adjustment cannot be made automatically.
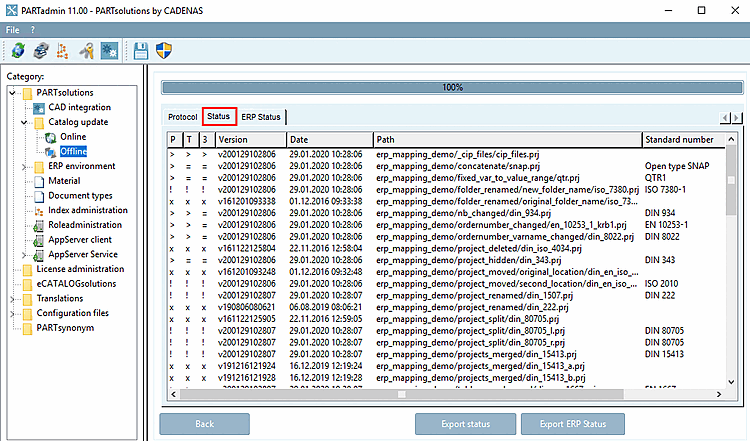
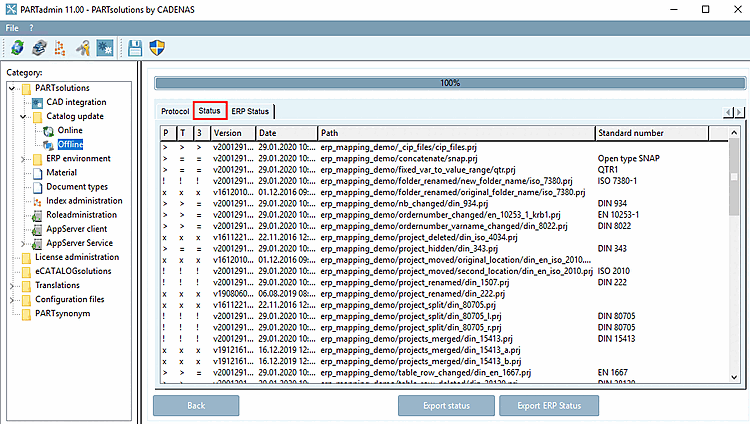
On the Status tab page, you will find a detailed list of the status of the individual projects.
The following table shows the meaning of the symbols.
On the Status ERP [ERP Status] tab page, you will find a list of all ERP numbers with their update status (successful [successful], expired, to be checked [to check] and not mapped ), as well as old path, new path, old NB and new NB. Explanations of the individual statuses can be found above.
By default, the Log [Protocol] tab page displays the message There were assignment problems in the LinkDB. Please clean these up in the UpdateManager. [There were mapping problems in the LinkDB. Please correct these in the UpdateManager.] Click on the UpdateManager link to open it.
You can simply test whether there is anything to edit: In the Update Manager [Update manager], deactivate the Show assigned rows [Show mapped lines] button .
.
-> Only the rows for which there have been changes that have not yet been confirmed are then displayed on the right under Row assignment [Line mapping].
If everything could be mapped automatically, nothing more can be selected. Otherwise, carry out the mappings with the Update Manager. You can find details on this under Section 4.15.3, “ Catalog update with ERP link - Fix assignment problems with Update Manager ” in ENTERPRISE 3Dfindit (Professional) - Administration.
Button "Show assigned rows [Show mapped lines] " deactivated: Only directories with an icon ![Button "Show assigned rows [Show mapped lines] " deactivated: Only directories with an icon are displayed (none in this example).](https://webapi.partcommunity.com/service/help/latest/pages/en/3dfindit/doc/resources/img/img_1bdf2e5e74f5428ba810142485167a3b.png) are displayed (none in this example).
are displayed (none in this example).
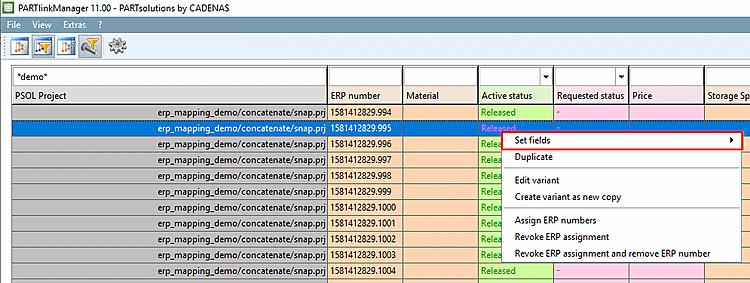
If you work with the variables ACTIVE_STATE and/or REQUESTED_STATE in the ERP rules, view the statuses in the PARTlinkManager.
You have a better overview if you activate the Hide old component versions [Hide old versions of parts]
 button.
ACTIVE_STATE was automatically set to Released for all non-hidden or filtered projects.
If necessary, you can set the status manually under Set fields.
You also have the option of retrieving information on changes before the catalog update is installed (even if only the statuses successful and/or expired occurred, i.e. no editing is necessary in the Update Manager [Update manager] ).
The Protocol, Status and Status ERP [ERP Status] tabs are displayed again in the dialog box:
An overview is displayed on the Log [Protocol] tab page, divided into the following categories:
On the Status tab page, you will find a detailed list of the status of the individual projects.
The following table shows the meaning of the symbols.
On the Status ERP [ERP Status] tab page, you will find a list of all ERP numbers with their update status (not mapped [not mapped], checked, successful and expired ), as well as Path, Path (new), NB and NB (new). Explanations of the individual statuses can be found above.
[69] The status to be checked [to check] should not actually occur if the ERP mapping has been executed, which is mandatory for publishing a catalog.
[70] Detailed information on the Update Manager [Update manager] can be found under Section 4.15.3, “ Catalog update with ERP link - Fix assignment problems with Update Manager ” in ENTERPRISE 3Dfindit (Professional) - Administration.
[71] On the Status ERP tab page, you can also see which ones. These are the ones marked as to be checked or those not found.


![[Tip]](https://webapi.partcommunity.com/service/help/latest/pages/en/3dfindit/doc/images/tip.png)


![CIP Installation " dialog box -> "Protocol" [Protocol] tab page](https://webapi.partcommunity.com/service/help/latest/pages/en/3dfindit/doc/resources/img/img_1a86f4ec265a4259ac896b1282769b09.png)
![CIP Installation " dialog box -> "ERP Status" [ERP Status] tab page](https://webapi.partcommunity.com/service/help/latest/pages/en/3dfindit/doc/resources/img/img_b4ea888551324cddbc4880d00566e050.png)
![Show assigned rows [Show mapped lines] " button activated.](https://webapi.partcommunity.com/service/help/latest/pages/en/3dfindit/doc/resources/img/img_59f2cde1903e4bb089975c766d326589.png)
![Button "Show assigned rows [Show mapped lines] " deactivated: Only directories with an icon are displayed (none in this example).](https://webapi.partcommunity.com/service/help/latest/pages/en/3dfindit/doc/resources/img/img_4c768eb8437147ef8c6ef9addd913a53.png)
