 |
In PARTproject, a part shall be classified, that means allocation of classes and attributes, and finally the result shall be displayed in PARTdataManager.
Select the project file of the part, that you want to classify.
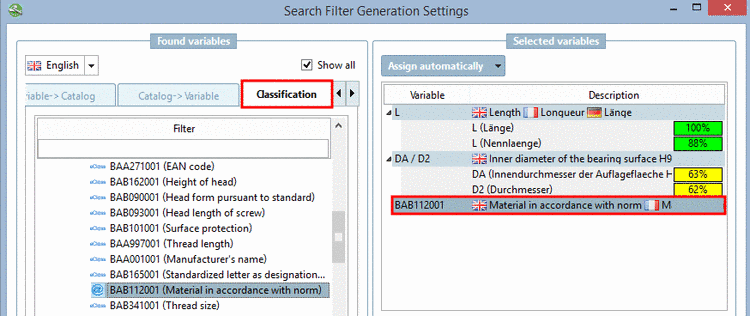
Select the tabbed page Classification and then the tabbed page of the desired classification.
Under Class system, select the desired class where the selected part should be assigned.
Using the filter is often helpful (here "flach aufliegend"), in order to quickly find the correct class.
Assign the class via selection and click on the button Add
 or via double-click.
Classes can be assigned to projects, connection points and other objects. On this see notes below.
Update the display index either via PARTproject -> button Update index
 or via PARTadmin -> Index administration (see Section 1.3.8, “
Index administration
” in PARTsolutions - Administration Manual), in
order for the new assignments to be displayed in PARTdataManager. The update has to be
performed both for the affected projects and for the
classification!
or via PARTadmin -> Index administration (see Section 1.3.8, “
Index administration
” in PARTsolutions - Administration Manual), in
order for the new assignments to be displayed in PARTdataManager. The update has to be
performed both for the affected projects and for the
classification!
A classification can be planned for parts or for Connection points.
In case that there are multiple options, before starting the process of assignment under Filter, select the desired option (see Fig. „Tabbed page "Classification" -> tabbed page "CNS"-> "Filter"“).
At the most classifications, only the option Classes is available.
![[Note]](https://webapi.partcommunity.com/service/help/latest/pages/en/3dfindit/doc/images/note.png) | Note |
|---|---|
In the CNS classification there are different options. Very often the option Connection points is used. Connection points (geometrical objects) can also be classified in PARTproject, on the tabbed page 3D view. Advantageously is here that you have direct relation to the part.
On this see Section 5.12.5.4, “Classify connection points”. | |
Classification can also be performed for multiple projects via context menu command Add projects to classification. On this see next section under Section 5.12.5.1.2, “ Assignment of classification classes and attributes at directory level ”.