5.23.8.2.3. Request with attachment in the Part Number Manager plus LinkDB entry
5.23.8.2.3.2. Procedure |  |
| Prev | Next |
The entire process alternates between different stations.
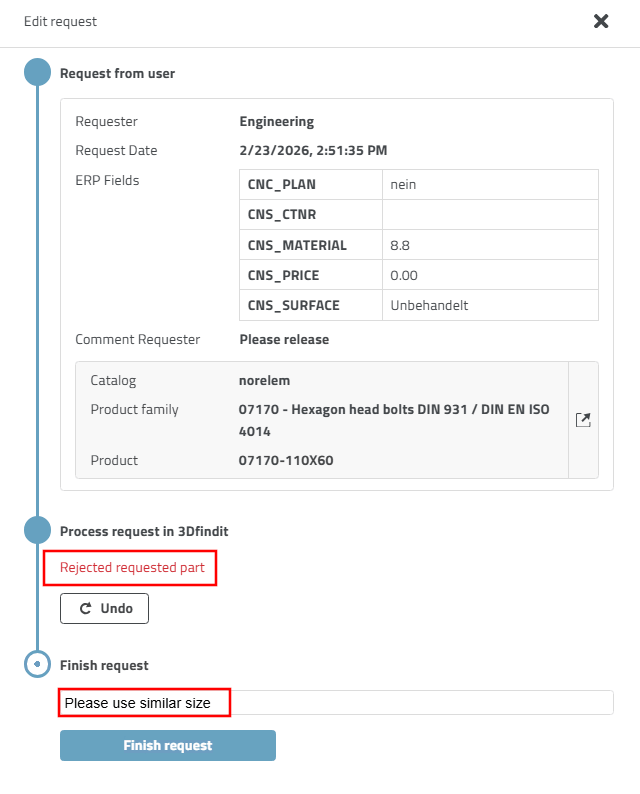
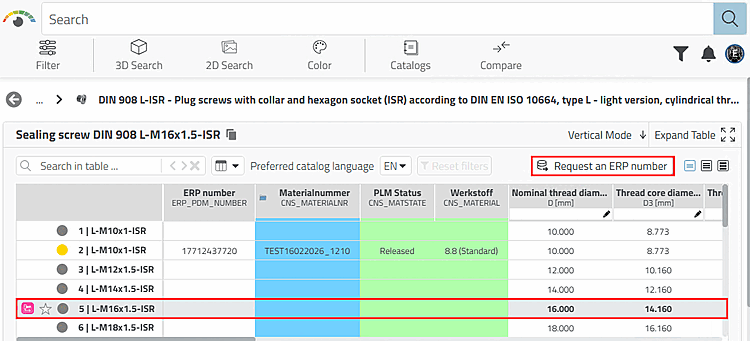
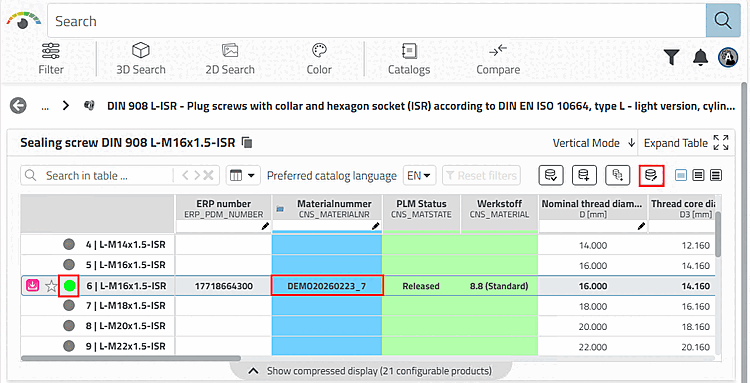
Select the desired line and click on the button.
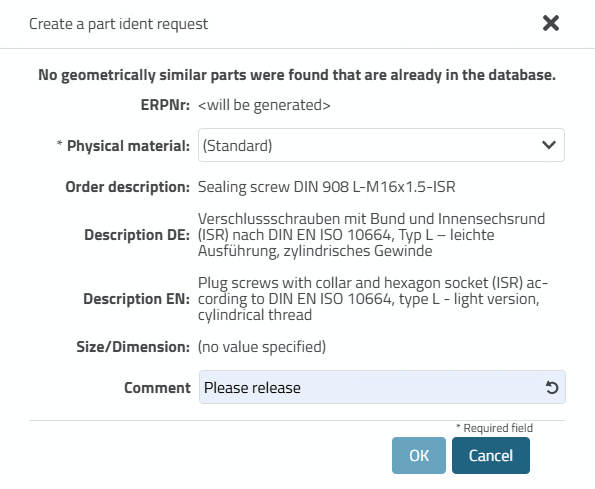
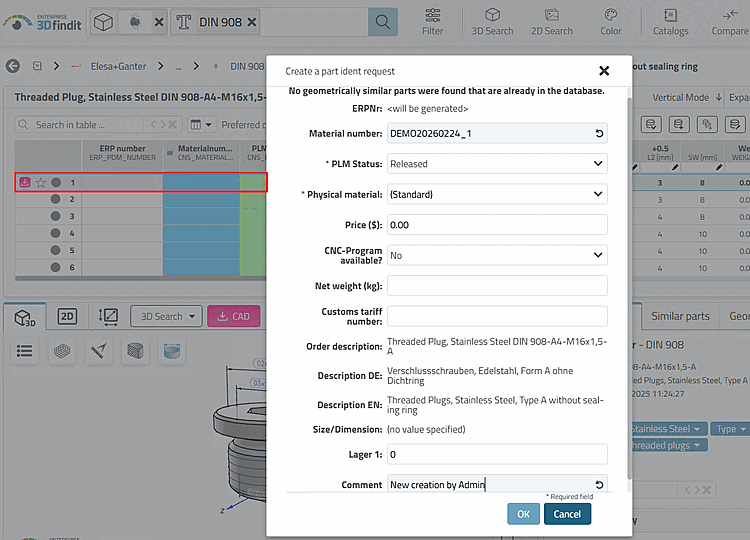
-> The Request Ident Number [Create a part ident request] dialog box opens.
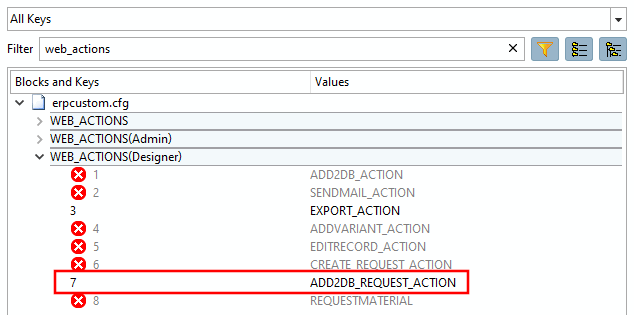
The button was defined for the Designer role under WEB_ACTIONS.
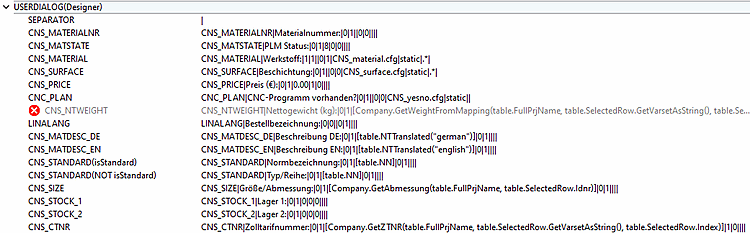
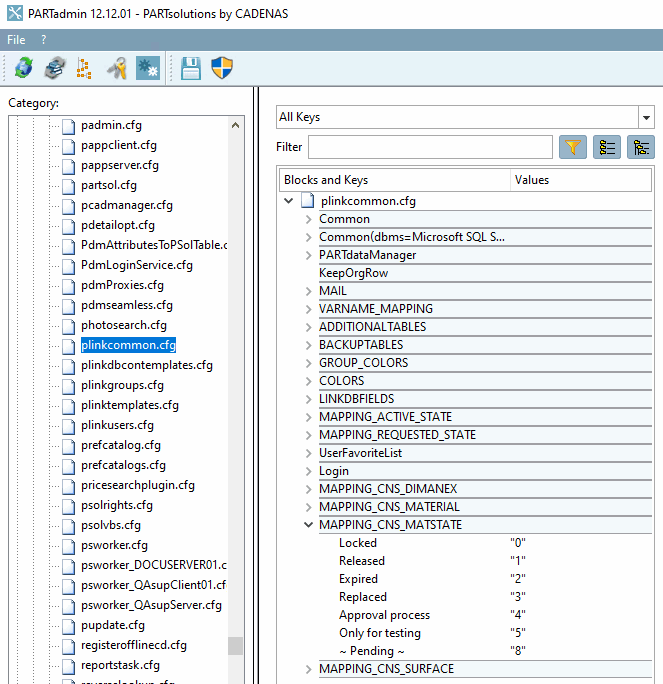
The USERDIALOG(Designer) block defines for the Designer role which fields are generally displayed and which are also available for input. The list shows declared variables, whereby the key values define whether a field is displayed in the dialog or whether an entry is made in the LinkDB, etc.
In this example, a selection can be made in the list field for material. In addition, a corresponding comment can be entered in the comment field.
This triggers the following actions:
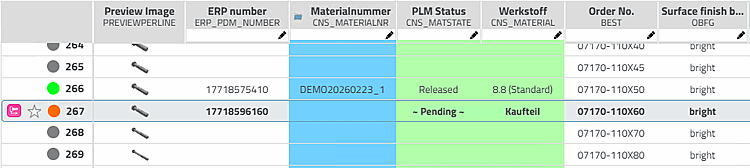
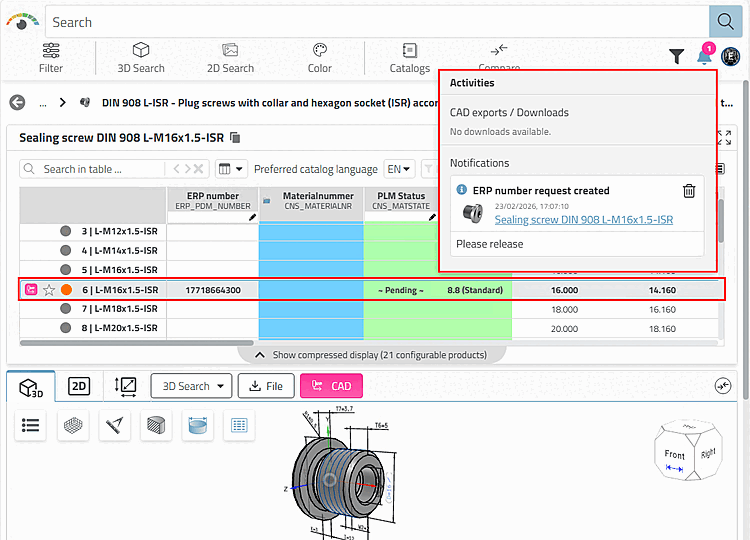
The line receives a LinkDB entry, i.e. an ERP number, and is thus uniquely identified.
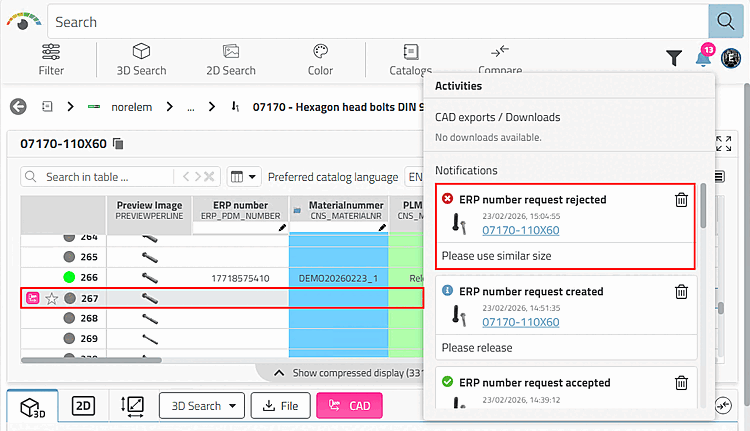
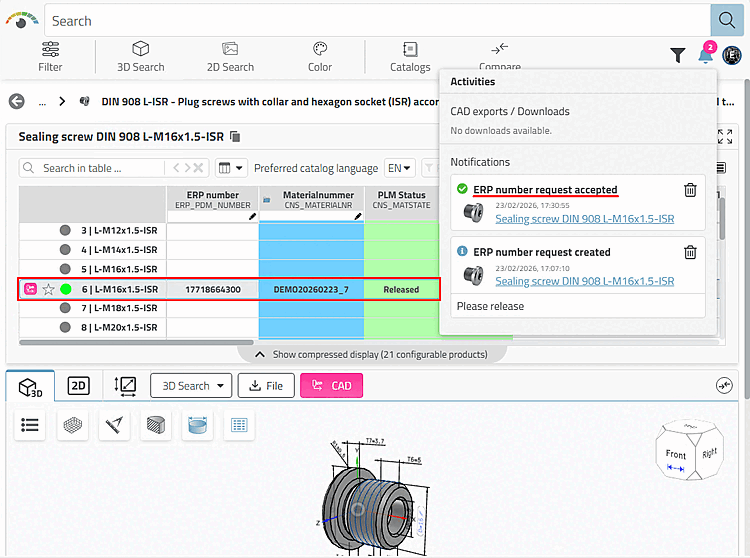
A notification appears in the Activities dialog box that an ERP number has been created or a request for approval has been created.
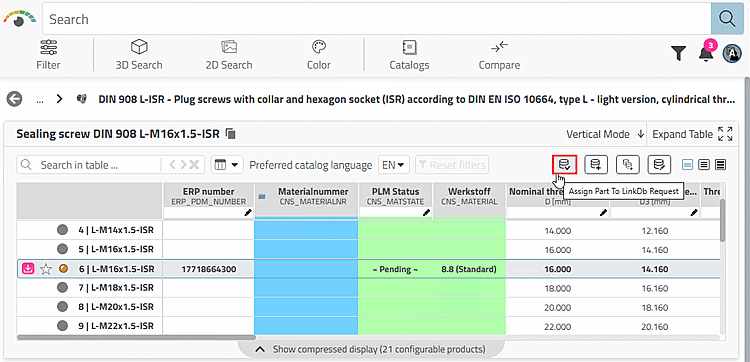
The entry ~Pending~ appears in the PLM Status column. Based on this entry, export restrictions can be triggered if necessary, so that, for example, exports may only be carried out when the status is Released.
Background information on the underlying setting: The 5th parameter with the value "8" causes ~Pending~ to be displayed.
USERDIALOG CNS_MATSTATE|PLM Status:|0|1|8|0|0||||The mapping to the display term takes place in plinkcommon.cfg > Block MAPPING_CNS_MATSTATE.
The request for approval for export is now processed by the administration, standards department or a key user, depending on the respective company workflow.

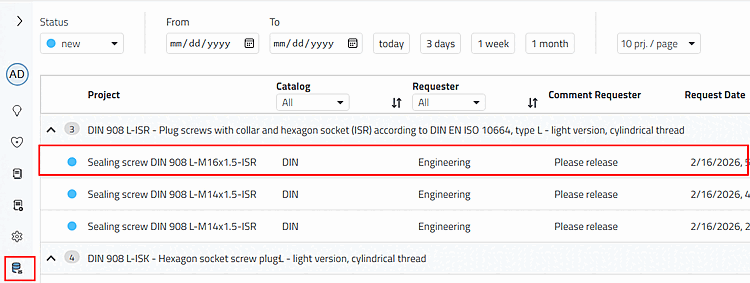
The user's part request is displayed in the dashboard.
Click on to open the table view.
![[Note]](https://webapi.partcommunity.com/service/help/latest/pages/en/partsolutions_user/doc/images/note.png)
Note The key user can now make the assignment directly on the desired part or search for a similar part using all the usual methods (even in another catalog) and assign it. The rest of the process remains the same. If the key user assigns a part that does not yet have an entry in the LinkDB, a small special feature must be taken into account. See Section 5.23.8.2.3.2.4, “Notes for new creation by admin”.
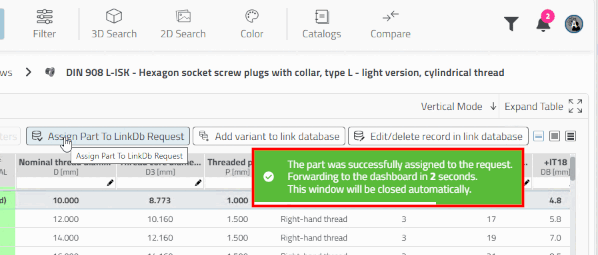
In the following, we consider the case of assigning the desired part...
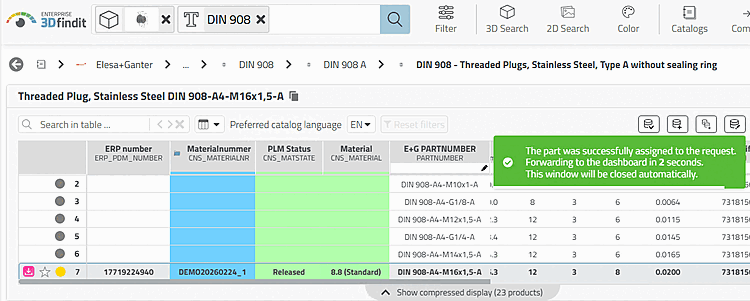
-> A notification appears that the part has been successfully assigned to the request.
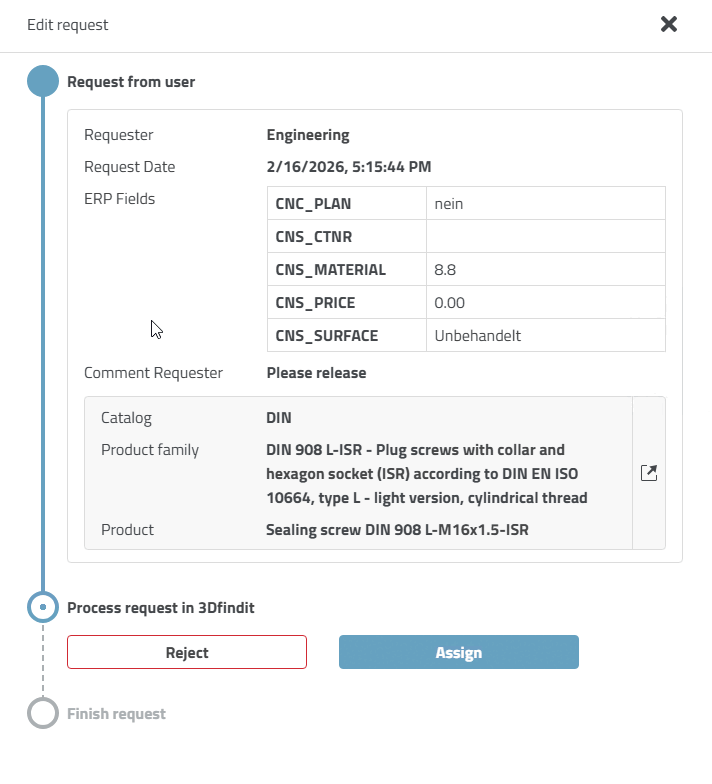
-> The Edit request dialog box opens.
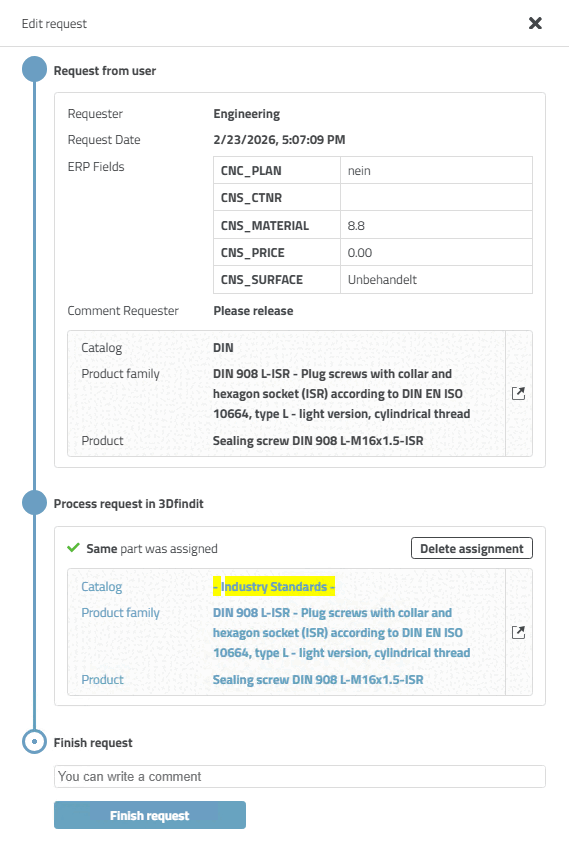
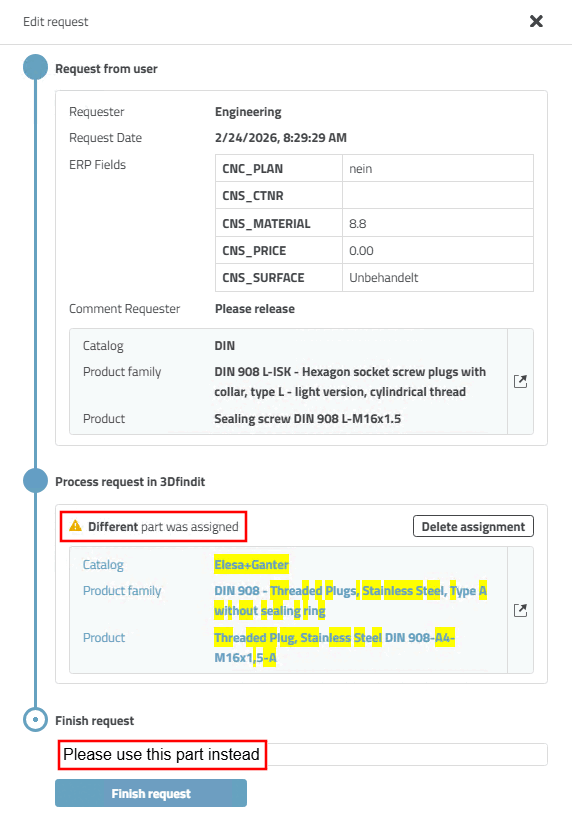
-> The message Same part was assigned appears. (If a similar part was assigned, e.g. from another catalog, Different part was assigned is displayed).
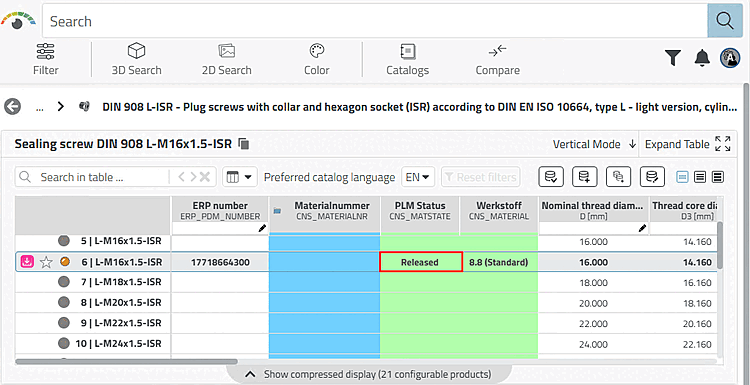
Released" is now displayed in the PLM Status column in the table view.
Optionally, the administration, standards body or a key user can fill in the data record manually; in practice, this is usually done automatically via reverse mapping.

Once the request for part release has been accepted by the administration, standards body or a key user, the following changes take effect:
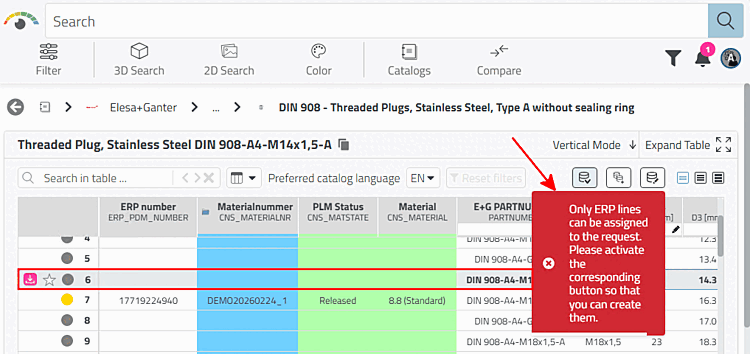
If the administration, the standards body or the key user (depending on the company workflow) decides not to assign the part requested by the user, but a similar part AND this part does not yet have an ERP number (i.e. no entry in the link database), then the ADD2DB_ACTION function must also be activated.
[WEB_ACTIONS(Admin)]
1= ADD2DB_ACTION
In this case, the Create a part ident request dialog opens by default.
After confirming with , a positive confirmation also appears by default.
If the ADD2DB_ACTION key is not activated, an error message appears.
If the admin assigns a similar part with an existing ERP number, there is no difference to the standard process.