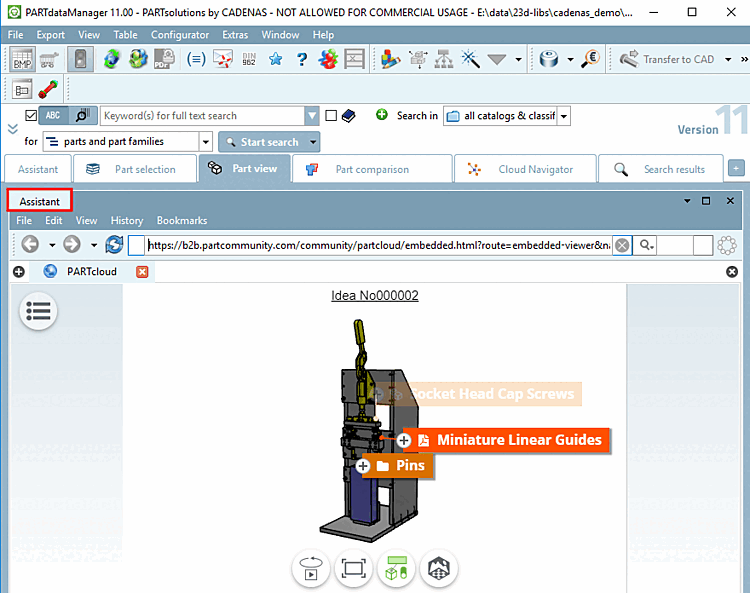
Projects uploaded in PARTcloud can be linked via project of the type Assistant and thus displayed in PARTdataManager / PARTcommunity can be displayed.
In this way you can demonstrate the use of your parts at an exemplary design and directly link into the catalog.
The following describes how to embed a PARTcloud page in PSOL / PCOM.
Create a new project with the Assistant project type [Project type] or use an existing Assistant project [Assistant].
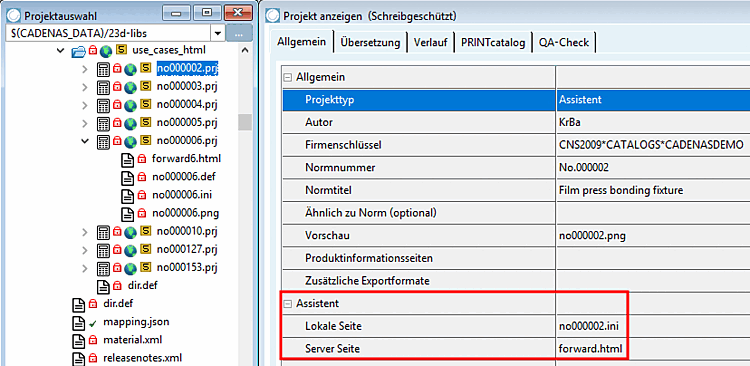
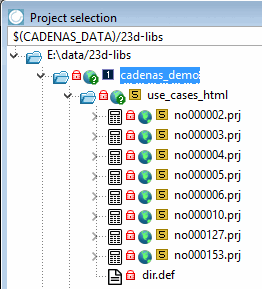
The corresponding icon is displayed in the project selection [Project selection]
 is displayed.
The project type wizard [Assistant] must be displayed under Edit project -> General -> General -> Project type.
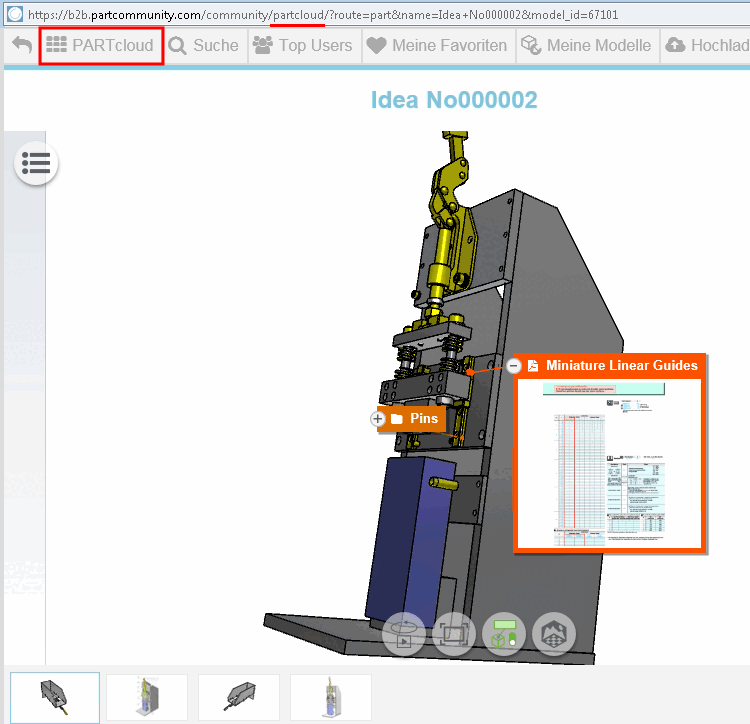
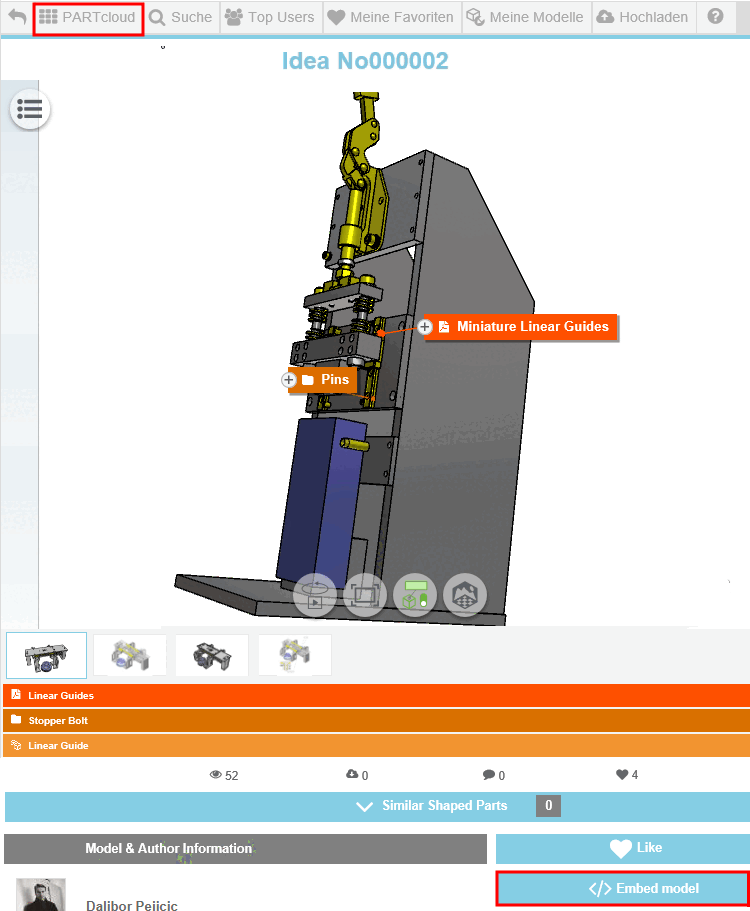
Call up the part to be embedded on PARTcloud.
https://b2b.partcommunity.com/community/partcloud/?
 route=part&name=Idea+No000002&model_id=67101
The page "Create a code to embed on your website " opens.
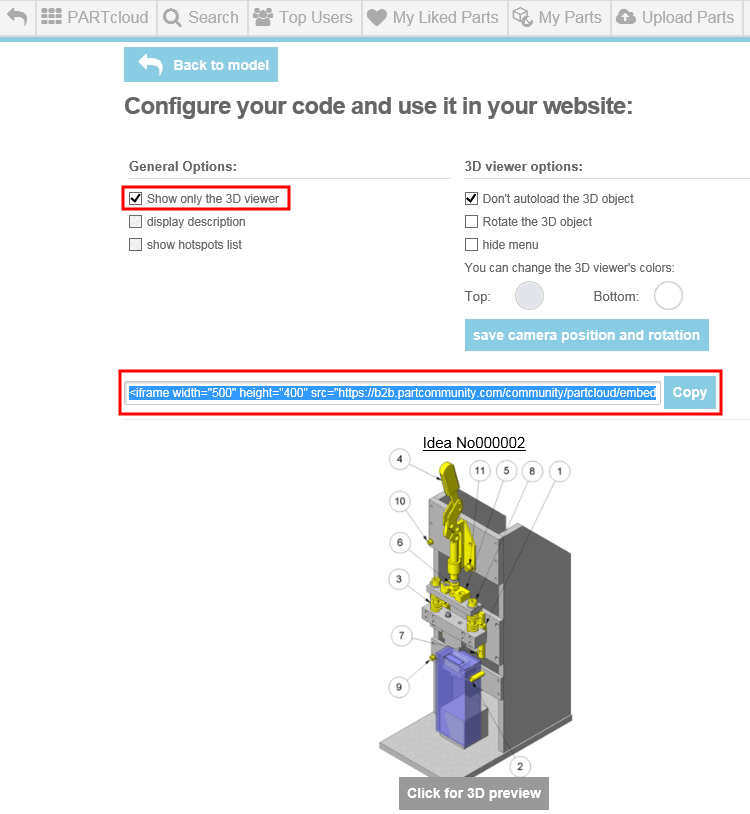
Under General Options on the left-hand side, only set the Show only the 3D viewer checkbox. Leave the other settings as they are.
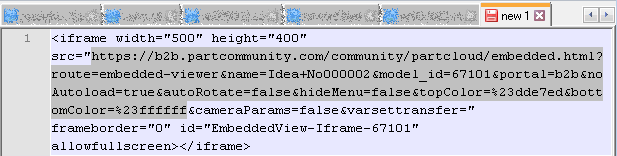
Copy the HTML code and only use the marked part of code (see next figure).
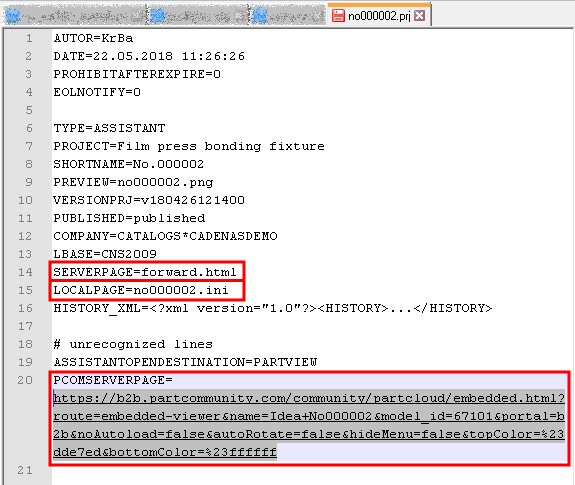
Create following keys or modify them accordingly.
As soon as the keys
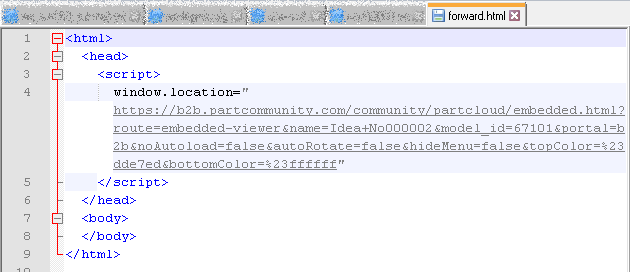
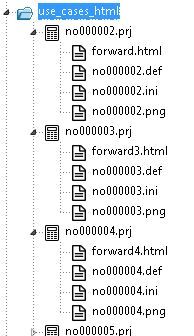
SERVERPAGEandLOCALPAGEhave been created at file level, they are displayed on the General tab page in the Wizard [Assistant] section. These two keys can also be edited here.Always use a forward file according to the following schema.
The attribute
window.locationhas the section copied from the <iframe> tag as its value (see above).The name of the ini file has to be the same in compare to the respective project name.
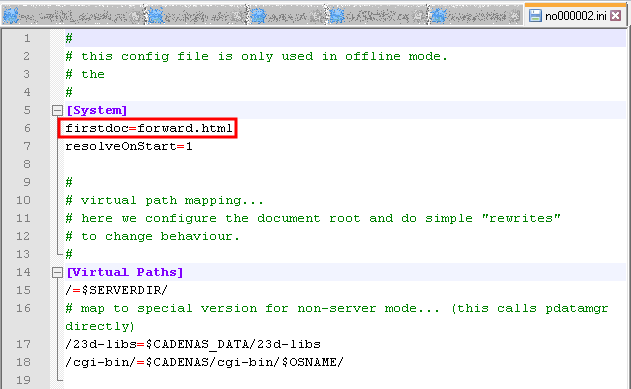
Always use an ini file according to the following example.
The key
firstdochas the value "forward<xy>.html".
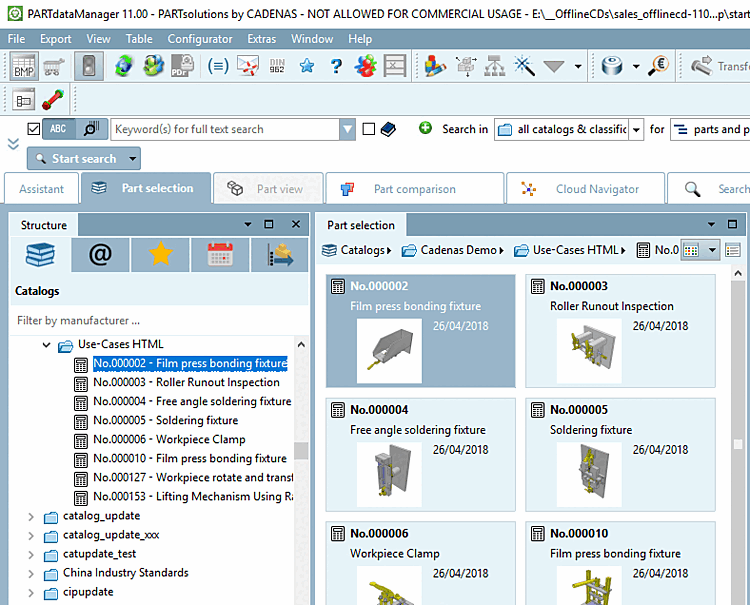
Once the project has been completed, it can be called up in PARTdataManager or uploaded to the SVN server and published LIVE.
![Project type "Assistant [Assistant] "](https://webapi.partcommunity.com/service/help/latest/pages/en/partsolutions_user/doc/resources/img/img_778d10601f6d4aadaf37b29533e83a17.png)
![[Note]](https://webapi.partcommunity.com/service/help/latest/pages/en/partsolutions_user/doc/images/note.png)