
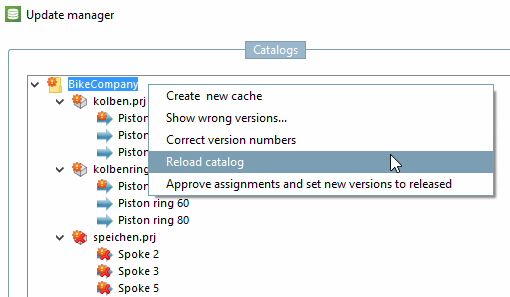
Now open the Update Manager in the PARTlinkManager via Extras -> Update Manager [Update manager] (if you have not opened it via "There were assignment problems in the LinkDB. Please clean them up in the UpdateManager. [There were mapping problems in the LinkDB. Please correct these in the UpdateManager.] " had opened).
Click on Reload catalog and expand the Bikecompany catalog structure in the index tree.
On the left in the expanded tree ( Catalogs dialog area) you will see the following:
Deactivate
 Show assigned rows [Show mapped lines] and activate
  Show tree filtered [Filter tree] (hide everything without update information).
-> Only those directories and projects are displayed, where assignments have to be edited.
For the edition of assignments there are two basic options:
Edit projects and characteristics individually
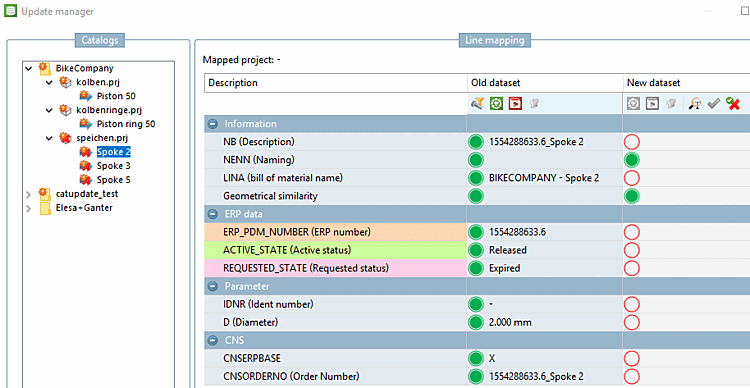
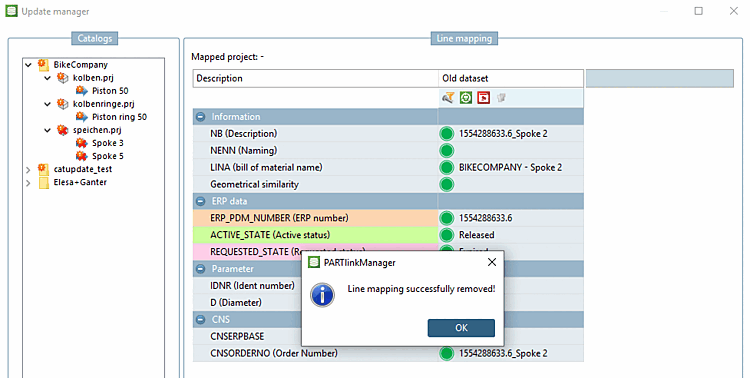
In the Catalogs dialog area on the left, select the characteristic to be edited (here in the example "Spoke 2".
Click Confirm assignment [Approve assignment] on the right in the Row assignment [Line mapping] dialog area
 or on Cancel assignment and save [Revoke assignment and save changes]
 (in the case of a data record marked as deleted, the effect is the same).
-> The confirmation message appears: "The line assignment was successfully canceled! [Line mapping successfully removed!] "
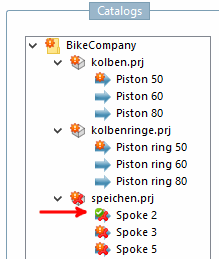
-> If you work with a filtered tree view the just edited characteristic disappears.
-> If you work with an unfiltered tree view, then at the just edited characteristic the icon with the green checkmark
 is displayed.
After selecting a project, you can also confirm the entire project by clicking Confirm and release new versions [Approve assignments and set new versions to released].
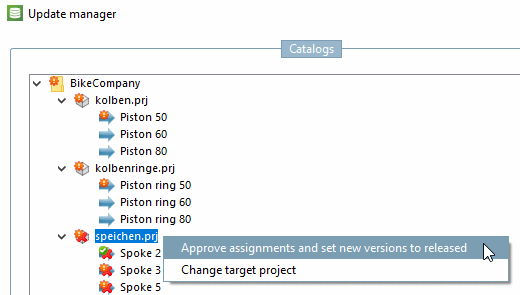
Another workflow is to check the single characteristics at first and finally to confirm everything at once.
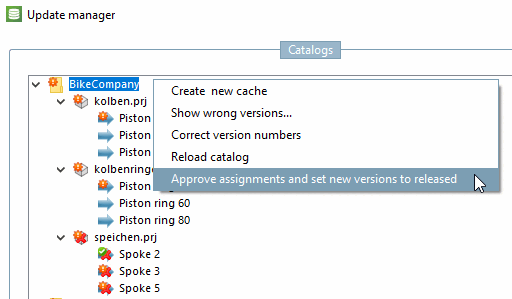
Select the catalog directory and click on the Confirm and release new versions [Approve assignments and set new versions to released] command in the context menu.
Check single lines in this project:
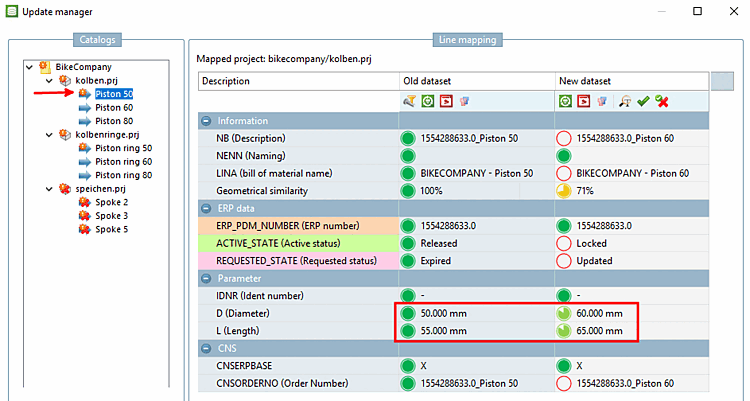
For piston 50, you can see under Parameter (D / L) that no mapping can take place. -> Click on
Cancel mapping and save [Revoke assignment and save changes].Always pay attention to the values under Information -> Geometric similarity [Geometrical similarity].
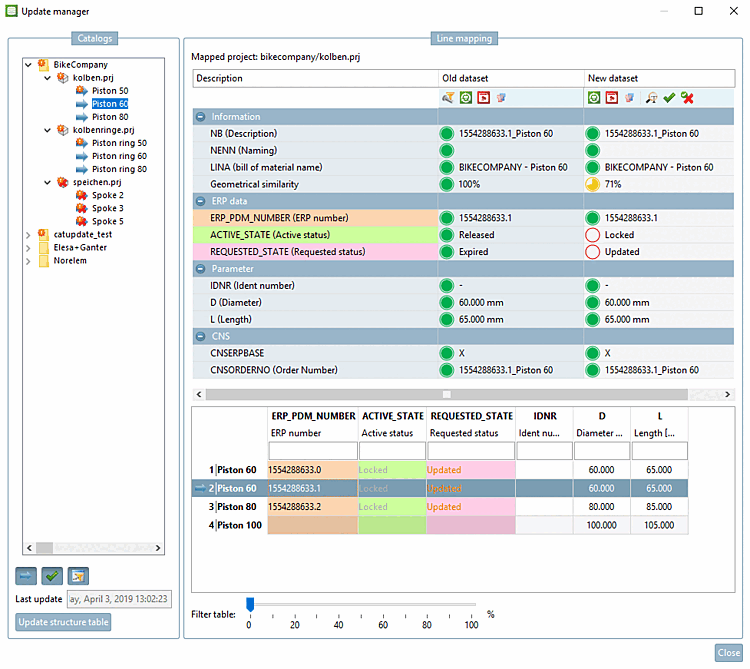
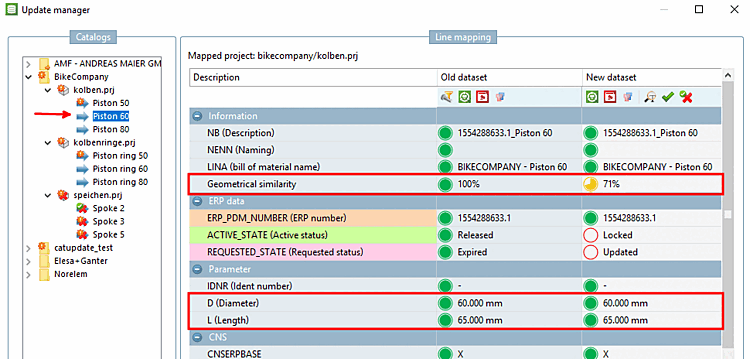
For piston 60, the parameters D and L are identical, but a geometric deviation is displayed. In such cases, open the old and new version in the component comparison [Part comparison]
 .
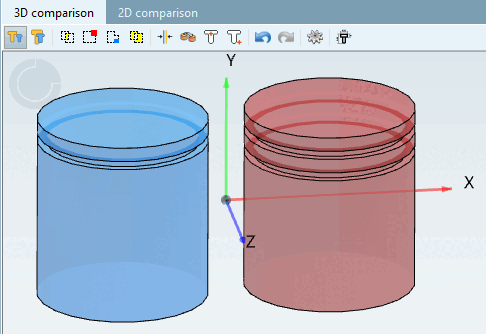
.The basic geometry is identical, but the new version has two piston rings. If this is the official successor version, confirm by clicking on Confirm assignment [Approve assignment]
otherwise click on Cancel assignment and save [Revoke assignment and save changes]
.
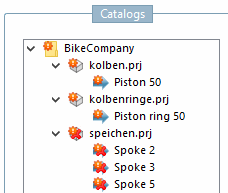
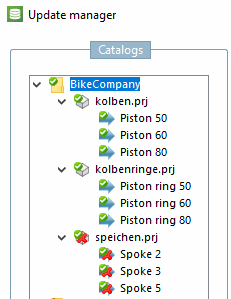
After a final confirmation at catalog level, it looks like this in the Update Manager [Update manager]:
Now the catalog directory, the single projects and the single characteristics show the green checkmark.
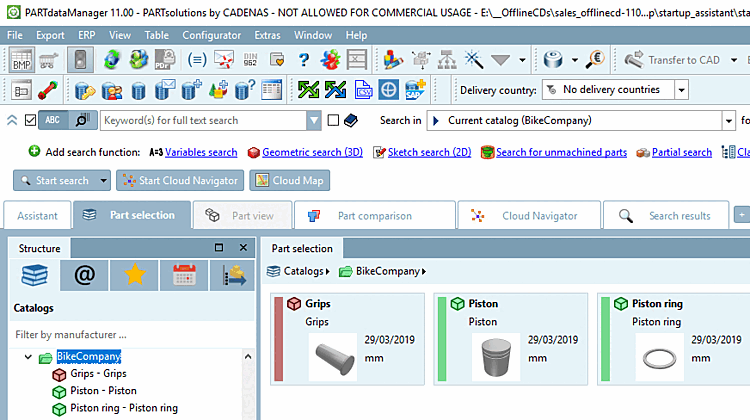
Open the PARTdataManager and select the "Bikecompany" catalog.
The project "Spoke" does not exist anymore (compare Fig. „PARTdataManager catalog "Bikecompany" V1“).
The project "Handles" has been added. It is displayed in red, because as new project it cannot have an ERP number yet.
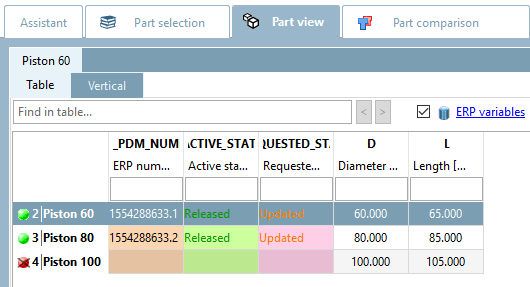
Open the project "Piston". (Compare Fig. „PARTdataManager: Current version "Piston" after update, but before editing through Update Manager“.)
In the new version, the line "Piston 50" is missing and the line "Piston 100" has been added (can't have gotten an ERP number yet).
At Piston 60 and 80 the status light is on green, because the specified role condition is met.
Now open PARTlinkManager or click on the button in PARTlinkManager to refresh the view.
Enter "bike* " in the filter of the PSOL Project column to display only the rows from Bikecompany.
Click on Hide old component versions [Hide old versions of parts].
Current status [Active status] and requested status [Requested status] after processing in the Update Manager
In the Current status [Active status] column, 4 data records of the new version are now set to Released.


![[Note]](https://webapi.partcommunity.com/service/help/latest/pages/en/partsolutions_user/doc/images/note.png)
![Current status [Active status] and requested status [Requested status] after processing in the Update Manager](https://webapi.partcommunity.com/service/help/latest/pages/en/partsolutions_user/doc/resources/img/img_b1a9d80b4f0b4690b1fc560b701ddf7b.png)