Autodesk Revit uses templates to define the placement of an object within the system.
eCATALOG 3Dfindit modelers can prepare parts accordingly so that all the advantages of these templates with their special features can be used when exporting to Revit.
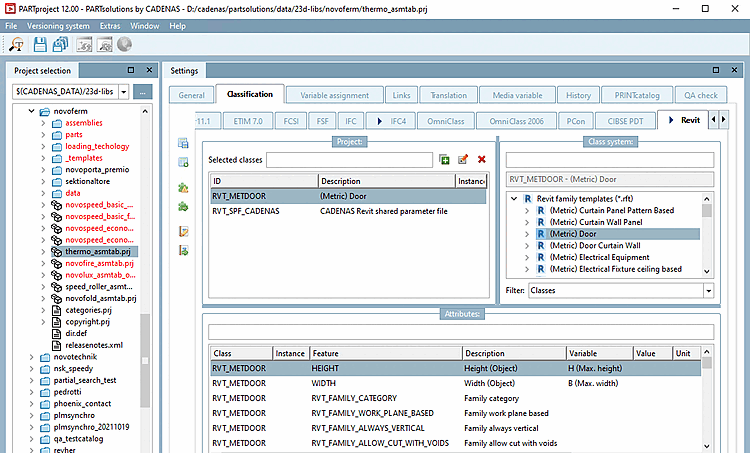
Start PARTproject and navigate via the directory structure to the component that is to be equipped with the classification.
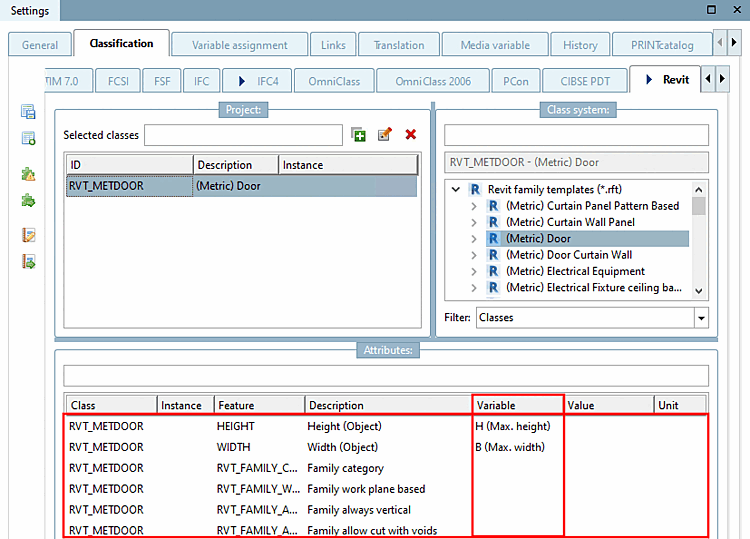
Open the Classification tab page and then the Revit tab page.
Select the most suitable family template (class) on the right-hand side under Class system (only one selection is permitted ). In this example, this is (Metric) Door. Assign the class to the component by double-clicking on it.
Now classify the desired characteristics in the Characteristics [Attributes] dialog area.
Here in this example, the adequate table is assigned to the attributes for height and width.