When selecting a class in the Structure view on the right side, the tabbed pages Class features, Products and Properties are displayed.
On the tabbed page Class features you can add class features to individual classes from the global feature set (ALL LinkDB variables and ALL table variables) or create new class features.
On the tabbed page Products these can only be displayed if they have Class features.
After an export to PARTsolutions class features appear as table variables.
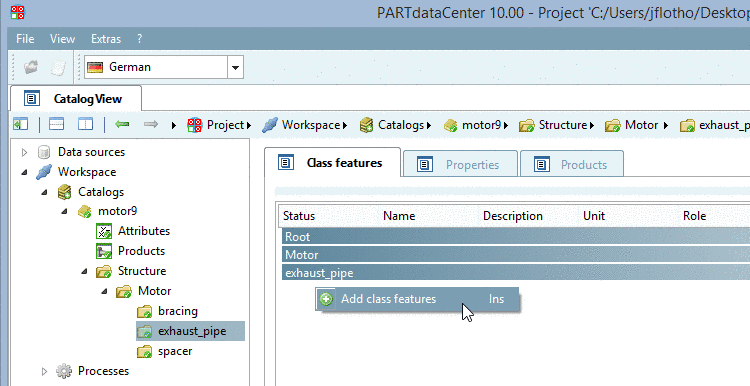
In the Structure view, select that class where you want to assign class features.
On the right side, select the tabbed page Class features.
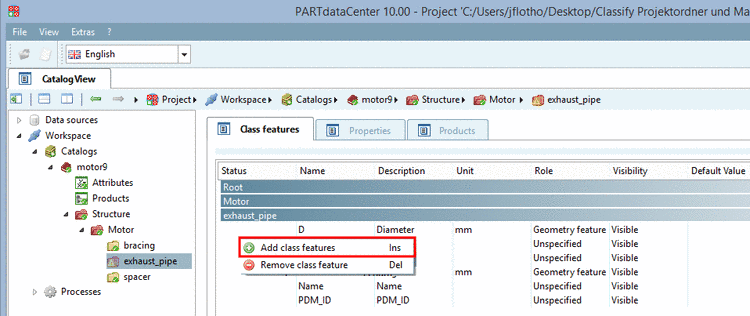
Here, the hierarchical structure of the respective class is shown.
On the desired class, click on the context menu command Add class features.
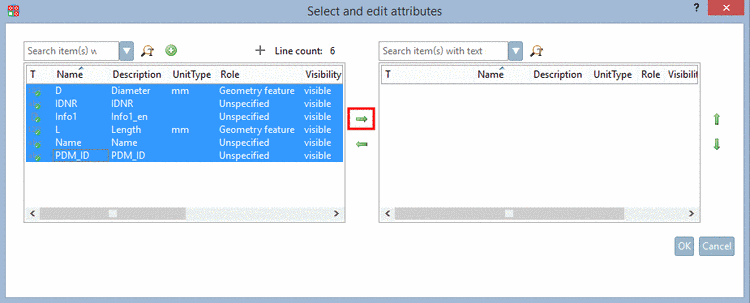
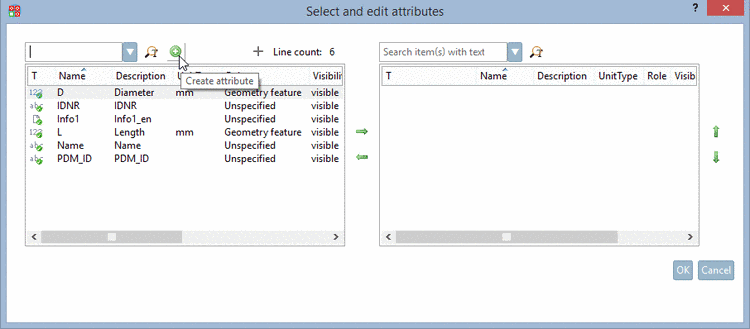
-> The dialog box Select and edit attributes opens.
On the left side, all existing attributes are shown (both the LinkDB attributes and the table attributes).
Select the desired class features (multiple selection with Ctrl or shift key) and transfer these with the arrow key on the right side.
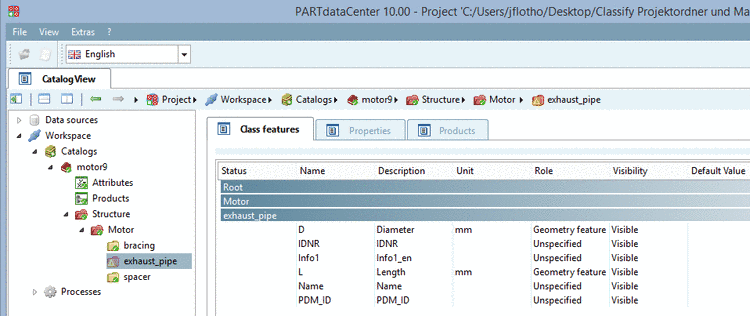
-> Now the selected class features are part of the respective class feature set. (These are shown as table variable in PARTsolutions after export.)
Add new class features (attributes)
If class features are missing then you can add them anytime.
Select the tabbed page Class features and call the context menu command Add class features at the desired class again.
-> The dialog box Select and edit attributes opens again.
This time, in the dialog box, click on the button Create attribute
 .
.-> The dialog box Add new attribute opens.
Fill out the fields or select the desired option in the list fields.
When exporting to PARTsolutions the respective settings are applied.
Columns specified as Document are displayed as green columns in PARTdataManager. A detailed description on this can be found under Section 1.3.4.1.1, “Document columns”.
Role: Details on this can be found under Typ-Identifikation.
Unit: If needed, open the list field with .
Visibility -> Attribute visible: Concerns the display in PARTsolutions.
If the respective attribute has been hidden in PARTproject, here, the option is automatically set to invisible and vice versa at the export the setting is used in PARTdataManager.
Both classes and attributes can be set as „visible“ or „invisible“. At classes, then in PARTdataCenter a transparent folder icon
 is shown as a note, which otherwise has
no further effects.
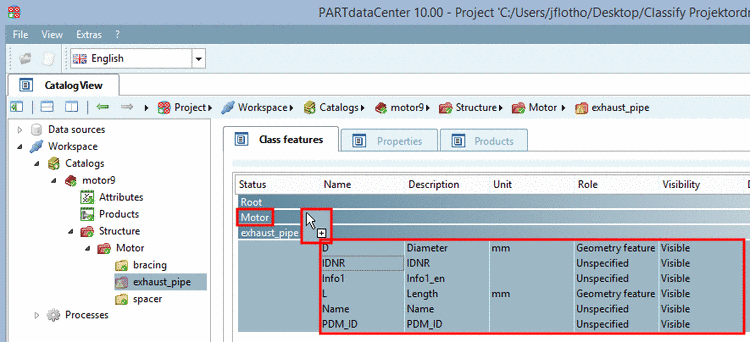
In this example class features have been set for "exhaust_pipe", but not for "spacer" and "bracing". Assuming that you want the same class features there as they are at "exhaust_pipe" then simply move them via drag & drop on the level "motor", hierarchically one level higher.


![[Note]](https://webapi.partcommunity.com/service/help/latest/pages/en/3dfindit/doc/images/note.png)