![[Note]](https://webapi.partcommunity.com/service/help/latest/pages/en/ecatalogsolutions/doc/images/note.png) | Note |
|---|---|
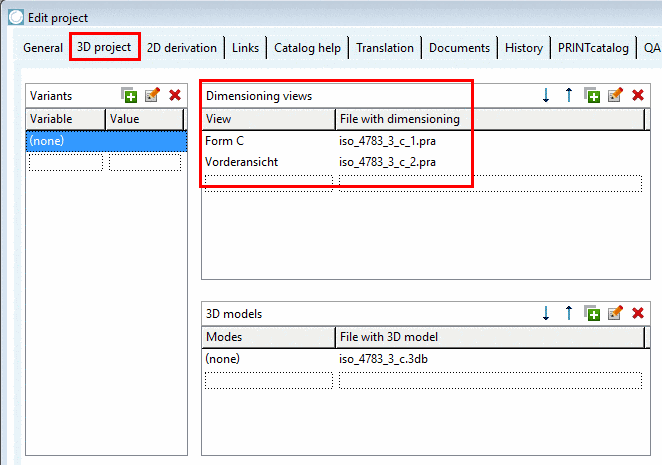
Declaration of Dimensioning views is optional. They are displayed in PARTdataManager under Technical views. Optionally, you can use the dialog area Variants, if you want to assign certain Dimensioning views to different variable values (table rows). | |
In the View column, open the list field with the arrow key and select a View or enter a name.
In the File with dimensioning column, open the list field with the arrow key and select the desired file. It has to be stored in the project file.
Allowed file types are .pra, .bmp, .tif.
![[Note]](https://webapi.partcommunity.com/service/help/latest/pages/en/ecatalogsolutions/doc/images/note.png)
Note DWG and DXF files can be imported and be converted into the "pra" format. Detailed information on this can be found under Section 5.11.2, “External creation and import/conversion of Dimensioning views ”.
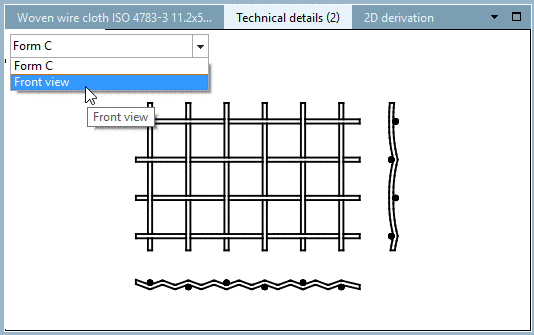
Have a look on the result in PARTdataManager, in the docking window Technical details.


