 |
The Table view has been completely revised. The modern layout fits in the general view. Furthermore a number of new features has been added.
The line hight and so the picture size can be adjusted with pressed Ctrl key and mouse wheel.
Document fields are marked with a specific icon
 (green columns before).
You can recognize value range fields by the respective icon
 . The icon is only displayed on the active
row.
. The icon is only displayed on the active
row.When clicking on the icon the respective settings dialog opens.
Value range: In the opened input field, simply enter a desired value within the value range or choose the value with the slider. Then confirm with a click on the green checkmark.
Selection of discrete values: In the list field, select the desired option and confirm with a click on the green checkmark.
Selection of discrete values with preview images:
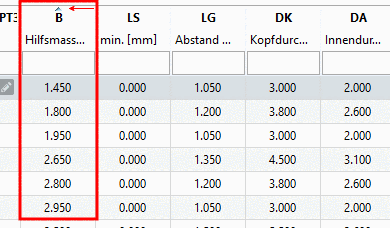
Column sorting ascending and descending
The first time when loading the table the first column determines the sorting of lines.
However, you can use any columns as basis for sorting: Once you click into a column header, a small arrow appears. With a click on the arrow you can switch between ascending and descending sorting. The mode is symbolized by the arrow direction.
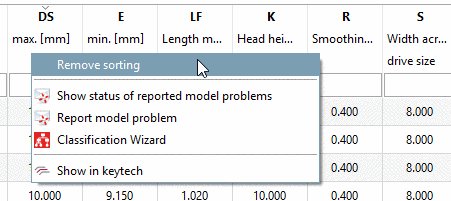
Restore original sorting: In a header of any column, open the context menu. Click on Remove sorting.
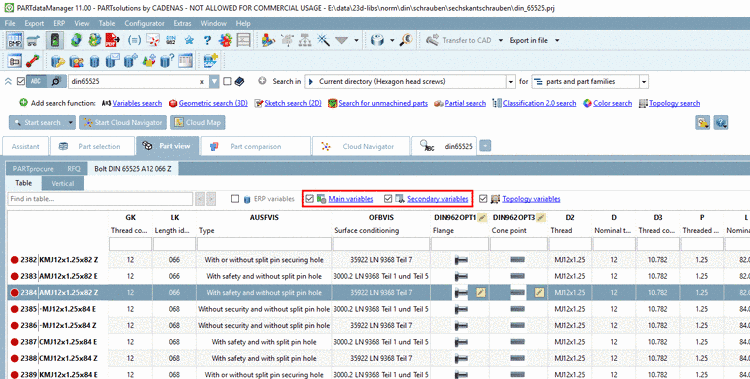
Especially if the table contains a lot of columns, it makes sense to hide not needed columns.
Simply activate/deactivate the respective checkboxes.
Often an ERP integration brings along a lot of extra columns. However, for the selection of geometrical or topological values these are unneeded.
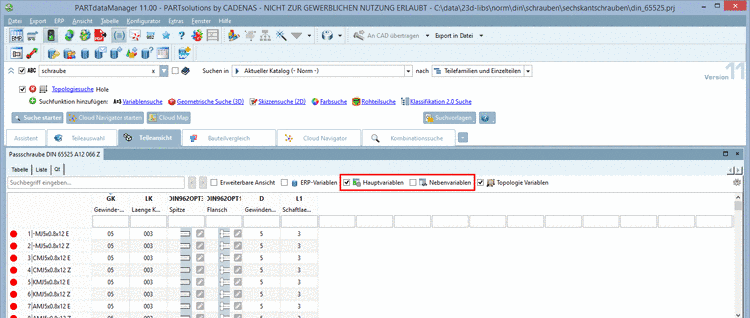
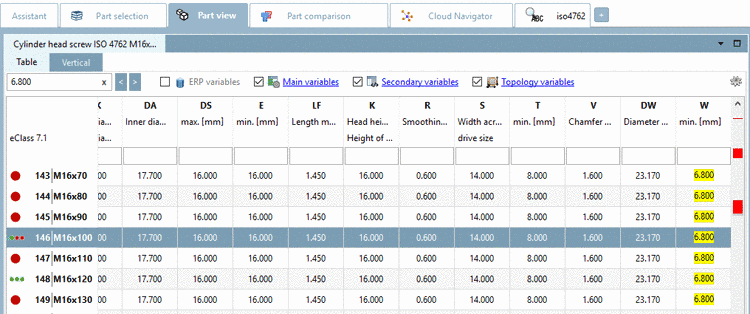
Main variables / Secondary variables
Main variables are used for the standard name. All other variables are Secondary variables.
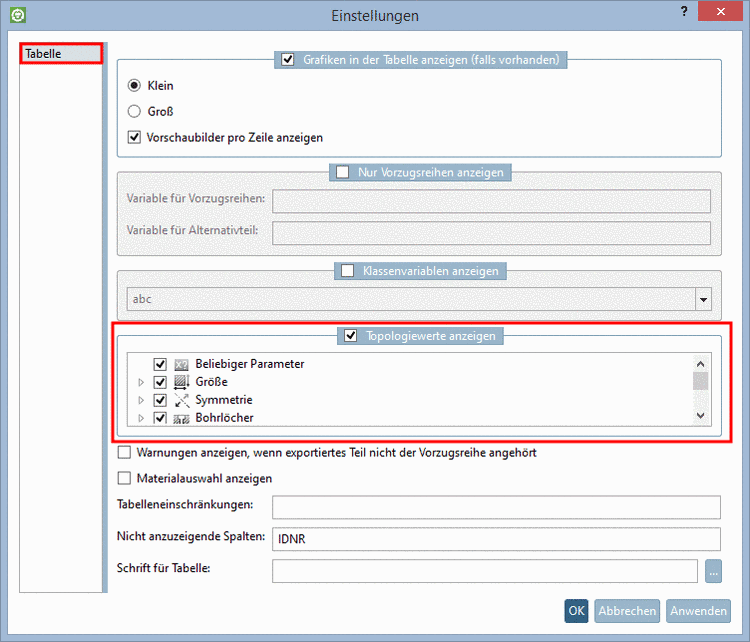
Topological variables can be displayed beside the standard table information. With the checkbox Topology variables you can activate / deactivate the display if needed. Especially at own part catalogs characteristic values are not necessarily in the characteristic attribute table. In this case the display makes sense in particular.[18]
Precondition is that the desired topological columns have been determined in the settings dialog. If a Topology search is performed, the respective columns are automatically displayed.
Call the settings dialog with a click on Settings
 and activate the checkbox under Show topological values. Then you can
activate/deactivate the desired types of topology.
and activate the checkbox under Show topological values. Then you can
activate/deactivate the desired types of topology.
Preview images per line in the table view
More and more catalogs contain preview images per line. Now these are displayed in the Part view. In the search results this was already the case.
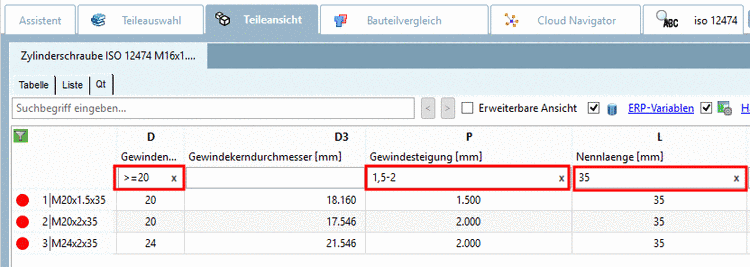
In the header of each column input fields are displayed. With only a few inputs you can receive the relevant table lines.
The following syntax can be used in the column header in order to restrict the table:
In the input field, enter a search term (numerical, alphanumerical, mixed). (Value range fields are not searched.)
Directly when entering terms hits are marked with yellow and the first hit is selected.
With a click on the icon
the settings dialog for the table is
opened.


[18] Missing topological values are not generated on the fly, but available values are displayed. In standard catalogs, mostly this is a certain percentage, in own part catalogs normally topological values are available for all table lines.
In the docking window Topology information topological values are generally displayed.