
Previously, connection points could only be created in the direction of the feature. With V12.9, it is now also possible to rotate and move the connection point. This is required, for example, if placement points with the Z-axis of the connection point are to point to the ground and a cylinder in the X-direction is used as the origin of the point.
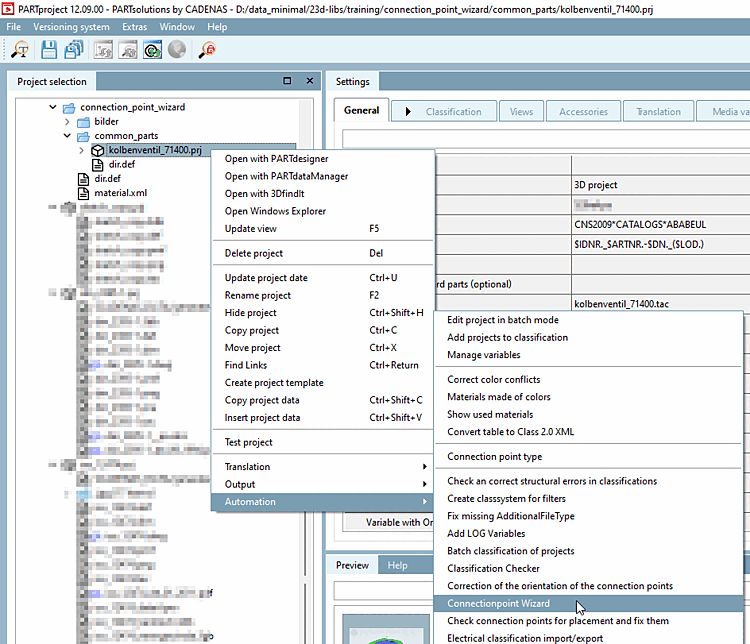
Select the part to be edited and call up the connection points wizard [Connection point wizard].
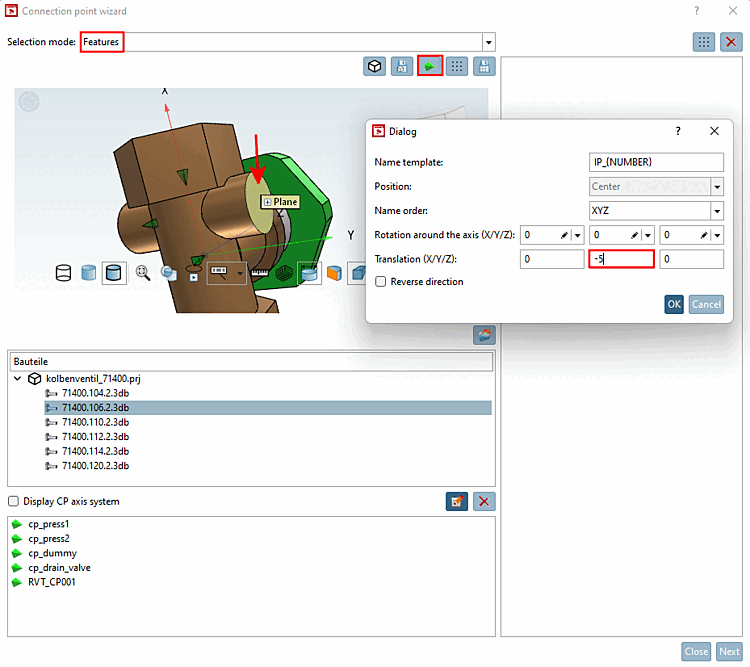
Under Selection mode, select the Features option and select a feature (in this example, a level).
Click on the button
 Create Cp
(Ctrl+C). [Create Cp (Ctrl+C)]
Create Cp
(Ctrl+C). [Create Cp (Ctrl+C)]
-> The corresponding dialog opens.
For example, select Translation = '-5' for the Y-axisand confirm with .
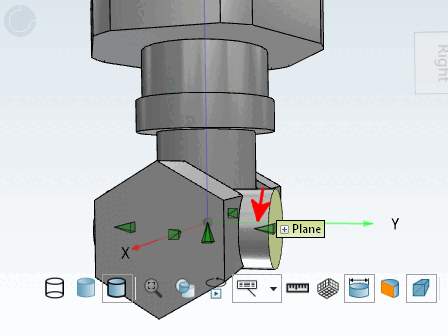
-> The connection point is set. It is offset inwards from the selected level.
![[Note]](https://webapi.partcommunity.com/service/help/latest/pages/en/3dfindit/doc/images/note.png)
Details on the connection point wizard [Connection point wizard] can be found under Section 5.12.11.28.1, “ Connectionpoint Wizard ” in eCATALOG 3Dfindit.