4.21.7. Show / hide LinkDB buttons (erpcustom.cfg)
4.21.7.4. Request ERP number: administration via dashboard
|  |
| Prev | Next |
 /
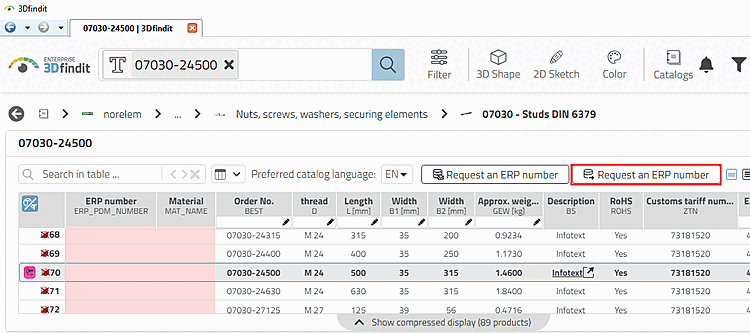
/  ERP number
apply for [Request ERP number]
ERP number
apply for [Request ERP number]
There is a
alternative method to send requests (for an ERP number) to the AppServer.
(new button  3Dfindit ) and use it on the new
Dashboard page Part number manager
instead of working with emails. The user is notified via the
Current status in 3Dfindit using
3Dfindit ) and use it on the new
Dashboard page Part number manager
instead of working with emails. The user is notified via the
Current status in 3Dfindit using  activities [Activities] dialog
informed.
activities [Activities] dialog
informed.
Update of the LinkDB tables using
erp_patch_mssql.sql(see$CADENAS\tools\databases\databasename). NOTIFICATIONTABLE and REQUESTTABLE is required.The button
be reported. It makes sense to use only the
button of the method used (i.e. SENDMAIL_ACTION
[ ] or CREATE_REQUEST_ACTION []) and control the display on a role-specific basis.
Unneeded buttons can be stored in
] or CREATE_REQUEST_ACTION []) and control the display on a role-specific basis.
Unneeded buttons can be stored in erpcustom.cfg, block [WEB_ACTIONS], can be hidden.[WEB_ACTIONS] 1=ADD2DB_ACTION 2=SENDMAIL_ACTION 3=EXPORT_ACTION 4=ADDVARIANT_ACTION 5=EDITRECORD_ACTION 6=CREATE_REQUEST_ACTION
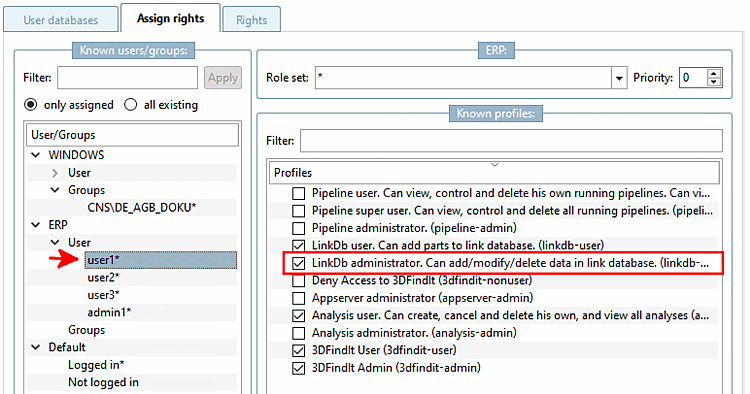
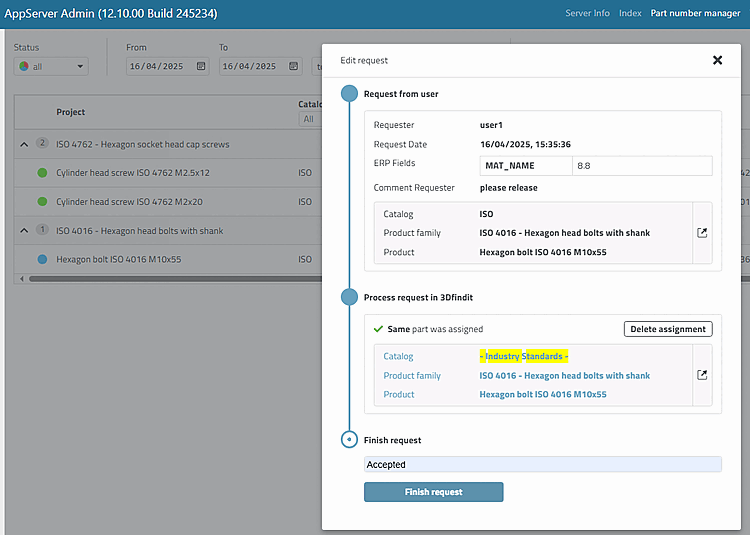
Administration / Standardization department must have the LinkDb administrator profile.
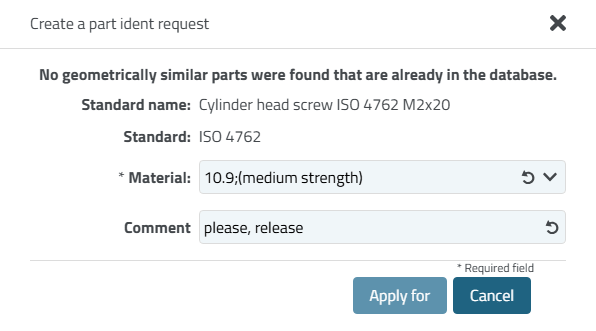
Select the desired line for which you would like to request a release (ERP number).
-> The Request Ident Number [Create a part ident request] dialog box opens.
Fill in the fields and click on the button. In this example, the fields are Material and Comment, but there can be any number depending on the configuration. You can also enter in the comment field, for example, that a specific variant is required.
-> After After sending, a notification is displayed
 for the user.
![Notification: "ERP number request created [ERP number request created]"](https://webapi.partcommunity.com/service/help/latest/pages/en/3dfindit/doc/resources/img/img_0201827378344ef487c03779983bd836.png)
Admin actions (standardization department)
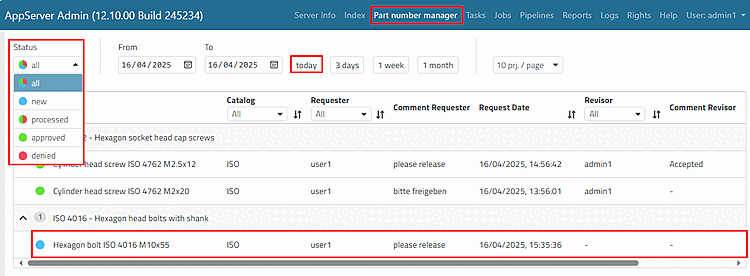
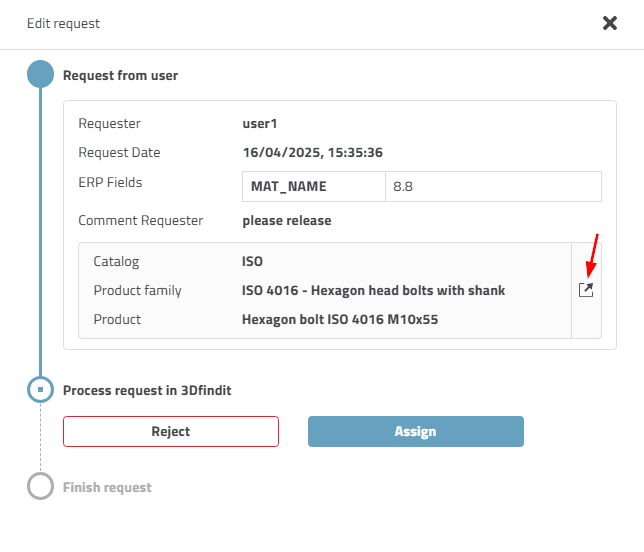
-> The requested part is now listed in the dashboard, in the Part number manager. Here you have the option of filtering by status and date.
Click click the Open requested part
 or button.
-> In both cases, the table of the relevant part is opened in 3Dfindit. (See next point.)
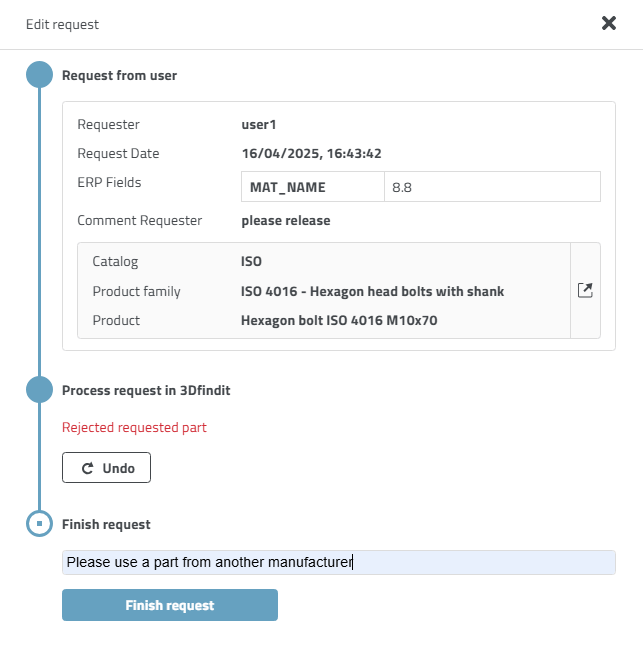
Alternatively, the administrator can also click the button. In this case, a comment field opens. The reason for the rejection can be entered here, for example.
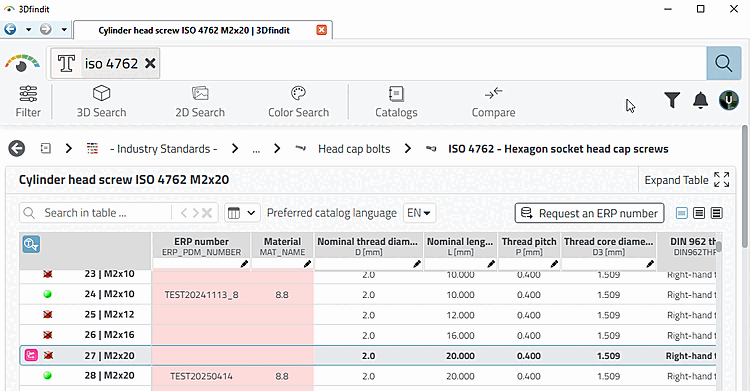
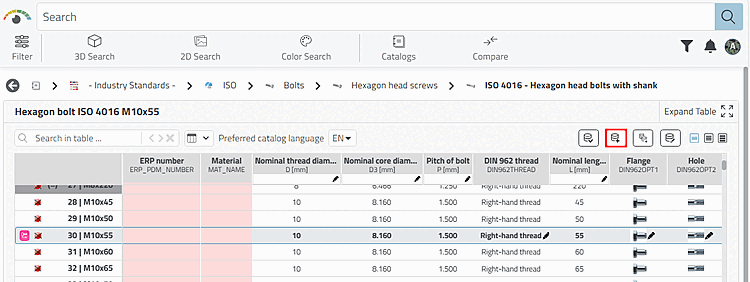
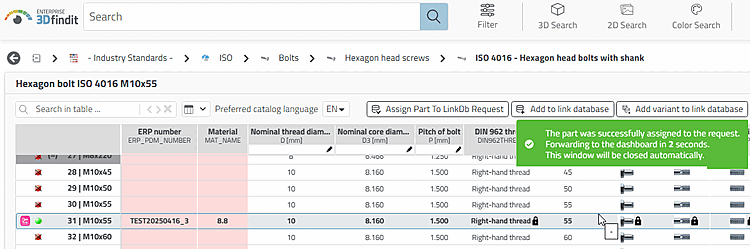
Click on the Add to link database button. (A variant can also be created using Add variant to link database ).
-> The New ident number [new ident-no.] dialog opens.
Now fill in the fields. Depending on the intended workflow, the ERP number [ERP Number] field may already have been filled in automatically.
-> A message appears stating that the part has been successfully assigned.
The administrator can now enter a comment (e.g. "Accepted") and finally click on the button.
deletes the assignment of the part to the request. (This has nothing to do with LinkDB actions. It can only be used to undo the assignment of an incorrect row).
![[Note]](https://webapi.partcommunity.com/service/help/latest/pages/en/3dfindit/doc/images/note.png)
![New ident number [new ident-no.]" dialog New ID number](https://webapi.partcommunity.com/service/help/latest/pages/en/3dfindit/doc/resources/img/img_8d10fad9133b44228750a009a162023c.png)
Activities / Notifications dialog
In 3Dfindit, the user is always informed about the current status.
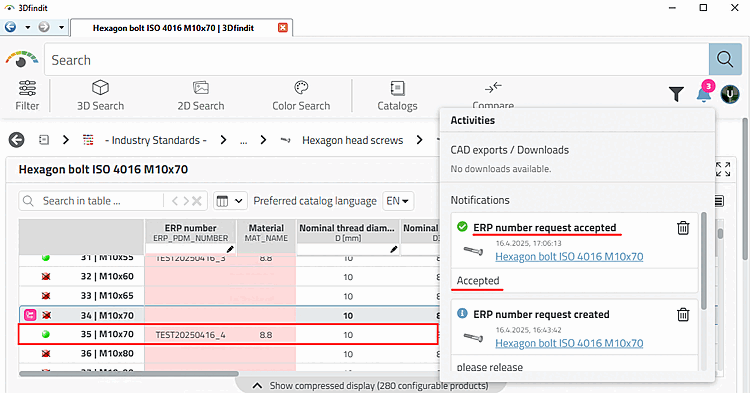
Example: Notification after the requested part has been approved. The status display now shows green and the part can be exported to CAD/PDM.