Make sure that
the correct macro template is active in ifugnx.cfg and perform a placing
with a test part. Ideally, all settings in the template are already designed
as actually required. In this case any adjustments are unnecessary.
Otherwise perform the steps of the following instruction.
Make sure that "Solid-Layer (by default 27)" is activated.
Perform a placing as a test. Then for the macro recording you should not make a mistake.
Determine the macro's storage location and file name and confirm with . Save the macro, best in the directory intended for this purpose under
...\iface\unigraphics\shared\macro\cns_place_....macro.-> The record is immediately started.
In the list field under Look In, select the option Teamcenter.
Next under Number and Revision, correct entries have to be made.
In order to get the adequate information, open My Teamcenter -> Home -> Newstuff.
In the input field under Number, enter a valid Item ID.
Switch to the next field by using the TAB and under Revision, enter a valid revision.
Close the dialog and by clicking .
Open the list field under Assembly Location and select the option Absolute - Work Part.
Optional: Change the setting under Placement from "Move" to "Constrain".
Optional: Under Settings -> Interaction Options, disable the option Preview and enable Preview Window.
For the macro recording a concrete sample part had been used. Places containing references to this part have to be replaced by common place holders now.
May be you want to replace your user name by "administrator", for example (doesn't matter for functionality).
In the Teamcenter standard template, search for lines with angle brackets.
BEG_ITEM 9175040 (1 OPTM 0) = <<CNS_REVISIONRULEINDEX>> ! <<CNS_REVISIONRULE>>
Transfer these lines into the recorded macro with the help of the used comparison tool; in above figure by clicking on the yellow arrow.
When clicking on the yellow arrow, on the left, the whole block is overwritten.
Example 3: In the case of very frequent occurrences it also makes sense to work with Search & Replace functionality, instead of transferring each single occurrence be using the yellow arrow.
Example 4: Ignore empty lines.
Optionally, you can delete the following lines at the file end.
WINDOW RESIZE 1.000000 10.822917 7.906250 -1.000000 -0.730510 1.000000 0.730510
WINDOW RESIZE 1.000000 10.822917 7.906250 -1.000000 -0.730510 1.000000 0.730510
WINDOW RESIZE 1.000000 10.822917 7.906250 -1.000000 -0.730510 1.000000 0.730510
WINDOW RESIZE 1.000000 10.822917 7.906250 -1.000000 -0.730510 1.000000 0.730510
WINDOW RESIZE 1.000000 10.822917 7.906250 -1.000000 -0.730510 1.000000 0.730510
Set placement macro in
ifugnx.cfg![[Note]](https://webapi.partcommunity.com/service/help/latest/pages/en/3dfindit/doc/images/note.png)
Note This step has to be performed manually up to NX version 1926 inclusively, for later versions it will happen automatically, so that manual intervention can be omitted, except the macro is recorded for a special NX subversion.
For later versions no adjustment of name has to be performed. Simply store the recorded macro file under
...\iface\unigraphics\shared\macroaccording to the schemacns_place_nxXXXX.macroorcns_place_nxXXXX_teamcenter.macro. Then the matching file is automatically detected.If the reference is explicitly stated in
ifugnx.cfgunder "placementmacro=" the name doesn't matter.Test the macro by using PARTdataManager once with a part and once with an assembly, possibly once again with an inch part.
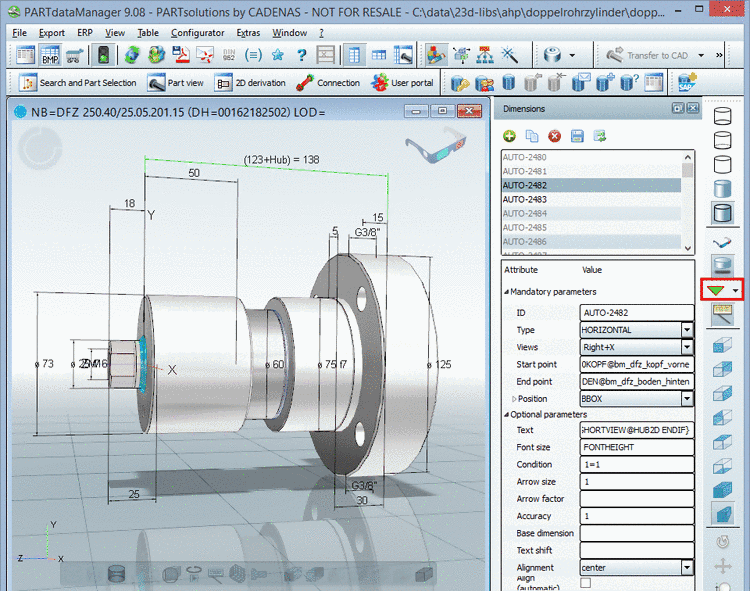
After the part is transferred, click on the green arrow (native placement dialog).
-> Now the NX placement dialog should show exactly those settings which had been applied when recording the macro.
Optional checking: Have a look into the macro file
cns_place.macro, in the user directory.After each export it should show exactly the currently used replacements.


![[Tip]](https://webapi.partcommunity.com/service/help/latest/pages/en/3dfindit/doc/images/tip.png)


![[Caution]](https://webapi.partcommunity.com/service/help/latest/pages/en/3dfindit/doc/images/caution.png)


