1.1.5.
Dimension search (with "Article Assignment Wizard" for standard parts) 1.1.5.4. Import Data
in the Wizard (Dimension Search) |  |
| Prev | Next |
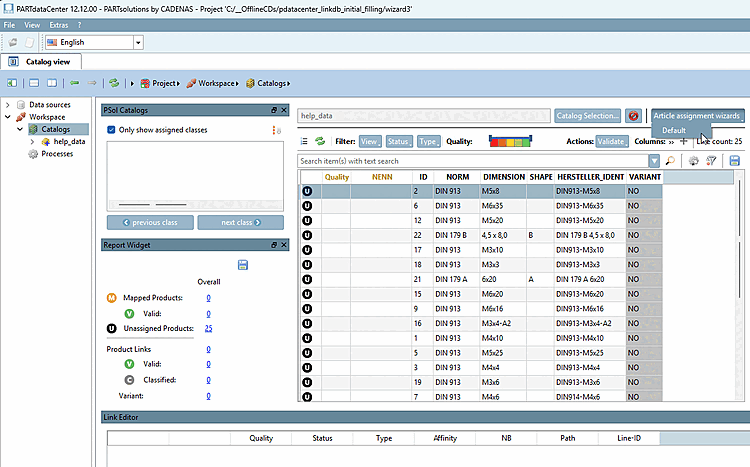
Start the wizard by clicking on the button > Default sub-item[2].
-> The Article assignment wizard - standard dialog box opens.
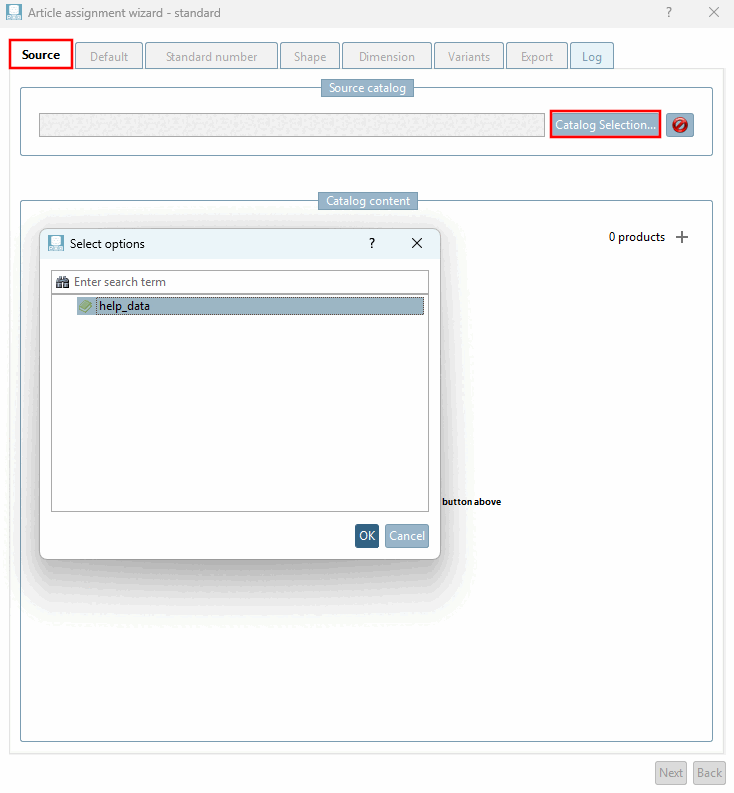
Select the Source tab and click on the
![[Note]](https://webapi.partcommunity.com/service/help/latest/pages/en/partwarehouse/doc/images/note.png)
Note If you have already selected the CSV catalog in the main window (also via the button [see above ]), this point is omitted here.
-> The "help_data" catalog that has already been imported is displayed in the Select options dialog box.
Select "help_data" and confirm with .
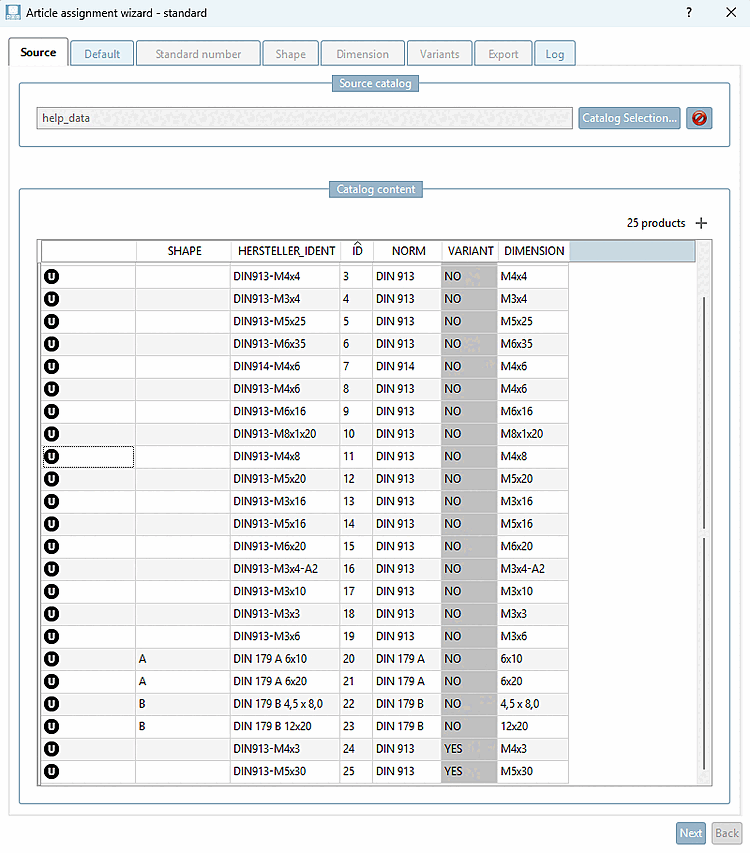
-> The data is displayed in the Catalog content dialog area.
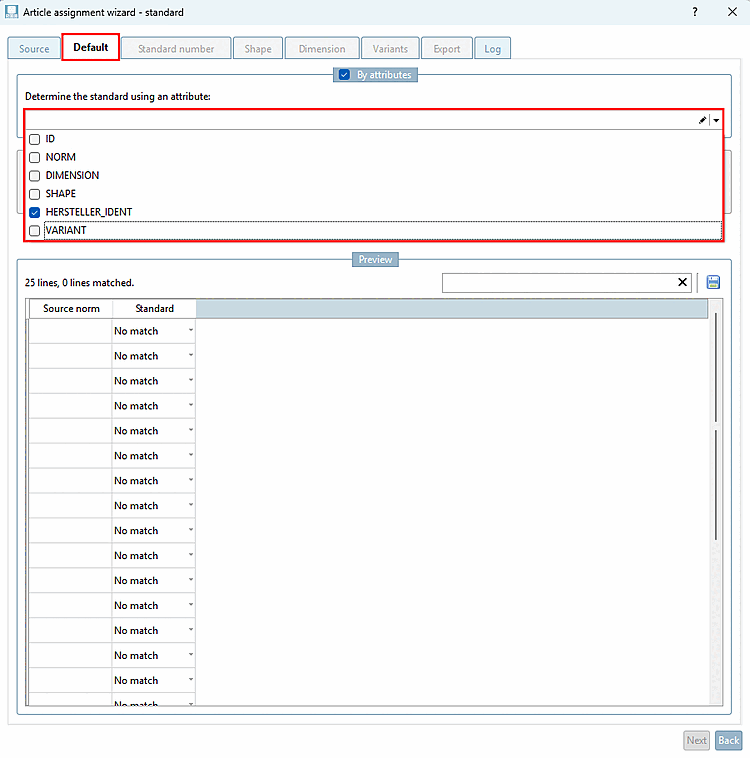
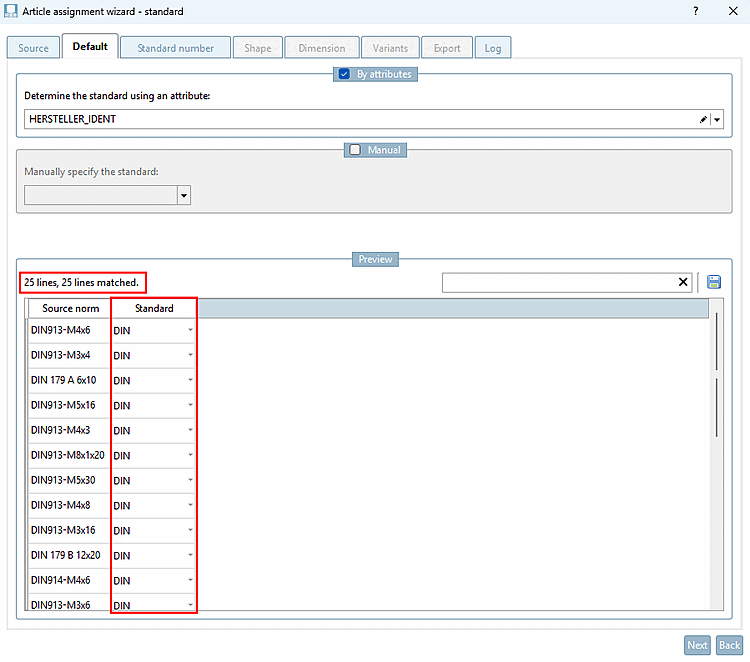
-> The view switches to the Default tab (in future "Standard").
Determine the standard by selecting a suitable attribute.
To do this, expand the list field and select either NORM or MANUFACTURER_IDENT.
Close the list field. Ideally, all existing rows are matched and entered in the "Standard" column (which is the case here in the example).
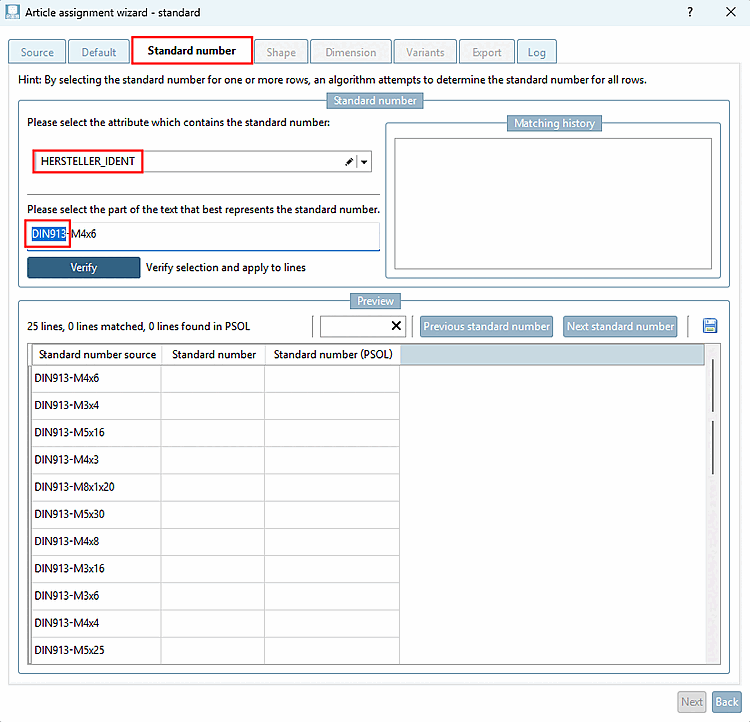
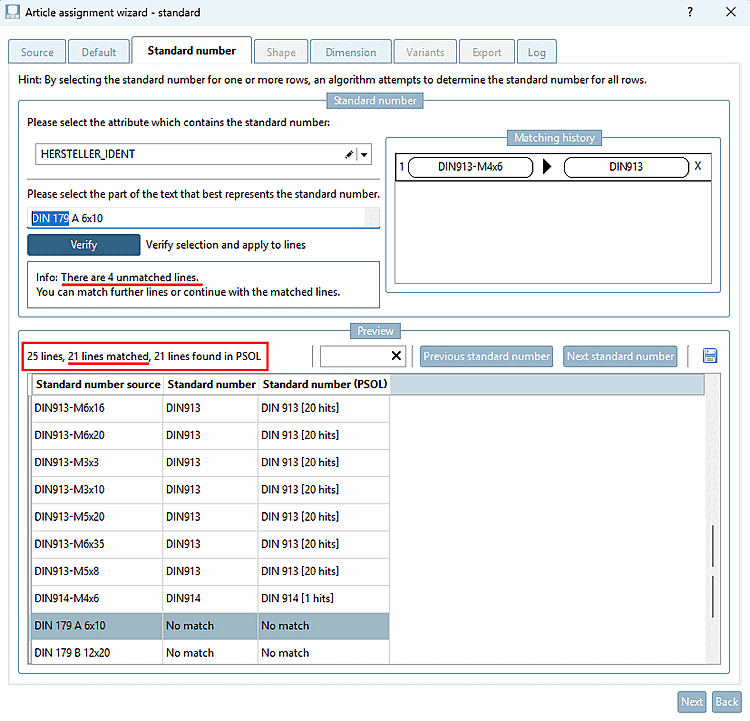
-> 21 of 25 lines have been matched.
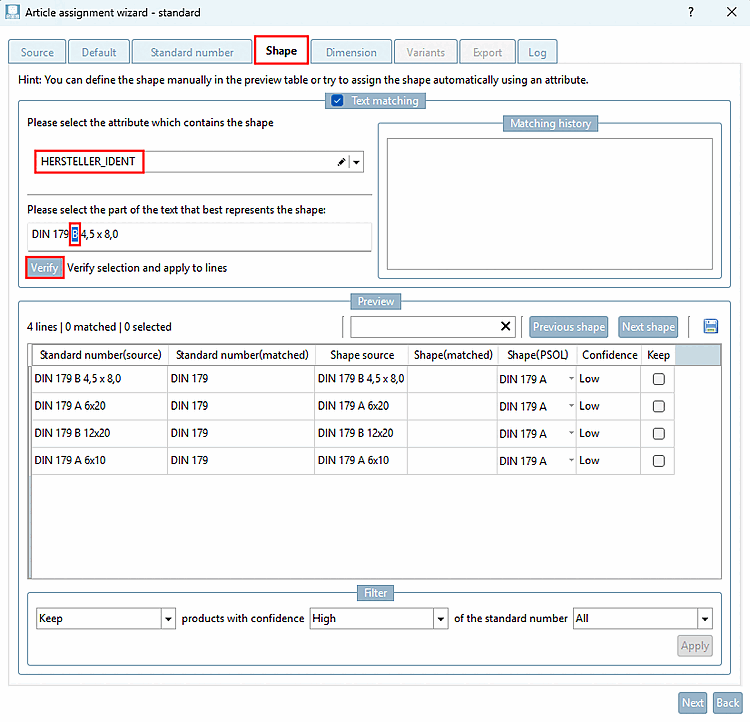
Select a new line that has not yet been matched (line with "No match") and again select the part of the text that best represents the standard designation (here "DIN 179" as an example).
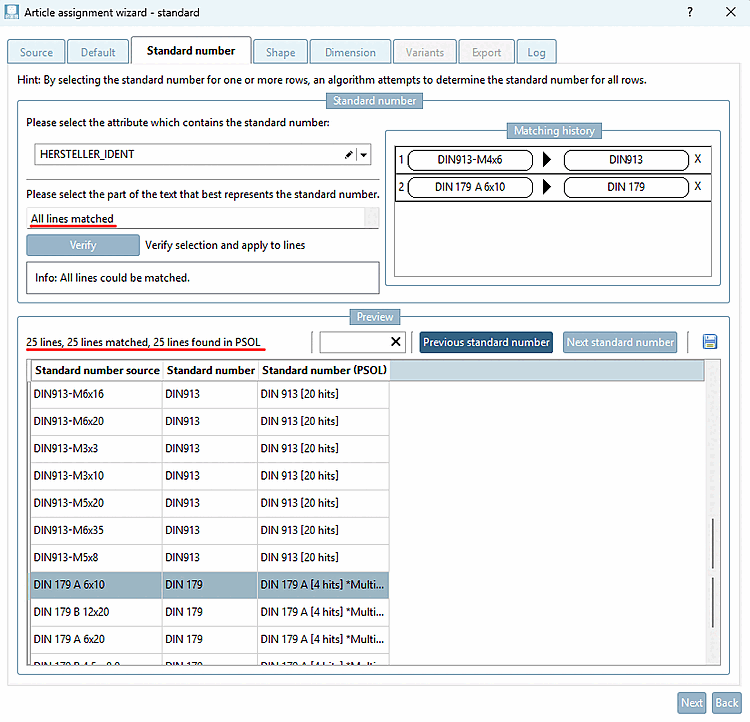
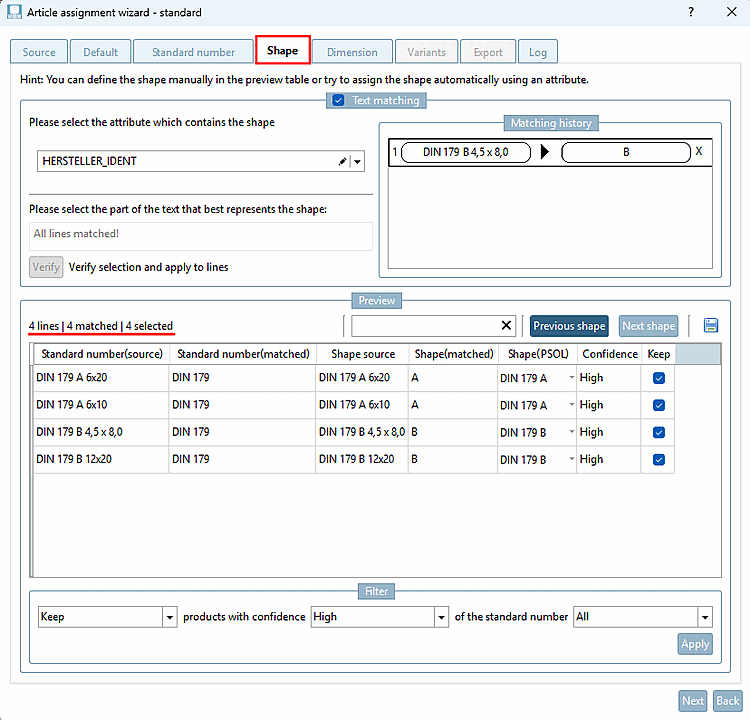
-> Now all lines have been matched.
-> The 4 lines in question have now also been matched.
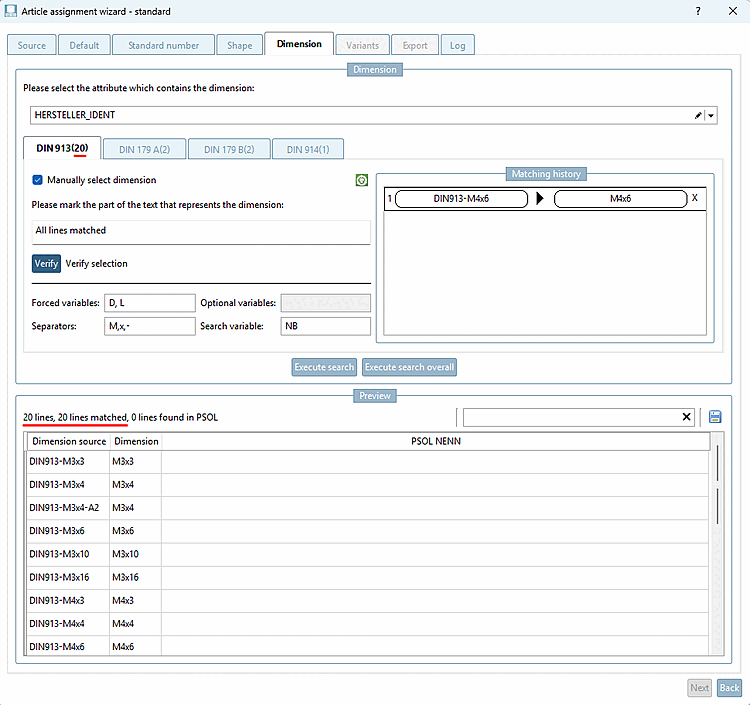
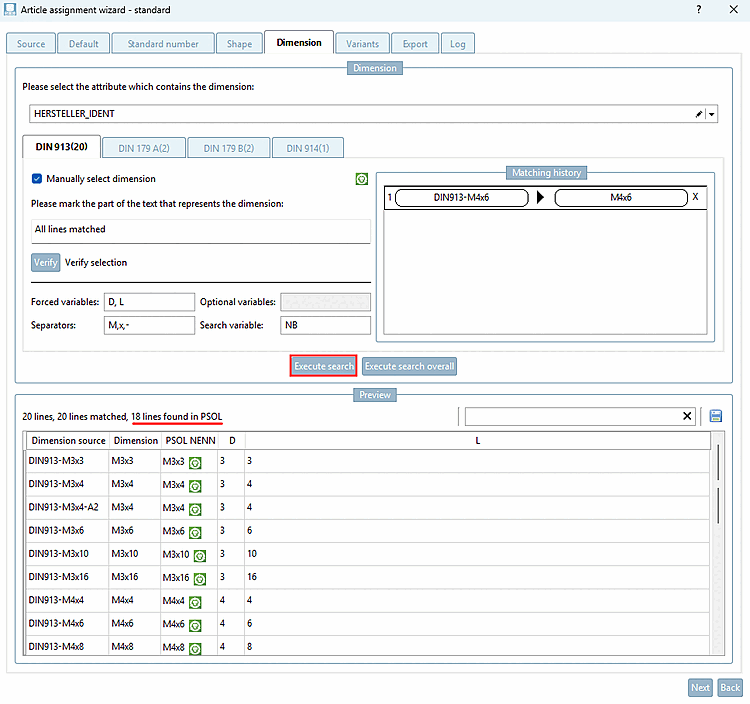
-> 20 of 20 lines are matched.
-> Although all 20 lines were matched, only 18 were found in PARTsolutions. In this case this is due to variants. (Variants will not achieve an exact match in the PARTsolutions catalog).
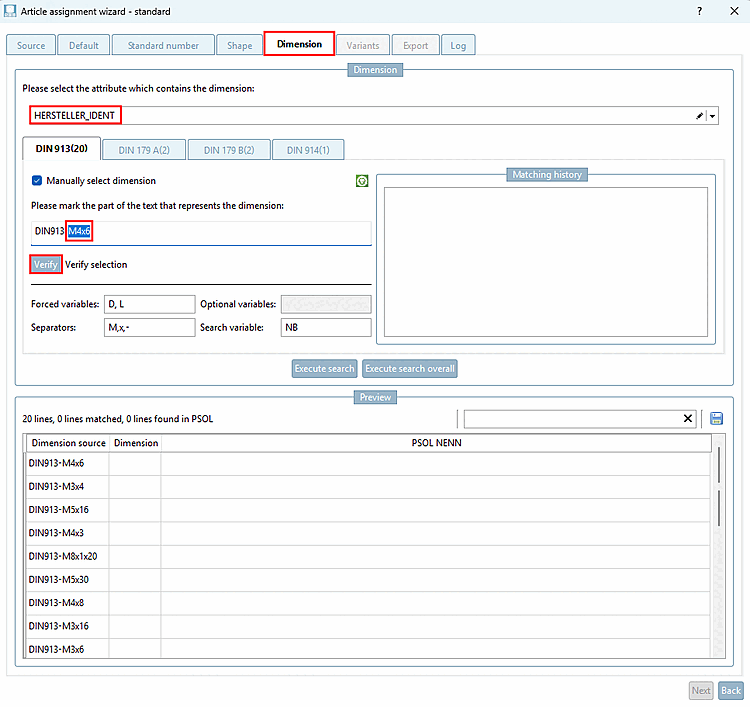
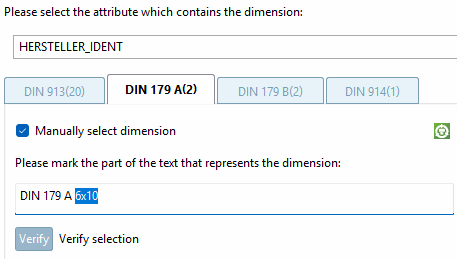
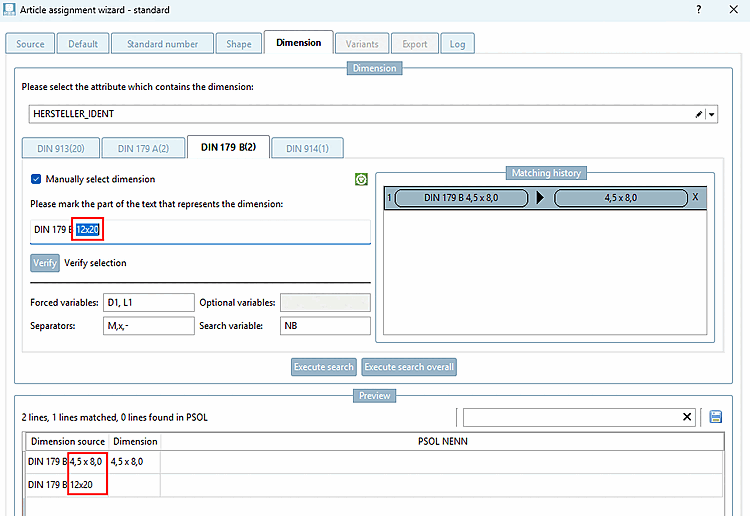
Repeat the procedure for the parts on the Tabbed pages "DIN 179 A(2)", "DIN 179 B(2)" and "DIN 914 (1)",
If the assignment is not made immediately for all rows, simply repeat the procedure again.
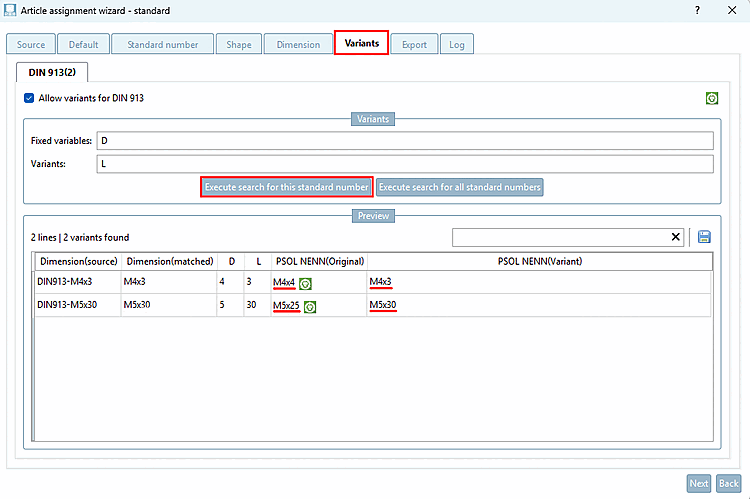
Click on the Execute search for this standard number button.
-> The line closest to the variant is determined. The table shows the result under PSOL NENN(Original) and PSOL NENN(Variant).
Ideally, all products have been found. If necessary, check the Log Tabbed page for further information. Ideally, there are no entries under Log.
If you want to export all products, activate the Export all products checkbox. Otherwise, you have the option of filtering the export via the list fields. If you are carrying out several exports, the Overwrite existing [Overwrite existing links] option on the left [Overwrite existing links] is of interest.
Export to local product database executed successfully! should now be displayed.
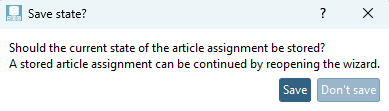
-> The message Save state? appears.
Mappings Check: See Section 1.1.9, “Mappings Check”.
Validating mappings: See Section 1.1.10, “Validate Mappings”.
Links Export to a CSV file: See Section 1.1.11, “Links Export to CSV file”.
Export data to a link: See Section 1.1.14, “LinkDB export (directly or via CSV file)”.

[2] "Default" currently stands for standard catalogs. There will be further sub-items such as manufacturer catalogs later.